Uncategorized

Kids making homemade colorful slime together.
Uncategorized

How to Make Homemade Slime for Kids

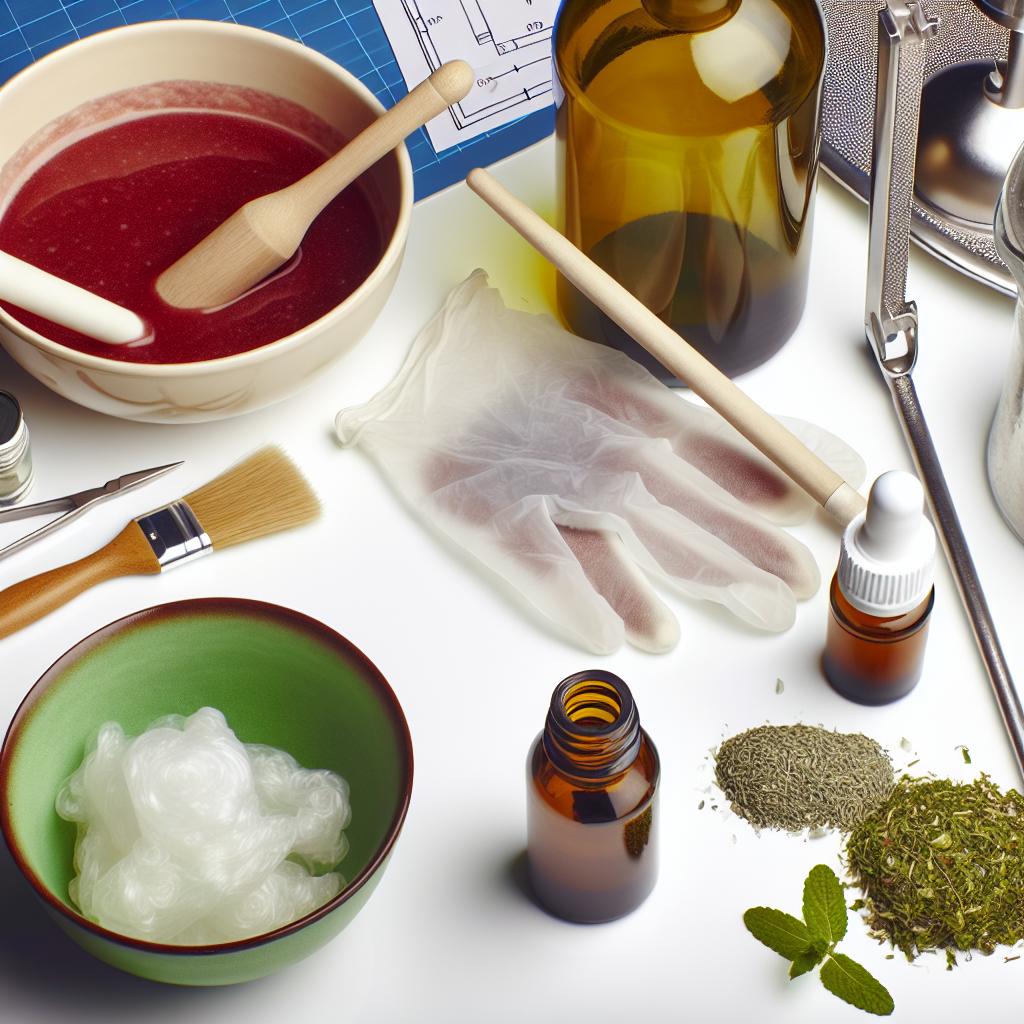
Introduction DIY projects are a fun way to engage kids in hands-on, creative activities. One popular and incredibly fun project is making homemade slime. This squishy, stretchy, and gooey substance is perfect for sensory play and is surprisingly easy to make at home. In this guide, we’ll walk you through how to make easy homemade slime that your kids will love. From gathering the materials to step-by-step instructions, safety tips, and mess control, we’ve got you covered. Plus, we’ll share some fun variations to customize your slime and make the experience even more enjoyable. Materials Before diving into the process, you’ll need to gather some essential materials. Here’s what you’ll need for the basic slime recipe: White school glue (e.g., Elmer’s Glue) Baking soda Contact lens solution (must contain boric acid and sodium borate) Food coloring (optional) Glitter, beads, or sequins (optional) Mixing bowl Mixing spoon or spatula Measuring spoons Step-by-Step Instructions Making slime is straightforward and can be done in just a few steps. Follow these instructions for an easy homemade slime: Step 1: Pour the Glue Start by pouring 1 cup of white school glue into a mixing bowl. If you’re making a larger batch, you can adjust the quantities accordingly. Step 2: Add Baking Soda Next, add 1 teaspoon of baking soda to the glue. This will help to thicken the mixture and is a crucial part of the chemical reaction that creates the slime. Step 3: Mix Well Stir the baking soda and glue mixture until they are well combined. This is also the time to add food coloring if you want colored slime. A few drops should be enough, but you can add more for a more vibrant color. Step 4: Add Contact Lens Solution Add 1 tablespoon of contact lens solution to the mixture. Stir well. You’ll notice the mixture starting to form and pull away from the sides of the bowl. If the slime is still too sticky, add more contact lens solution in small increments until it reaches the desired consistency. Step 5: Knead the Slime Take the slime out of the bowl and knead it with your hands. This will help to further combine the ingredients and improve the texture. If the slime is still too sticky, you can add a few more drops of contact lens solution and continue to knead. Safety Tips While making slime is generally safe, it’s essential to follow some safety guidelines to ensure a fun and worry-free experience: Always supervise children during the slime-making process. Make sure kids wash their hands before and after playing with slime. Avoid ingesting any of the slime ingredients. If your child has sensitive skin, consider using gloves during the kneading process. Store slime in an airtight container to prevent it from drying out. Fun Variations Once you have mastered the basic slime recipe, you can experiment with different variations to make it even more fun. Here are some ideas: Glow-in-the-Dark Slime To make glow-in-the-dark slime, add glow-in-the-dark paint or powder to the basic slime recipe. Mix it thoroughly and allow the slime to absorb light before playing with it in the dark. Fluffy Slime Fluffy slime has a lighter, airier texture. To make it, simply add shaving cream to the glue and baking soda mixture before adding the contact lens solution. The more shaving cream you add, the fluffier the slime will be. Galaxy Slime Create a cosmic experience with galaxy slime. Divide the basic slime mixture into several bowls and add different colors of food coloring to each. Swirl the colors together to create a galaxy effect. You can also add glitter for extra sparkle. Edible Slime If you’re concerned about young children putting slime in their mouths, try making an edible version. One simple recipe involves mixing marshmallow fluff, cornstarch, and a bit of cooking oil. While it may not have the same stretchy properties as regular slime, it is safe for little ones to taste. Mess Control Tips Making slime can be messy, but with a few simple tips, you can keep the mess under control: Cover your workspace with a plastic tablecloth or newspaper before starting. Keep a wet cloth or baby wipes handy for quick clean-up. Use a large mixing bowl to minimize spills. Store slime in a plastic container to avoid it sticking to surfaces. Conclusion Making easy homemade slime is a fantastic DIY project for kids. It’s not only fun but also provides a hands-on learning experience. By following these step-by-step instructions, safety tips, and mess control strategies, you can ensure a smooth and enjoyable slime-making session. Don’t forget to explore the various fun variations to keep things interesting. For more exciting DIY projects, check out our articles on DIY fall decor ideas, homemade Goo Gone, and fun projects to do at home with family.

DIY fall decor with autumn crafts
Uncategorized

DIY Fall Décor Ideas to Cozy Up Your Home

DIY Fall Décor Ideas to Cozy Up Your Home As the temperatures drop and the leaves start to change, there’s no better time to cozy up your home with some DIY fall décor. This season offers a wonderful palette of warm hues and textures that can transform any space into a snug autumnal retreat. In this article, we’ll guide you through various DIY fall décor ideas that are not only affordable but also easy to create. Whether you’re a seasoned DIY enthusiast or a beginner, these seasonal crafts will help you add a touch of fall to your home effortlessly. Fall Décor Ideas 1. Leaf Garland A leaf garland is a simple yet stunning way to bring the beauty of fall indoors. With just a few materials, you can create a garland that can be draped over your fireplace, windows, or even your dining table. 2. Pumpkin Centerpieces Pumpkins are a quintessential symbol of fall. Crafting a pumpkin centerpiece for your dining table or coffee table can make your living space feel seasonally appropriate and inviting. 3. Mason Jar Candle Holders Mason jars are versatile and can be repurposed into beautiful candle holders. Add some fall-themed embellishments, and you’ve got yourself a cozy light source perfect for chilly autumn nights. 4. Wreaths A fall wreath can add a welcoming touch to your front door. Using materials like twigs, pinecones, and artificial leaves, you can craft a wreath that embodies the essence of autumn. 5. Plaid Blankets and Throws One of the easiest ways to make your home cozier is by adding plaid blankets and throws. Drape them over your sofa or armchairs, and you instantly get a warm and inviting look. Materials Needed Artificial leaves Twine Hot glue gun Mason jars Craft paint Pumpkins (real or artificial) Tea light candles Pinecones Twigs Ribbon Fabric (plaid or fall patterns) Scissors Floral wire For more seasonal craft ideas, check out our article on Dollar Tree Craft Ideas for Every Season for budget-friendly inspiration. Step-by-Step Guide How to Make a Leaf Garland Start by gathering artificial leaves in various fall colors. Cut a long piece of twine to your desired length. Using a hot glue gun, attach the leaves to the twine, spacing them evenly. Let the glue dry completely before hanging your garland. Crafting a Pumpkin Centerpiece Select a few pumpkins of different sizes. Paint them in fall colors or leave them as they are for a more natural look. Arrange them on a tray or directly on your table. Add other elements like candles, pinecones, and small twigs to complete the look. For more DIY inspiration, explore our guide on DIY Home Projects for Beginners. Creating Mason Jar Candle Holders Clean the mason jars thoroughly. Paint the exterior with a fall color of your choice. Allow the paint to dry completely. Wrap some twine around the neck of the jars and secure it with a bow. Place a tea light candle inside each jar and light them up to cast a warm glow. For more creative home décor projects, take a look at our article on High-End Dollar Tree DIY Home Décor. Designing a Fall Wreath Create a base using a circular frame made of twigs or a wire wreath form. Attach artificial leaves, pinecones, and twigs to the frame using floral wire. Add a ribbon for a final touch, and hang the wreath on your door. Tips for Personalizing Décor Use Personalized Colors: Choose colors that complement your existing décor. If your home has a neutral palette, add pops of autumn colors like orange, yellow, and red. Incorporate Natural Elements: Using natural elements like leaves, pinecones, and twigs adds an authentic touch to your décor. Add Custom Touches: Personalize your décor by adding monograms or family names to pumpkins or other decorative items. Mix and Match Textures: Combining different textures, such as rough twine with smooth pumpkins, can make your decorations more interesting and visually appealing. Thrift and Upcycle: Don’t shy away from using items you already have at home. Thrift old décor items to give them a new life with a fall theme. Check out our post on Easy DIY Projects for Home Décor for more ideas. Conclusion Embracing the fall season with DIY fall décor is a delightful way to add warmth and coziness to your home. From creating leaf garlands to designing pumpkin centerpieces, these crafts are both fun and meaningful. Using affordable and easily accessible materials, you can transform your living space into a cozy autumn haven. Moreover, by personalizing your decorations, you give your home a unique and heartfelt touch that reflects your style and creativity. Feeling inspired? Dive into even more DIY projects with our collection of Fun Projects to Do at Home with Family for endless creative possibilities. Happy crafting, and enjoy the cozy fall season!

Person making homemade goo remover with DIY supplies.
Uncategorized

Homemade Goo Gone: A DIY Solution for Sticky Messes

Homemade Goo Gone: A DIY Solution for Sticky Messes Sticky, stubborn messes are a common nuisance in any household, whether it’s leftover adhesive from price tags, crayon marks on the wall, or gum stuck to the carpet. Many of us turn to store-bought solutions like Goo Gone, but have you ever considered a homemade alternative? In this guide, we’ll delve into a practical and eco-friendly approach to creating your own homemade goo gone using simple, readily available ingredients. This DIY cleaning solution is not only effective but also safe for various surfaces around your home. Read on to discover the ingredients, how the solution works, step-by-step instructions, and tips for achieving the best results. Ingredients Creating your homemade goo gone requires only a handful of natural ingredients, each chosen for its cleaning power and safety. Here’s what you’ll need: Vegetable Oil: Any type of vegetable oil will work, including olive oil, coconut oil, or sunflower oil. Baking Soda: This common household item is a mild abrasive that helps to lift sticky residues. Lemon Essential Oil (Optional): Adding a few drops of lemon essential oil not only enhances the cleaning power but also leaves a pleasant scent. These ingredients are non-toxic, making them a safer choice for homes with children and pets compared to commercial chemical cleaners. How It Works The effectiveness of this DIY cleaning solution lies in the combined properties of the ingredients: Vegetable Oil: The oil helps to loosen and dissolve adhesives and sticky residues due to its greasy texture. Baking Soda: The mild abrasiveness of baking soda helps to scrub away the loosened sticky substance without damaging surfaces. Lemon Essential Oil: Lemon oil is a natural solvent that enhances the ability to break down sticky materials while adding a fresh scent. Together, these ingredients create a potent, eco-friendly cleaning solution that can tackle a variety of sticky messes around the house. Step-by-Step Instructions Gather Your Supplies Before you start, make sure you have all the necessary ingredients and tools: Vegetable oil of your choice Baking soda Lemon essential oil (optional) Mixing bowl Measuring spoons Spoon or spatula for mixing Microfiber cloth or sponge Container with a lid for storage Mix the Ingredients In a mixing bowl, combine 1 part baking soda with 1 part vegetable oil. For instance, use one tablespoon of each. If you are using lemon essential oil, add 5-10 drops to the mixture. Mix the ingredients thoroughly until achieving a paste-like consistency. Apply the Solution Using a microfiber cloth or sponge, scoop a small amount of the mixture and apply it to the sticky area. Gently rub the solution onto the sticky residue, allowing the mixture to sit for a few minutes. After a few minutes, continue to rub in a circular motion until the sticky substance begins to lift and dissolve. Wipe Clean Once the sticky residue has been broken down, use a clean, damp cloth to wipe away the remaining solution and adhesive residue. Dry the surface with a clean, dry cloth. Before & After Use Before Using Homemade Goo Gone Before applying your homemade goo gone, it’s essential to consider a few preparations: Test the Solution: Always test the solution on a small, inconspicuous area of the surface to ensure it does not cause any damage or discoloration. Remove Loose Debris: Wipe away any loose dirt or debris from the area to ensure the solution works solely on the sticky residue. After Using Homemade Goo Gone After successfully removing the sticky residue, follow these steps: Rinse the Area: After wiping away the solution, rinse the area with water to remove any remaining oil or baking soda. Clean the Cloths: Wash any cloths or sponges used in the process to prevent oil buildup. Store Leftover Solution: If you have any leftover mixture, store it in an airtight container for future use. Cleaning Tips General Advice Here are some additional tips to consider for the best results: Type of Oil: While any vegetable oil can work, some oils like coconut oil have a thicker consistency and might be more effective on tougher residues. Avoid Over-Scrubbing: Gently scrubbing is usually sufficient; avoid using excessive force, which could damage delicate surfaces. Multiple Applications: For particularly stubborn messes, multiple applications may be necessary. Allow the mixture to sit for a little longer during each application. Surface-Specific Tips This DIY solution is versatile but requires some precautions based on the type of surface: Glass: For glass surfaces, be gentle to avoid scratches. Baking soda can be abrasive; use a soft microfiber cloth and avoid heavy scrubbing. Wood: Test on a small, hidden area first. Make sure to wipe away any residual oil to prevent staining the wood. Plastic: Plastic can mar easily, so be particularly gentle and avoid vigorous scrubbing. Fabric: For fabrics, test a hidden area first. Use a small amount of the mixture and gently rub, then launder as usual. Eco-Friendly Considerations One of the greatest benefits of using a homemade goo gone is its eco-friendliness. By opting for natural ingredients, you avoid the harmful chemicals found in many commercial cleaning products. This makes your cleaning routine safer for the environment and reduces your carbon footprint. Looking for more eco-friendly DIY solutions? Check out our guide on creating a DIY room spray with natural scents. Storage and Longevity Proper storage of your homemade solution can extend its shelf life: Airtight Container: Store the mixture in an airtight container to prevent it from drying out. Cool, Dark Place: Keep the container in a cool, dark place to maintain the efficacy of the essential oil (if used). This simple storage method ensures that your homemade cleaning solution is always ready to tackle any sticky situation that arises. Additionally, if you are interested in more homemade cleaning solutions or DIY projects, you might find these guides helpful: How to make homemade Vicks Vapor Rub High-end Dollar Tree DIY home decor Easy DIY projects for home decor Fun projects to do at home with family Conclusion Tackling sticky

Elegant Dollar Tree DIY home décor elements inspired setup
Uncategorized

High-End Dollar Tree DIY Home Décor

High-End Dollar Tree DIY Home Décor Home décor can often seem expensive, especially when aiming for that high-end, luxurious look. However, achieving a sophisticated and upscale aesthetic doesn’t have to break the bank. In this article, we will explore how you can create stunning high-end Dollar Tree DIY home décor using inexpensive items. Whether you’re a DIY enthusiast or a homeowner looking to add elegant touches to your space, these projects will show you that a touch of creativity and a visit to Dollar Tree can transform your home into a lavish oasis. Affordable High-End Décor Ideas Creating home décor that looks high-end does not always require a high-end budget. Here are some affordable ideas that use Dollar Tree items to achieve that luxe look: Glamorous Candle Holders Chic Lantern Centerpieces Elegant Picture Frames Marble-Inspired Coasters Stylish Wall Art Classy Floral Arrangements Luxurious Storage Solutions Materials For our high-end Dollar Tree DIY projects, you’ll need the following materials: Dollar Tree glass candle holders Dollar Tree picture frames Metallic spray paint Fake flowers Marble contact paper Mod Podge Candles Glue gun and glue sticks Scissors Rope or twine Decorative beads Mirror tiles For more seasonal craft ideas, you can check out our Dollar Tree craft ideas for every season. Step-by-Step Guide Glamorous Candle Holders Materials Needed: Dollar Tree glass candle holders Metallic spray paint (gold or silver) Glue gun and glue sticks Decorative beads Instructions: Begin by cleaning your glass candle holders to ensure they are free of dust and debris. Spray paint the candle holders with metallic paint. Apply thin, even coats to avoid drips. Once the paint is dry, use the glue gun to attach decorative beads around the base and top of the holders. Allow the glue to dry completely before placing candles inside the holders. Your glamorous candle holders are now ready to add a touch of luxury to your home. Chic Lantern Centerpieces Materials Needed: Dollar Tree picture frames (4 per lantern) Metallic spray paint Hot glue gun and glue sticks Battery-operated candles Instructions: Remove the backing and glass from each picture frame. Spray paint the frames with a metallic finish. Once dry, use the hot glue gun to glue the frames together to form a lantern shape. Place the battery-operated candle inside each lantern. These chic lantern centerpieces are perfect for adding a sophisticated touch to your dining table or entryway. Elegant Picture Frames Materials Needed: Dollar Tree picture frames Metallic spray paint Decorative beads or ribbons Glue gun and glue sticks Instructions: Remove the glass and backing from the picture frames. Spray paint the frames in a metallic finish. Allow the paint to dry completely. Decorate the frames by gluing beads or ribbons along the edges. Reassemble the frames and place your photos or prints inside. These elegant picture frames will give your photos a high-end display. Marble-Inspired Coasters Materials Needed: Dollar Tree coasters Marble contact paper Scissors Mod Podge Foam brush Instructions: Cut the marble contact paper to fit the size of the coasters. Peel and stick the contact paper onto the coasters, smoothing out any bubbles. Apply a layer of Mod Podge over the contact paper using a foam brush for a protective finish. Allow the Mod Podge to dry completely before using the coasters. Your luxurious marble-inspired coasters are now ready to impress your guests. To keep your DIY projects on a budget, see more DIY home renovation ideas on a budget. Stylish Wall Art Materials Needed: Dollar Tree canvases Metallic acrylic paint Painter’s tape Paintbrushes Instructions: Use painter’s tape to create geometric patterns on the canvases. Paint the uncovered areas with metallic acrylic paint. Once the paint is dry, carefully remove the tape to reveal the pattern. Hang the canvases on the wall to create a stunning gallery display. Your stylish wall art can serve as a focal point in any room and cost just a few dollars. Classy Floral Arrangements Materials Needed: Dollar Tree vases Metallic spray paint Fake flowers Floral foam Decorative stones or pearls Instructions: Spray paint the vases in a metallic finish. Place floral foam inside the vases to hold the fake flowers in place. Arrange the fake flowers in the foam. Decorate the base of the arrangement with stones or pearls. These classy floral arrangements look like they came from a floral shop but cost a fraction of the price. Luxurious Storage Solutions Materials Needed: Dollar Tree storage bins Rope or twine Hot glue gun and glue sticks Metallic spray paint Instructions: Spray paint the storage bins with a metallic finish. Once dry, glue rope or twine around the bins to add a rustic touch. Use these luxurious bins to organize your items while adding a decorative flair. For more storage and organization tips, check out our DIY home projects for beginners. Tips for a Luxury Look To ensure your Dollar Tree DIY projects look high-end and luxurious, consider the following tips: Choose Metallic Finishes Metallic finishes like gold, silver, and rose gold instantly elevate the look of any item. Opt for metallic spray paints or accents to give your projects a luxurious touch. Incorporate Faux Marble Marble is synonymous with luxury. Use marble contact paper or paint techniques to mimic the look of marble on coasters, trays, and other surfaces. Use Floral Elements Flowers add elegance and sophistication to any space. Create stunning floral arrangements using realistic-looking fake flowers for a fresh and upscale look. Pay Attention to Details Small details like beads, ribbons, and stones can make a big difference. Add these decorative elements to your projects to enhance their appearance. Focus on Craftsmanship Take your time with each project to ensure a high level of craftsmanship. Clean lines, smooth finishes, and attention to detail are key to achieving a luxurious look. Avoid Overcrowding Less is often more when it comes to high-end décor. Choose a few statement pieces rather than overcrowding your space with too many items. Want more tips on DIY home projects? Visit our guide on how to build

Diverse group engaged in DIY home projects.
Uncategorized

Easy DIY Projects for Home Décor

Easy DIY Projects for Home Décor Home décor doesn’t have to involve expensive renovations or professional interior decorators. With a bit of creativity and some easy DIY projects, you can transform your living spaces into beautiful, personalized areas. This article dives into simple yet impactful DIY home projects that cater to homeowners and DIY enthusiasts alike. Whether you’re looking to refresh a room or add a unique touch to your décor, you’ll find plenty of inspiration here. Easy Décor Ideas Mason Jar Candle Holders Mason jar candle holders are a fantastic DIY project to add a rustic charm to any room. These versatile decorations can be used on dining tables, mantels, or as centerpieces for special occasions. Wall Art with Washi Tape Washi tape wall art is an excellent way to personalize your space without permanent changes. With various patterns and colors available, you can create geometric designs, stripes, or even abstract art directly on your walls. Floating Shelves Floating shelves are an excellent way to add storage and display space. They are easy to install and can be customized with paint or stain to match your existing décor. Customized Doormat A customized doormat can give a personal touch to your front door. Using stencils and outdoor paint, you can create a welcoming design that reflects your style. Materials Needed Mason Jar Candle Holders Mason jars Tea light or votive candles Twine or ribbon Decorative stones or sand Craft glue Wall Art with Washi Tape Washi tape in various colors and patterns Scissors or a craft knife Ruler Pencil Floating Shelves Wood planks (desired length) Brackets Screws Drill Level Paint or stain Customized Doormat Plain coir doormat Outdoor paint Stencils Stencil brush or sponge Masking tape Step-by-Step Instructions Mason Jar Candle Holders Start by cleaning the mason jars thoroughly. Add a layer of decorative stones or sand at the bottom of the jar. Place the tea light or votive candle on top of the stones/sand. Wrap twine or ribbon around the mouth of the jar and tie it into a bow. You can add additional decorations like small charms or seasonal items tied with the twine. Wall Art with Washi Tape Decide on the design you want to create and sketch it lightly on the wall using a pencil and ruler. Start applying the washi tape along the pencil lines, smoothing it as you go to avoid air bubbles. Use scissors or a craft knife to cut excess tape and create sharp edges. Continue until your design is complete. Step back and admire your personalized wall art. Floating Shelves Measure and mark the desired location for the shelves on the wall. Attach the brackets to the wall using a drill and screws, ensuring they are level. Place the wood plank on the brackets and secure it with screws. If desired, paint or stain the shelves to match your décor. Add your items to the shelves and enjoy your new storage space. Customized Doormat Use masking tape to secure the stencil to the doormat. Dip the stencil brush or sponge in the outdoor paint and dab off the excess. Carefully apply the paint in an up-and-down motion to avoid bleeding under the stencil. Let the paint dry completely before removing the stencil. Place your custom doormat at the front door to welcome guests. Budgeting Tips Transforming your home décor doesn’t have to break the bank. Here are some budgeting tips to help you complete your DIY home projects: Thrift Shops and Garage Sales: Look for materials and tools at thrift shops or garage sales. You can find unique items at a fraction of the cost. Recycle and Repurpose: Before buying new materials, see if you can repurpose items you already have. For instance, old jars can be used for candle holders. DIY with Friends: Gather a group of friends for a DIY day. You can share materials and tools, making the projects more cost-effective and fun. Plan Ahead: Make a list of all the materials you’ll need and compare prices at different stores. Watching for sales and using coupons can also help you save money. Free Online Resources: Use online resources like tutorials and downloadable templates. These can guide you through projects without needing to purchase instructions or patterns. For more ideas on budget-friendly home improvements, check out our guide on DIY home renovation ideas on a budget. Transforming your home with easy DIY projects is a rewarding experience that adds both beauty and personal value to your space. Whether you’re creating mason jar candle holders, washi tape wall art, floating shelves, or a customized doormat, each project reflects your creativity and effort. Don’t forget to check out our article on fun projects to do at home with family for more inspiration. For those just starting their DIY journey, our guide to DIY home projects for beginners is a must-read. Happy decorating!

Homemade vapor rub with essential oils and herbs.
Uncategorized

How to Make Homemade Vicks Vapor Rub

How to Make Homemade Vicks Vapor Rub For those colder months or when allergies hit, Vicks Vapor Rub is a household staple. But did you know you can make a homemade version using all-natural ingredients? A homemade Vicks Vapor Rub can be just as effective and offers the added benefit of being free from synthetic chemicals. This DIY health project is not only simple but ensures you know exactly what you’re applying to your skin. In this guide, we’ll walk you through the process of making your own Vicks Vapor Rub at home. Let’s dive into the ingredients, step-by-step instructions, benefits, precautions, and a FAQ section to answer all your queries. Ingredients You’ll be pleased to know that the ingredients required are not only natural but also easily accessible. Here’s a list of what you need: 1 cup of Coconut Oil ¼ cup of Beeswax Pellets 20 drops of Eucalyptus Essential Oil 15 drops of Peppermint Essential Oil 10 drops of Rosemary Essential Oil 10 drops of Tea Tree Essential Oil 10 drops of Lavender Essential Oil A storage container with a lid (preferably glass) Step-by-Step Instructions Creating your homemade Vicks Vapor Rub is an easy process. Follow these steps, and you’ll have your DIY health remedy ready in no time: Melt the Coconut Oil and Beeswax Pellets: Use a double boiler to melt the coconut oil and beeswax pellets together. If you don’t have a double boiler, you can create one using a heatproof bowl over a simmering pot of water. Stir constantly until fully melted. Add the Essential Oils: Once the mixture is fully melted, remove it from heat. Immediately add all the essential oils and stir well to combine. The heat will help the oils mix thoroughly with the base. Pour into Containers: Quickly pour the mixture into your storage container(s) before it starts to solidify. It’s best to use glass containers as they’re sturdy and won’t react with the oils. Allow to Set: Let the mixture cool and solidify, which should take a few hours. You can speed up the process by placing the container in the refrigerator. Benefits The homemade Vicks Vapor Rub offers numerous benefits, both in terms of health and practicality: Natural Ingredients: Free from synthetic chemicals, making it safe for sensitive skin and for use on children. Cost-Effective: High-quality, natural remedies can be expensive. By making your own, you save money while ensuring the quality of the ingredients. Multiple Uses: Besides being an effective decongestant, this rub can also soothe sore muscles, alleviate headaches, and act as an insect repellent. Customizable: You can adjust the essential oils to suit your preferences or specific needs, such as adding more tea tree oil for its antibacterial properties. Precautions While homemade Vicks Vapor Rub is generally safe, here are some precautions to consider: Patch Test: Always perform a patch test on a small area of your skin to ensure there are no adverse reactions. Avoid Eyes: Keep the rub away from your eyes and mucous membranes to prevent irritation. Consult a Doctor: If you are pregnant, nursing, or have a medical condition, consult with a healthcare professional before using essential oils. Keep Out of Reach: Store it in a place where children cannot access it to avoid accidental ingestion. FAQ Can I use other oils instead of coconut oil? Yes, you can substitute coconut oil with other carrier oils such as olive oil, almond oil, or shea butter. Keep in mind that the consistency might vary. What if I’m allergic to one of the essential oils mentioned? If you have an allergy to any of the essential oils listed, you can omit it or replace it with another essential oil with similar properties, such as cedarwood or oregano oil. How long does homemade Vicks Vapor Rub last? When stored in a cool, dark place in a sealed container, your homemade vapor rub should last for up to one year. However, always check for any changes in smell or texture before use. Can I use this on my kids? While this rub is made from natural ingredients, it’s recommended to use it on children over the age of two. Always consult a pediatrician if you are unsure about its use. Where can I buy these ingredients? Most of these ingredients can be found at health food stores or online retailers specializing in natural products. Essential oils should be from reputable brands to ensure their purity. If you’re interested in more DIY health and home projects, check out our other guides such as DIY Room Spray Natural Scents and Dollar Tree Craft Ideas for Every Season for inspiration. With these simple steps, you can whip up your own batch of homemade Vicks Vapor Rub that’s both cost-effective and customizable to your liking. Not only will you find it beneficial for cold and flu seasons, but it can also become a multipurpose staple in your home. Happy crafting!

DIY home renovation with painting and woodworking.
Uncategorized

DIY Home Renovation Ideas on a Budget

DIY Home Renovation Ideas on a Budget Renovating a home can be both exciting and daunting, especially if you’re working within a tight budget. Whether you’re aiming to improve your living space for personal comfort or to boost your home’s resale value, there are numerous budget-friendly ways to achieve impressive results. In this article, we’ll explore various DIY home renovation ideas by room, highlight cost-effective materials, and guide you through some step-by-step renovations. Let’s dive in! Renovation Ideas by Room The Kitchen The kitchen is often described as the heart of the home. However, updating it can sometimes come with a hefty price tag. Here are some ways to give your kitchen a fresh look without breaking the bank: Cabinet Makeover Paint: Repainting your cabinets can totally transform your kitchen. Choose a color that brightens up the space and matches the décor. New Hardware: Swap out old handles and knobs for modern alternatives. Before: Drab, outdated brown cabinets ![Before Kitchen Cabinet](path/to/before-kitchen-cabinet.jpg) After: Freshly painted white cabinets with sleek new handles ![After Kitchen Cabinet](path/to/after-kitchen-cabinet.jpg) Backsplash Update Peel-and-Stick Tiles: These are cost-effective and easy to install. They come in a variety of styles and don’t require grout. The Bathroom Bathrooms are smaller spaces, which means you can make a big impact with small updates. Vanity Update Paint: Just like in the kitchen, a fresh coat of paint can work wonders for your bathroom vanity. Countertop Contact Paper: You can cover old countertops with contact paper for a marble or granite look. Before: Outdated bathroom vanity ![Before Bathroom Vanity](path/to/before-bathroom-vanity.jpg) After: Modern bathroom vanity with new countertop contact paper ![After Bathroom Vanity](path/to/after-bathroom-vanity.jpg) Mirror Magic Frame It: Add a frame to a plain mirror to give it a custom look. You can use wood, rope, or even mosaic tiles. The Living Room The living room is one of the most used spaces in a home, and it can benefit from a few cost-effective upgrades. Accent Wall Paint: Choose a bold color and create an accent wall. It adds depth and makes the room feel cozier. Wallpaper: Removable wallpaper is available in various patterns and is easy to install. Furniture Refresh Slipcovers: If a new sofa isn’t in the budget, consider slipcovers for a fresh look. Painted Furniture: Give your coffee tables, side tables, and other furniture pieces a new lease on life with a coat of paint. Before: Plain living room with old furniture ![Before Living Room](path/to/before-living-room.jpg) After: Cozy living room with an accent wall and refreshed furniture ![After Living Room](path/to/after-living-room.jpg) Budget-Friendly Materials For Walls Paint: One of the most affordable ways to change a room’s look. Removable Wallpaper: Adds patterns and textures without permanence. For Floors Peel-and-Stick Tiles: Ideal for quick and affordable updates. Rugs: Cover existing floors with stylish rugs to enhance the décor. For Furniture Contact Paper: Cover old surfaces for a fresh look. Slipcovers: Easily change the look of sofas and chairs. Step-by-Step Guide Updating Kitchen Cabinets Materials Needed Paint (primer and finish) Sandpaper Painter’s tape Screwdriver New hardware (optional) Steps Remove Doors and Hardware: Use a screwdriver to remove cabinet doors, drawers, and hardware. Sand Surfaces: Lightly sand all surfaces to help the paint adhere better. Clean: Clean all surfaces to remove dust and grease. Apply Primer: Use a primer suitable for your type of cabinets. Paint: Apply two coats of paint, allowing each coat to dry completely. Reattach Doors and Hardware: Once the paint is dry, reattach the doors and add the new hardware. Installing Peel-and-Stick Backsplash Materials Needed Peel-and-stick tiles Utility knife Measuring tape Level Steps Clean Surface: Ensure the surface is clean and dry. Measure: Measure the area you plan to cover. Cut Tiles: Use a utility knife to cut tiles to fit. Apply Tiles: Start from one corner and press tiles firmly onto the wall, using a level to ensure they are straight. Final Thoughts Renovating your home doesn’t have to be expensive. With a bit of creativity and willingness to get hands-on, you can achieve fantastic results on a budget. Whether it’s the kitchen, bathroom, or living room, there are always ways to make improvements without breaking the bank. For more inspiration, check out these fun projects to do at home with family or these Dollar Tree craft ideas for every season. Happy renovating!

Family enjoying DIY projects at home.
Uncategorized

Fun Projects to Do at Home With Family

Fun Projects to Do at Home With Family There is no better way to bond with your family than by engaging in fun projects to do at home. These activities not only foster creativity but also strengthen family ties. Whether you have young children or teenagers, there are a plethora of home crafts and DIY projects that everyone can enjoy. This article will explore a variety of family-friendly projects that are safe, engaging, and easy to execute. Project Ideas 1. DIY Room Spray with Natural Scents Create a customized room spray with your family’s favorite scents. Not only is this project fun, but it’s also practical and eco-friendly. 2. Homemade Bird Feeders Encourage your family to connect with nature by making bird feeders. This project is easy and provides endless entertainment as you watch birds visit your creation. 3. Customized Family T-Shirts Create personalized t-shirts for every member of the family. This project allows you to express your creativity and pride in your family. 4. Decorative Mason Jars Transform plain mason jars into beautiful decorative pieces. This project is perfect for all ages and can be used to organize various household items. 5. Family Tree Wall Art Create a visual representation of your family’s history. This project is educational and serves as a wonderful piece of art for your home. 6. Painted Flower Pots Spruce up your garden or indoor plants by painting flower pots. This project is ideal for encouraging artistic expression and a love for gardening. Step-by-Step Instructions DIY Room Spray with Natural Scents Gather essential oils, distilled water, and small spray bottles. Fill each spray bottle three-quarters full with distilled water. Add 20-30 drops of your chosen essential oils. Screw on the spray top and shake well. Label each bottle with its scent and enjoy a freshly scented home! For more in-depth instructions, visit our DIY Room Spray with Natural Scents guide. Homemade Bird Feeders Gather empty toilet paper rolls, peanut butter, birdseed, and string. Spread a thin layer of peanut butter on the outside of the toilet paper roll. Roll the peanut butter-covered roll in birdseed until fully coated. Thread a piece of string through the roll and tie it to form a loop. Hang the bird feeder in your garden and watch the birds flock in. Customized Family T-Shirts Purchase plain t-shirts in sizes for each family member. Gather fabric paint, brushes, and stencils. Plan your designs and lay out the t-shirts on a flat surface. Use fabric paint and stencils to create your designs. Let the paint dry completely before wearing the t-shirts. Decorative Mason Jars Gather mason jars, acrylic paint, brushes, and decorative elements (ribbons, stickers). Paint the jars in your desired colors and let them dry. Add decorative elements like ribbons and stickers to personalize the jars. Use the jars to store small items like stationery, kitchen supplies, or cosmetics. Family Tree Wall Art On a large piece of canvas, sketch a tree outline. Gather family photos and print them in various sizes. Using glue, attach the photos to the branches of the tree. Label each photo with the family member’s name and relation. Hang the completed family tree art in a prominent place in your home. Painted Flower Pots Purchase plain terracotta pots and acrylic paint. Wash and dry the pots thoroughly. Paint the pots in your desired designs and let them dry completely. Use the painted pots to plant flowers or herbs indoors or outdoors. Materials Needed Essential oils Distilled water Spray bottles Toilet paper rolls Peanut butter Birdseed String Plain t-shirts Fabric paint Brushes Stencils Mason jars Acrylic paint Decorative elements (ribbons, stickers) Canvas Photos Glue Terracotta pots Age-Appropriate Tips When embarking on fun projects to do at home with family, it’s essential to consider age-appropriate activities and safety tips. Here are some guidelines to ensure everyone has a great time: For Young Children (Ages 3-7) Choose simple projects with minimal tools. Supervise all activities closely to ensure safety. Encourage creativity by allowing children to choose colors and designs. Use non-toxic materials and paints. For Tweens (Ages 8-12) Introduce more complex projects that require basic tools, like scissors. Encourage teamwork by assigning roles and tasks. Involve them in planning and gathering materials. Teach safety practices, such as how to handle tools properly. For Teenagers (Ages 13+) Allow them the freedom to lead projects and make decisions. Introduce DIY projects that align with their interests, such as fashion or technology. Encourage problem-solving and creativity in project design. Discuss proper safety measures, especially when using more advanced tools. Conclusion Fun projects to do at home with family create lasting memories and produce tangible results that can be enjoyed long after the activity is complete. From DIY room sprays to customized t-shirts, these home crafts provide endless opportunities for creativity and bonding. So, gather your materials, engage your family, and embark on your next DIY adventure! For more inspiration, check out our other DIY project ideas like Dollar Tree Craft Ideas for Every Season and DIY Home Projects for Beginners. Happy crafting!

Woman mixing essential oils in a DIY home setting.
Uncategorized

DIY Room Spray: Natural Scents for Every Room

DIY Room Spray: Natural Scents for Every Room In the quest for a healthy and fragrant home environment, many homeowners are turning to natural alternatives for room freshening. DIY room sprays not only infuse your space with delightful scents but also offer an eco-friendly solution, free of harmful chemicals. Making homemade room sprays is simple, customizable, and cost-effective. Benefits of Natural Room Sprays Healthier Environment Commercial room sprays often contain synthetic chemicals that can trigger allergies and respiratory issues. Natural DIY room sprays use essential oils and other non-toxic ingredients, ensuring a healthier environment for you and your family. Eco-Friendly Homemade room sprays reduce plastic waste since you can reuse spray bottles. Additionally, using natural ingredients minimizes your carbon footprint. Customizable Scents Create unique scents tailored to each room and your personal preferences. Whether you prefer calming lavender in the bedroom or invigorating citrus in the kitchen, the possibilities are endless. Cost-Effective Buying essential oils and other ingredients upfront may seem expensive, but in the long run, DIY room sprays are much cheaper than regularly purchasing commercial products. Ingredients for Homemade Room Sprays Essential Oils Essential oils are the primary ingredient in natural room sprays, providing fragrance and additional benefits such as relaxation or invigoration. Popular choices include: Lavender Peppermint Lemon Eucalyptus Tea Tree Rosemary Orange Distilled Water Distilled water is preferred over tap water as it is free of impurities that could affect the spray’s scent and longevity. Witch Hazel or Vodka Both witch hazel and vodka act as natural preservatives and emulsifiers, helping to blend the oil and water while prolonging the spray’s shelf life. Spray Bottle Choose a dark-colored glass spray bottle to protect the essential oils from light degradation. The size of the bottle can vary depending on your needs, but a 4-ounce bottle is generally a good starting point. Step-by-Step Instructions for DIY Room Spray Gather Your Materials Before starting, ensure all necessary ingredients and tools are on hand: Essential oils of your choice Distilled water Witch hazel or vodka Dark glass spray bottle (4-ounce recommended) Funnel (optional, for easy pouring) Combine Ingredients Start by adding 1 tablespoon of witch hazel or vodka to the spray bottle using a funnel if needed. Add 10-30 drops of essential oils, depending on the desired intensity. Mix and match oils to create custom scents. Fill the rest of the bottle with distilled water, leaving a little space at the top. Screw on the spray nozzle and shake well to combine. Label Your Creation Label your spray bottle with the contents and date to keep track of the mixtures and ensure you use them before they lose efficacy (typically 6-12 months). Test and Adjust Spray a small amount in the air and adjust the scent if necessary. Add more essential oil for stronger scents or more distilled water for a lighter fragrance. Tips for Custom Scents Understanding Essential Oils Different essential oils offer various benefits and can create distinct atmospheres in your home. Here are a few blends to consider: Relaxation Blend: Lavender, chamomile, and ylang-ylang for a calming ambiance. Energizing Blend: Peppermint, eucalyptus, and orange to invigorate your senses. Refreshing Blend: Lemon, lime, and rosemary for a clean, uplifting scent. Seasonal Scents Change up scents according to the season. Try warm, spicy scents like cinnamon and clove in winter, or fruity and floral scents such as grapefruit and jasmine in summer. Room-Specific Scents Create different blends for various rooms in your home: Kitchen: Citrus oils like lemon and lime to neutralize cooking odors. Living Room: Soothing blends like lavender and vanilla for a welcoming environment. Bathroom: Fresh, clean scents such as eucalyptus and tea tree. Bedroom: Relaxing mixes like lavender and chamomile for restful sleep. Conclusion By making your own DIY room spray, you can enjoy a fresh-smelling, healthy home while being kind to the environment. With simple ingredients like essential oils and distilled water, creating a homemade room spray is an easy and cost-effective way to customize the scent of every room in your house. For more DIY inspiration, explore our [DIY Home Projects for Beginners](https://myhomediyguide.com/diy-home-projects-for-beginners) and [Dollar Tree Craft Ideas for Every Season](https://myhomediyguide.com/dollar-tree-craft-ideas-for-every-season).

DIY house construction step-by-step illustration.
Uncategorized

How to Build a House Step by Step

How to Build a House Step by Step Building a house from the ground up can be one of the most rewarding yet challenging ventures a homeowner can undertake. Whether you are a seasoned DIY enthusiast or someone considering their first major project, understanding the process of building a house step by step is essential. This comprehensive guide will provide a detailed roadmap, backed by tips and tricks, to help you through this remarkable journey. Planning Initial Considerations Before you even think about breaking ground, the planning phase is crucial. This involves selecting the right plot of land, finalizing house designs, and understanding zoning laws. Conduct thorough research and engage with local authorities to ensure that you comply with all regulations. Designing Your Dream Home Begin by sketching out your dream home. You can always refer to professional home designs for inspiration. Questions to consider: How many rooms do you need? What style of architecture do you prefer? What type of layout suits your family’s lifestyle? This is also the time to decide on key elements like the number of floors, basement options, and outdoor spaces. Ensure you consult an architect for a more detailed and professional plan. Getting Permits and Approvals With your design in hand, the next step is obtaining the necessary permits and approvals. This could range from building permits, electrical permits, to plumbing permits. Failing to secure these permits can result in legal issues and financial setbacks. Budgeting Creating a realistic budget is another critical part of planning. Factor in the cost of materials, labor, permits, and unforeseen expenses. It’s wise to include a contingency fund to cover unexpected issues. Assembling Your Team If you’re not taking the complete DIY route, you will need to assemble a team of professionals that may include architects, contractors, electricians, and plumbers. Ensure you carry out thorough background checks and get multiple quotes before making a decision. Foundation Site Preparation Once all the preliminary steps are completed, it’s time to prepare the site. This generally involves clearing the land, leveling the ground, and setting up temporary utilities. Proper preparation ensures that your foundation is stable and secure. Laying the Foundation The foundation is the most critical part of your house structure. It could be a slab, crawl space, or a full basement. Here are the basic steps to lay a foundation: Excavation: Digging out the area where your foundation will sit. Formwork: Setting up wooden forms to shape the foundation. Pouring: Pouring concrete into the forms. Reinforcing: Adding steel rods for additional strength. Setting: Allowing the concrete to cure and set. Ensure that the foundation is level and well-cured before proceeding to the next step. Framing Constructing the Skeleton The next step in building a house step by step is framing. This is the process of constructing the skeleton of your home. Framing includes building the floors, walls, and roof structure. Steps to Frame Your House Floor Framing: Use treated lumber to frame the floor structure. Wall Framing: Raise walls section by section, securing them properly. Roof Framing: Once the walls are up, construct the roof framework. Following these steps ensures that your home gets a solid and secure skeleton. Use appropriate braces and supports to keep everything in place. Electrical and Plumbing Installing Essential Systems With the framing complete, it’s time to install the electrical and plumbing systems. These tasks require professional expertise unless you are well-versed in these areas. Electrical Installation Steps for electrical installation: Planning: Design your electrical plan, locating outlets, switches, and fixtures. Running Wires: Install conduits and electrical boxes, then run the wires. Main Service Panel: Set up the main service panel and connect it to the power source. Inspection: Ensure all your work passes local electrical inspections. Plumbing Installation Steps for plumbing installation: Planning: Design the plumbing layout, including drains, water lines, and vents. Installing Pipes: Use PVC for drains and copper or PEX for water lines. Connecting Fixtures: Hook up essential plumbing fixtures like toilets, sinks, and showers. Inspection: Ensure all your work passes local plumbing inspections. Finishing Touches Insulation and Drywall After completing the electrical and plumbing systems, it’s time to insulate and install drywall. Insulate your walls and ceilings to make your home energy-efficient. Once the insulation is in place, hang drywall panels and finish with joint compound. Flooring and Painting Next, install flooring and paint the walls. Choose flooring materials that fit your budget and aesthetic preference. Once the flooring is laid, paint the interior and exterior walls in your chosen colors. Fixtures and Appliances The final step involves adding fixtures and appliances. These include lighting fixtures, kitchen appliances, bathroom fixtures, and more. Ensure that everything is correctly installed and functional. Timeline and Budgeting Setting a Timeline Building a house step by step requires setting a realistic timeline. Break down the entire project into smaller phases and set deadlines for each. This helps you stay on track and manage your time effectively. It’s also essential to be flexible, as unforeseen issues may cause delays. Managing the Budget Effective budgeting involves allocating funds for each phase of the project and sticking to it as closely as possible. Regularly review your expenses and make adjustments as necessary. Keep a contingency fund for unexpected costs to avoid any financial strain. Building a house yourself might seem daunting, but with meticulous planning, the right team, and careful execution, it is achievable. For those looking to start smaller, you might find inspiration from these DIY home projects for beginners and craft ideas for every season. These can offer you the chance to gain confidence and experience before diving into more substantial projects. Happy building!

Scroll to Top