Uncategorized

Rustic fall DIY decor on wooden table.
Uncategorized

DIY Fall Décor: Affordable and Easy Ideas

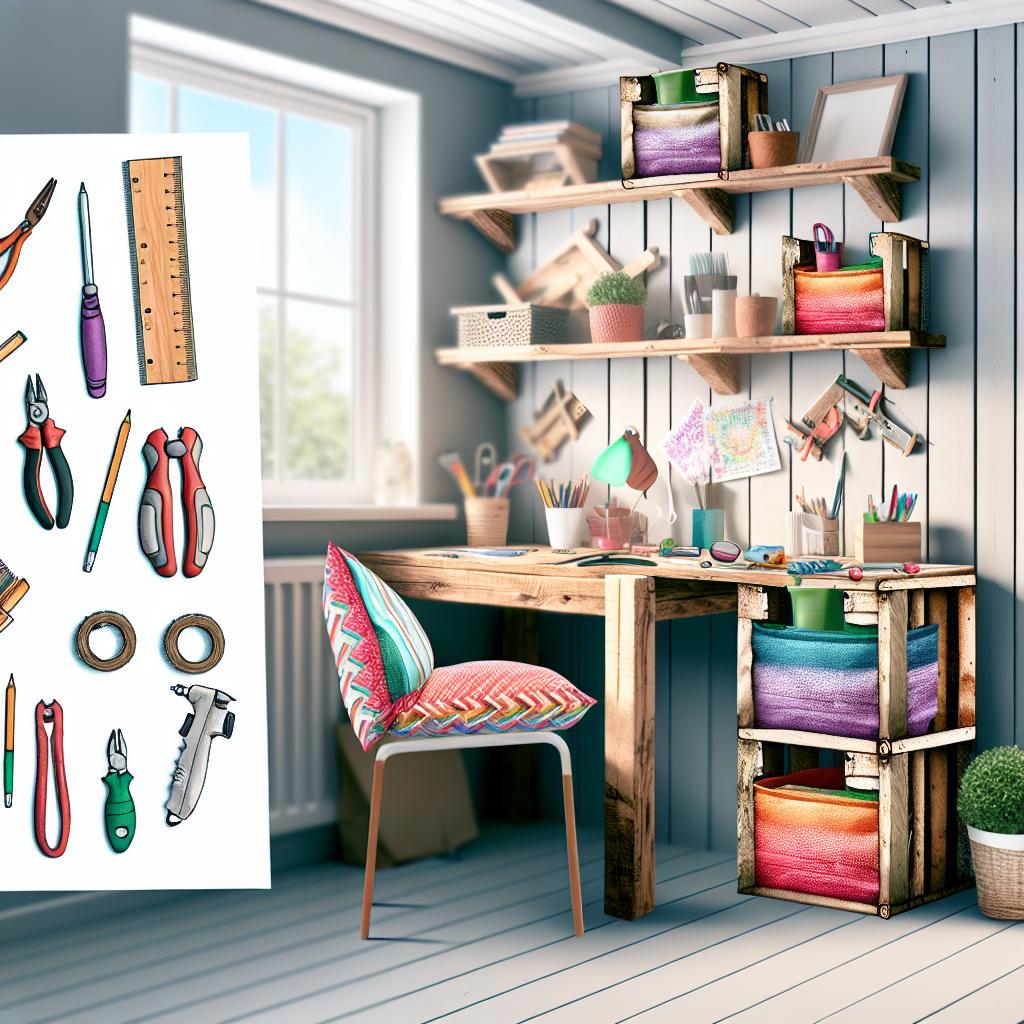
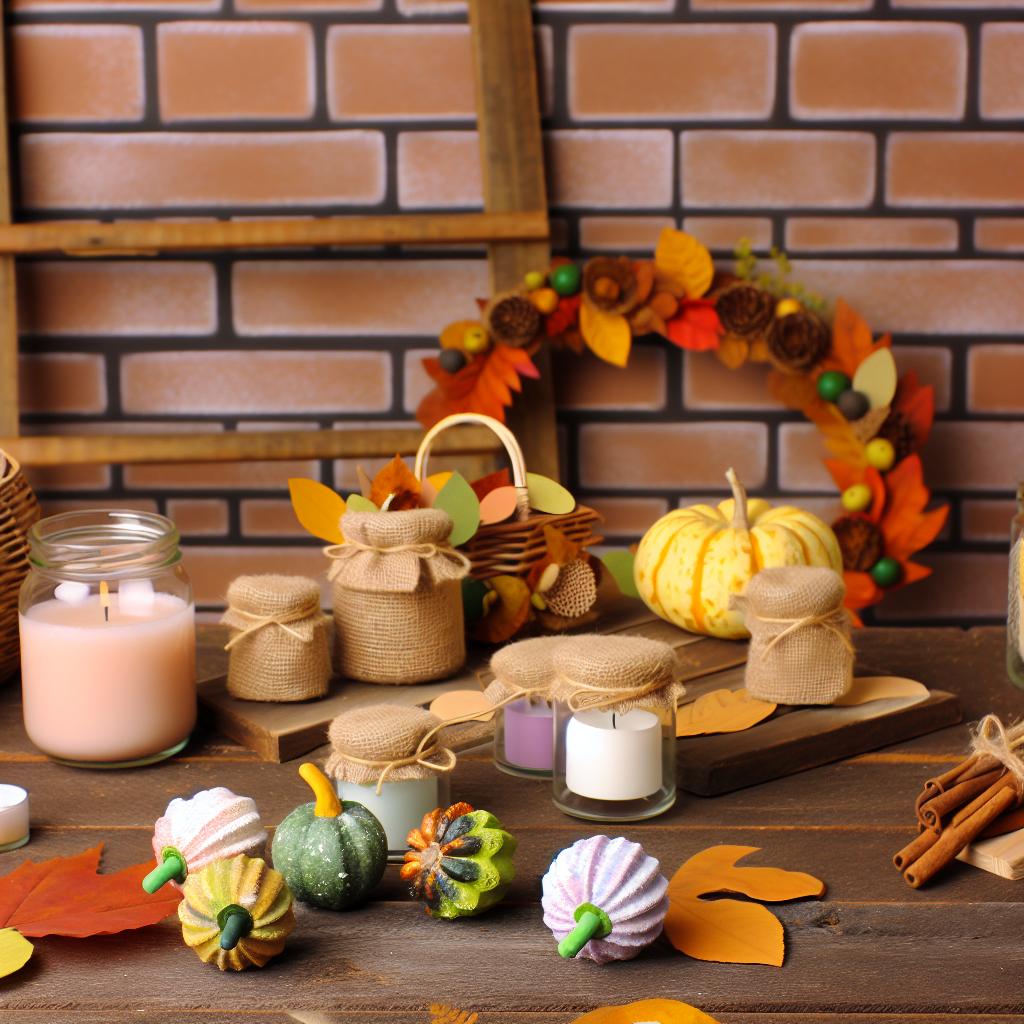
Introduction As the leaves change color and a crisp chill fills the air, it’s time to usher in the warmth and coziness of fall into your home. For many, this cozy transformation doesn’t mean spending a fortune on high-end decorations. Instead, DIY fall décor is the perfect solution for those on a budget, yet eager to infuse their living spaces with the vibrant hues and comforting tones of the season. With a few crafty tricks and some seasonal inspiration, you can create a home that reflects the beauty of autumn—without breaking the bank. This guide explores a variety of affordable and easy seasonal crafts to adorn your home. Keep reading to discover our eclectic selection of DIY fall décor ideas, accompanied by detailed instructions, a comprehensive list of materials, and savvy budget tips. Embrace your creativity and let your inner artisan shine! Décor Ideas Rustic Autumn Wreath A rustic autumn wreath is a welcoming addition to any front door. This versatile piece can be customized to incorporate your favorite seasonal colors and textures, allowing you to bring the outdoor elements indoors. Leaf Garland A leaf garland is a simple yet eye-catching piece that adds warmth and vibrancy to mantels, banisters, or walls. Using a mix of real and artificial leaves elevates this project, ensuring longevity throughout the season. Harvest Centerpiece Create a stunning focal point for your dining room table with a harvest centerpiece. Using natural elements such as mini pumpkins, gourds, and candles, this centerpiece captures the essence of fall beautifully and effortlessly. Pinecone and Acorn Accents Pinecones and acorns are quintessential fall items that can be used in various DIY projects. Whether painted, glittered, or displayed naturally, they add an organic touch to any setting. Mason Jar Luminaries Bring a soft, warm glow to any room with mason jar luminaries. With a touch of personalization, these jars can hold tea lights or LED candles, scattering ambient light around the room. Materials Needed For these projects, you will need: Wreath base (grapevine or wire) Artificial and real leaves Mini pumpkins and gourds Twine or string Pinecones and acorns Small paintbrushes Acrylic paints or spray paint Glue gun and sticks Mason jars Tea lights or LED candles Decorative ribbon Scissors These materials can usually be found at local craft stores or online at competitive prices, ensuring your DIY fall décor projects remain budget-friendly. Step-by-Step Guide Rustic Autumn Wreath Begin by selecting a wreath base. A grapevine wreath provides a rustic look while a wireframe allows for more customization. Gather an assortment of artificial and real leaves in various shades of red, orange, and yellow. Using a glue gun, adhere the leaves in layers, starting with the largest at the base and working your way to the smallest at the top, for a fuller look. Embellish with small pinecones, acorns, or mini pumpkins secured with hot glue. Finish by attaching a decorative ribbon to the top for hanging. Leaf Garland Collect real or artificial leaves. If using real leaves, make sure they’re dry and pressed. Cut a length of twine or string to your desired garland length. Attach leaves to the twine using small drops of hot glue at the stem or use mini clothespins for a more adjustable option. Space the leaves evenly along the twine. Add small pinecones or acorns for extra detail. Harvest Centerpiece Select an assortment of mini pumpkins, gourds, and candles. Arrange these items in the center of your table, varying height and size for visual interest. Weave in some artificial leaves and pinecones around the base of your arrangement. Add depth by incorporating mason jar luminaries with tealights interspersed throughout the arrangement. Pinecone and Acorn Accents Collect pinecones and acorns. Clean them thoroughly by soaking in a vinegar-water solution before drying. For a natural look, use them as is. For a pop of color, paint them using acrylic or spray paint in seasonal colors. Display them in bowls or scatter them across tables for a subtle yet stylish touch. Mason Jar Luminaries Choose clear mason jars and remove any labels or residue. Wrap the exterior with decorative seasonal ribbon, securing it with glue. Place tealights or LED candles inside each jar. Arrange the jars along windowsills or as part of your harvest centerpiece for added ambiance. Budget Tips Decorating for fall doesn’t have to be expensive. Here are some budget-friendly tips to help you create beautiful DIY fall décor: Shop off-season sales for supplies at reduced prices. Use natural elements from your backyard such as pinecones, acorns, and branches. Repurpose items you already own like mason jars or old wreath forms. Scout local thrift stores for inexpensive decorative pieces. Incorporating these cost-effective strategies ensures your DIY seasonal crafts remain affordable without sacrificing style. To manage your DIY projects efficiently, consider setting up a home office space dedicated to crafting. This allows you to keep supplies organized and easily accessible when creativity strikes. All in all, seasonal decorating can be an enjoyable, enriching endeavor that highlights your personal style and creativity. By employing these practical ideas and budget tips, your home will transform into a warm and inviting autumnal haven in no time. Enjoy the beauty of the season and happy crafting!

DIY fog juice creation for Halloween setup.
Uncategorized

DIY Fog Juice for Halloween Fun

DIY Fog Juice for Halloween Fun Halloween is right around the corner, and it’s time to bring out your spookiest décor for that unforgettable haunted house effect. A fog machine is an essential gadget in setting the perfect eerie atmosphere, but buying fog juice can quickly become expensive. Fortunately, crafting your own homemade fog juice is a simple, cost-effective solution that has DIY enthusiasts buzzing. In this comprehensive guide, we will explore how to make your own fog juice, recommended ways to utilize it, and essential safety tips to ensure everyone enjoys a fog-filled night of ghoulish fun. Ingredients Before you start concocting your homemade fog juice, you need to gather a few simple ingredients. These items are often readily available and do not require a significant investment, making this DIY project both budget-friendly and accessible. Distilled Water: Distilled water is vital as it ensures that there are no impurities, which could clog your fog machine. Glycerin: Vegetable glycerin is preferred because of its non-toxic properties. You can find glycerin at most pharmacies or health food stores. Measuring Cup: Precision is key in achieving the desired fog thickness, so a measuring cup is essential. Storage Container: A clean, plastic bottle to store the fog juice when not in use. Step-by-Step Guide Crafting your own fog juice is a straightforward process that doesn’t take much time or expertise. Simply follow the steps below to whip up your very own batch: Measure Your Ingredients: For an ideal fog output, mix one part glycerin to three parts distilled water. For example, use 1 cup of glycerin and 3 cups of distilled water for each batch. Adjust this ratio according to your fog density preference. Mix Ingredients Thoroughly: Combine the glycerin and distilled water in a measuring cup and stir gently until the solution is well-mixed. Avoid shaking, as this might cause bubbles. Store the Mixture: Pour the concoction into your chosen container and label it clearly. Store it in a cool, dry place until it’s time for Halloween festivities. Test Before Use: It’s always wise to test your homemade fog juice with your machine beforehand to ensure the mixture produces the desired fog effect. Fun Ideas for Fog Machine Use Once you’ve created your homemade fog juice, it’s time to get creative in using it to amplify the Halloween spirit. Here are some inspired ideas to utilize your fog machine: Enhancing Outdoor Decorations: Create an ominous landscape around your house by placing the fog machine among your outdoor decorations. The mystical mist can heighten the effect of gravestones, skeletons, and jack-o’-lanterns. Interior Special Effects: During a Halloween party, position the fog machine in party rooms to immerse your guests in a suitably spine-chilling atmosphere. Pairing the fog with sound effects and mood lighting can transform your event into the ultimate haunted experience. Creating an Entrance with Impact: Use the fog machine near the entrance of your haunted house or party to make an unforgettable first impression. Adding Drama to Photo Booths: For a themed photo booth, a fog machine can create a fantastical setting and serve as a backdrop to eerie costumes and makeup. Safety Tips While creating homemade fog juice for Halloween can be a rewarding project, it is crucial to observe safety measures. Here are a few guidelines to keep both your equipment and celebrants safe: Proper Ventilation: Ensure there is adequate ventilation wherever you use your fog machine. This prevents the area from becoming overly foggy or the air from becoming unpleasant. Use the Correct Machine: Always use a fog machine that matches the specifications of your homemade fog juice to prevent damage or inefficient fog production. Mind Allergic Reactions: Some individuals may be sensitive to glycerin mist. Be aware of your guests’ sensitivities and place the fog machine in areas where it can dissipate easily. Regular Maintenance: Regularly clean your fog machine to prevent clogs and maintain optimal performance. Follow the manufacturer’s instructions for any upkeep tasks. Supervise Young Children: If children are present, keep the fog machine out of reach and ensure they don’t interact with it unsupervised. While you’re preparing for the spooky season, why not explore other DIY solutions for your home? Check out our [DIY Natural Spray for Roses](https://myhomediyguide.com/diy-natural-spray-roses-protect-garden/) or [Simple Decor Ideas for Beginners](https://myhomediyguide.com/diy-home-design-simple-decor-ideas-for-beginners/) for more inspiration. For those interested in adding personal touches to parties and crafting projects, learn how to make [Homemade Mod Podge](https://myhomediyguide.com/homemade-mod-podge-craft-projects/) and explore the wide range of DIY possibilities it presents. By crafting your own fog juice, you not only enjoy a cost-effective solution but also add a personal touch to your Halloween festivity. With the right mixture, creative uses, and mindful safety, your Halloween celebration is sure to be foggy, fun, and memorable. Happy Halloween and happy crafting!

Hands crafting DIY home decor project.
Uncategorized

DIY Home Design: Simple Décor Ideas for Beginners

Introduction Embarking on a DIY home design journey can be both exciting and daunting, especially for beginners. Whether you’re looking to personalize your space or simply seeking a new hobby, upgrading your home décor DIY-style is a fulfilling way to infuse personality into your living area. In this comprehensive guide, we’ll explore several simple and creative ideas to refresh your home décor without breaking a sweat or emptying your wallet. With clear instructions and tips, you’ll be well on your way to transforming your abode into a reflection of your style. Décor Ideas The charm of DIY home design lies in its versatility and adaptability. Here, we’ve compiled a selection of easy-to-do projects perfect for newcomers wanting to enhance their home aesthetics: 1. Handmade Art Pieces There’s nothing like the impact of original art pieces in a room. You don’t have to be an artist to create something beautiful. From abstract paintings to framed fabric swatches, creating your artwork adds a unique touch to your space. 2. Decorative Throw Pillows Throw pillows are a fabulous way to add color and texture to your living space. Creating your decorative throw pillows allows you to choose fabrics and patterns that suit your taste. 3. Upcycled Furniture Breathe new life into old furniture with paint, stenciling, or new fabrics. Whether it’s an old chair, a bookshelf, or even an entertainment center, upcycling projects can make furniture pieces stand out. 4. DIY Wall Shelves Wall shelves are both stylish and functional. Crafting your shelves allows you to customize the size and storage capacity to your needs, while also serving as a display for books, plants, and cherished items. 5. Handmade Candles Creating candles can enhance the ambiance of any room. With various molds, fragrances, and colors available, DIY candles can be tailored to fit any décor theme. 6. Natural Home Fragrance Sprays Keeping your home smelling fresh and inviting with natural DIY fragrance sprays is an easy project that combines décor with functionality. For more DIY natural-scent ideas, check out our guide on DIY natural sprays for roses and gardens. Materials & Tools Needed Before beginning your DIY home design projects, it’s essential to gather all the necessary materials and tools. Here’s what you’ll typically need: Acrylic or water-based paints Paintbrushes in various sizes Fabric swatches or old garments for upcycling Scissors and a sewing kit Old furniture for upcycling projects Wood planks and brackets for DIY shelves Wax, wicks, molds, and essential oils for candles Spray bottles, distilled water, and essential oils for fragrance sprays A hot glue gun for multi-purpose use A measuring tape and a level for precision Step-by-Step Instructions Now that you have your ideas and materials ready, let’s dive into the practical steps for each project: 1. Create Handmade Art Pieces Start with a blank canvas or a piece of wood. Choose a color palette that complements your room’s existing décor. Experiment with brush strokes and textures until you create a design you enjoy. Allow the paint to dry before framing or hanging your artwork. 2. Sew Decorative Throw Pillows Choose fabric that enhances your room’s color scheme. Cut the fabric into squares that fit your pillow inserts, leaving an extra inch around each edge for seam allowance. Sew around three edges, leaving one side open to insert the pillow. Once the pillow is inside, close the final edge by sewing or with a concealed zipper. 3. Upcycle Old Furniture Choose a piece of furniture that needs a fresh look. Sand the surface to remove old paint or finish. Apply a base coat of primer and allow it to dry completely. Paint the piece in a color of your choice, applying multiple coats if necessary. Add stenciling or fabric features as desired for extra flair. Interested in more upcycling tips? Discover how to upcycle an old entertainment center for functional and aesthetic improvement. 4. Install DIY Wall Shelves Measure the desired space and cut wood planks to the suitable length. Sand the edges for a smooth finish. Paint or stain the wood according to your preference, letting it dry completely. Use a level to mark and drill brackets into the wall. Attach the wood planks to the brackets using screws. 5. Make Handmade Candles Melt candle wax in a double boiler. Prepare your molds by placing wicks at the center. Mix in essential oils for fragrance. Carefully pour the wax into molds, ensuring the wick remains centered. Let the candles cool and harden completely before removing from molds. 6. Mix Natural Home Fragrance Sprays Fill a spray bottle with distilled water, leaving some space at the top. Add 10-15 drops of your favorite essential oil. Shake well to mix the ingredients thoroughly. Spray around the home as needed for a refreshing aroma. For more homemade solutions and scent ideas, see our homemade hair spray guide. Final Thoughts Embarking on a DIY home design project can transform not just your living space, but also your perspective on creativity and personal expression. These simple décor ideas for beginners are a stepping stone into a world of home improvement that is both rewarding and cost-effective. Remember, each project you undertake is a journey of learning and discovery. As you grow more confident in your skills, you might even tackle more advanced tasks, like setting up a functional home office through our DIY home office setup tips or exploring affordable security solutions with DIY home security. Let your home be a canvas for your imagination, and enjoy the process every step of the way.

Two people making DIY garden spray.
Uncategorized

DIY Natural Spray for Roses: Protect Your Garden

DIY Natural Spray for Roses Protect Your Garden As any gardening enthusiast would agree, roses are among the most cherished blooms in any garden. Their vibrant colors and intoxicating fragrance make them a beloved choice for many, yet they can also be a magnet for pests and diseases. If you’re searching for an eco-friendly, effective method to protect your roses, this guide to creating a homemade rose spray is the perfect solution. Focusing on DIY gardening, this article provides a step-by-step approach to ensuring your roses remain healthy and beautiful. Benefits of Natural Sprays Before diving into the DIY process, it’s helpful to understand why natural sprays are beneficial for your garden. Emphasizing chemical-free pest control can yield numerous advantages for both your plants and the environment. Environmentally Safe Natural sprays lack the harsh chemicals found in store-bought brands, minimizing their impact on the ecosystem. Utilizing ingredients that don’t harm beneficial insects or pollute the soil is a proactive step towards sustainable gardening. Cost-Effective Solutions Creating a homemade rose spray can be much more cost-effective than purchasing commercial alternatives. Most ingredients are easily found in your kitchen or garden, which reduces expenses and fosters a more self-reliant lifestyle. Healthier Plants Unlike chemical pesticides, natural ingredients tend not to diminish soil quality or exclude beneficial microorganisms. The use of a DIY gardening approach can support healthier roses and produce robust growth with vibrant blooms. Reduced Allergic Reactions Many commercial products contain chemicals that may cause allergies or skin irritations. Natural sprays, by contrast, focus on safe ingredients that reduce the likelihood of adverse reactions for you and your pets. Ingredients Let’s delve into the essential ingredients needed to create a homemade rose spray. These ingredients have been selected for their effectiveness in deterring pests while promoting plant health. Neem Oil: Renowned for its ability to combat numerous pests, neem oil is an organic solution that disrupts pest lifecycles without harming beneficial insects. Garlic: As a natural insect repellent, garlic deters aphids, caterpillars, and other pests while being safe for plants. Soap: A mild dish soap or castile soap helps break down oils, allowing them to coat the leaves uniformly. It works as an emulsifier in the spray. Baking Soda: With antifungal properties, baking soda can help thwart powdery mildew—a common issue with roses. Water: The primary carrier for the solution, water allows you to apply the ingredients evenly across the plant. Essential Oils: Rosemary or peppermint oil enhances the spray’s effectiveness, further deterring pests with their strong scents. Step-by-Step Guide Now that we’ve covered the benefits and ingredients, let’s move on to creating your homemade rose spray. Follow these detailed steps to ensure a successful outcome. Gather Materials Start by collecting the necessary materials: A clean spray bottle Measuring cups and spoons Stirring rod or spoon Funnel (optional for easy pouring) Prepare the Spray Base Measure one quart of water and pour it into your spray bottle. Add one teaspoon of neem oil to the water. Ensure it’s well-mixed before continuing. Add Garlic Solution Crush two cloves of garlic thoroughly. Add crushed garlic to a small amount of water and let it steep for at least an hour. Strain the liquid and add it to your spray bottle with the neem oil solution. Combine Soap and Baking Soda Measure half a teaspoon of mild dish soap; add it to the mix as an emulsifier. Add half a teaspoon of baking soda to combat fungal issues naturally. Introduce Essential Oils Add a few drops of rosemary or peppermint oil if desired. These oils bolster the pest-repellent properties of your spray. Mix Thoroughly Attach the spray bottle’s lid securely and shake the mixture well to ensure all ingredients are combined smoothly. Application Tips Applying your homemade rose spray correctly maximizes its effectiveness. Follow these tips to achieve the best results and maintain healthy roses. Test Your Spray Before fully applying the spray to your rose bushes, test it on a small section or a single leaf. This helps ensure there are no adverse reactions on the plant. Apply in the Early Morning Spraying in the early morning allows the mixture to dry on the leaves without the intense midday sun, which can cause burning. Additionally, the calm weather ensures the spray is effective against pests. Focus on Undersides of Leaves Many pests hide on the undersides of leaves. Be sure to spray thoroughly there for maximum pest deterrence. Reapply Regularly For continual protection, reapply the spray every 5-7 days, especially after rain which can wash away the solution. Handle with Care Avoid contact with your eyes or skin and wash your hands thoroughly after handling to prevent potential irritation. For a similar topic emphasizing natural solutions check out our Homemade Gnat Spray Guide for more ideas on keeping your plants pest-free. Implementing a homemade rose spray as part of your DIY gardening routine can transform your crop yield while being gentle on the environment. For a broader perspective on sustainable living, consider exploring Homemade Mod Podge Craft Projects. By prioritizing natural ingredients, you’ll not only protect your cherished rose plants but also contribute to an eco-friendly gardening approach, reducing reliance on harsh, commercial pesticides. Happy gardening!

South Asian woman making DIY hair spray.
Uncategorized

How to Make Homemade Hair Spray

## How to Make Homemade Hair Spray: A Natural Solution for DIY Beauty In recent years, there’s been a notable shift towards natural and eco-friendly beauty products, with more people opting for homemade alternatives. This growing trend is evident in the increasing interest in DIY beauty solutions that feature simple, everyday ingredients. One such essential for those seeking to manage their hair with natural products is homemade hair spray. This guide will walk you through how to make your own DIY beauty essential, exploring the benefits and providing you with an easy-to-follow recipe. Additionally, this article will connect you with other exciting DIY projects, such as crafting your own mod podge for various craft projects or even designing a home office setup on a budget. ## Ingredients Creating a homemade hair spray isn’t complicated, and the ingredients are often readily available in most kitchens. This makes it not only an eco-conscious choice but also a cost-effective one. Here’s what you’ll need to get started: Water: The base for your hair spray, offering hydration without adding greasiness. Sugar: Provides the hold necessary for maintaining your hairstyle throughout the day. Essential Oils: Add a pleasant fragrance and can offer various benefits to your scalp and hair. Lavender, rosemary, or lemon oils are popular choices. Alcohol: Acts as a preservative to extend the shelf life of your homemade spray. You can use vodka or rubbing alcohol. Optional Additions: Glycerin for added moisture, aloe vera for soothing the scalp, or witch hazel for extra cleaning and toning effects. ## Benefits of Natural Hair Spray Using natural ingredients for your hair care routine presents several advantages not only for your hair’s health but also for the environment. Here are some reasons to consider making your own natural hair spray: Avoid Harsh Chemicals: Commercial hair sprays often contain synthetic chemicals and alcohols that can dry out your hair or cause irritation to your scalp. Eco-Friendly: By choosing natural ingredients, you reduce your carbon footprint and packaging waste, contributing to a healthier planet. Customizable: You can tailor your hair spray to your specific hair needs and preferences by adding different essential oils or extras like aloe vera. Cost-Effective: Making your own hair spray is often cheaper than purchasing commercial ones, saving you money while providing a quality beauty product. Safe for Sensitive Scalp: Carefully selected natural ingredients can minimize irritation and are suitable for those with sensitive skin. ## Step-by-Step Guide Now, let’s delve into the process of creating your very own homemade hair spray. Follow these steps to achieve a natural styling solution with ease: Gather Your Ingredients: Ensure you have all the necessary components ready, including a clean, empty spray bottle to store your product. Boil Water: Start by bringing one cup of water to a boil. This ensures the sugar dissolves completely and helps prevent microbial growth. Add Sugar: Once the water is boiling, add one to two teaspoons of sugar, depending on the level of hold you desire. Stir until the sugar fully dissolves. More sugar means stronger hold, but be mindful to avoid oversaturating the solution. Cool Down: Allow the liquid to cool to room temperature before proceeding to the next step. This will make it easy to add the remaining ingredients without destroying their beneficial properties. Add Essential Oils: At this stage, mix in five to ten drops of your chosen essential oils. Lavender and rosemary are excellent for nourishment, while lemon adds a refreshing scent. Mix in the Alcohol: Add one tablespoon of vodka or rubbing alcohol to act as a preservative. This step is important to ensure your spray remains fresh. Optional Enhancements: Consider adding a teaspoon of glycerin or aloe vera if your hair tends toward dryness or a teaspoon of witch hazel for extra cleansing effects. Transfer to Spray Bottle: Pour your mixture into the clean spray bottle and shake well to combine all the ingredients. Label and Store: Label your bottle with the date and details of the scent blend. Store in a cool, dark place to preserve its potency. ## Usage Tips Your homemade hair spray is now ready to use. To ensure you get the most out of your DIY beauty venture and keep your hair looking fabulous, consider the following tips: Application: Shake the bottle before each use to ensure even distribution of ingredients. Hold the spray about 8-10 inches from your hair and use a sweeping motion to cover evenly. Style Support: Use the spray as the final step in your styling routine to hold your desired look in place securely. Control Frizz: For frizz control, lightly mist the spray onto your hand and then gently pat through areas prone to flyaways. Refreshing: If needed, you can use the hair spray to refresh your style throughout the day, giving your hair a quick lift without leaving residue. Cleaning Your Bottle: Periodically wash your spray bottle to prevent buildup and ensure the longevity of future concoctions. Homemade hair spray is an excellent addition to your eco-friendly beauty routine. It’s a testament to how simple ingredients can create effective and health-conscious alternatives to store-bought products. While exploring the DIY beauty world, you might find interest in other natural projects like creating your own DIY Vicks Vapor Rub or concocting a natural lubricant at home. Embrace the satisfaction that comes with crafting your personalized beauty solutions, knowing that they’re not just good for your hair but also better for the environment.

Homemade weights in home workout scene.
Uncategorized

DIY Heavy Weights for Home Workouts

Introduction In recent times, home workouts have gained immense popularity, especially for those looking to save a few bucks on gym memberships. This need for economical and effective workout solutions has paved the way for ingenious ideas like homemade weights. Creating your own DIY heavy weights not only offers a budget-friendly exercise option but also allows you to customize the weights according to your fitness level and goals. For those who enjoy a hands-on approach to fitness, learning how to make your own weights can be a rewarding project that not only enhances your workout space but also provides a personal touch to your fitness routine. If you’re exploring ways to enhance your home workout setup without breaking the bank, you may also find our guide on creating a DIY home office on a budget useful, as optimizing your space is key to maintaining a productive and motivated environment. Materials Before diving into the creation of homemade weights, it’s essential to gather the right materials. Most of these are items you can easily find around the house or purchase inexpensively, making this project both practical and affordable. Plastic milk jugs or detergent bottles Sand or water (or a combination of both) Duct tape or strong adhesive tape Handles (e.g., wooden dowels, sturdy ropes) Concrete mix (optional, for heavier weights) Buckets or molds for shaping (if using concrete) Funnel (if using sand or water) Permanent marker for labeling Step-by-Step Instructions Step 1 Choose Your Container Your choice of container will largely depend on your current fitness level and the weight you want to achieve. For lightweight dumbbells, you can start with small plastic bottles, while larger milk jugs suit heavier weights. If you’re aiming for very heavy weights, consider using buckets with concrete. Step 2 Prepare the Filling If you’re using water or sand, prepare your filling. Sand is denser than water, so it will offer a heavier weight per volume. For a medium weight, you can mix sand with water. Use a funnel to fill the bottle or jug with sand or water. Seal the lid tightly with duct tape to prevent spills. Step 3 Attach Handles Choose a sturdy handle material to ensure a secure grip during workouts. If you’re using wooden dowels, saw them to the desired length and secure them to your weights using duct tape. For ropes, ensure they are tied and secured tightly. Step 4 Consider Concrete for Heavier Weights If you’re seeking heavier weights, consider a concrete mix. This process is slightly more involved but yields a robust solution. Mix the concrete according to the package instructions. Pour the concrete into a bucket or mold, allowing space for a handle. Insert the handle into the mix and allow it to set. Once cured, remove the weight from the mold. Step 5 Label Your Weights Using a permanent marker, label the weights on each container to easily track the amount you’re lifting. This addition will help monitor progress and ensure consistency in your workouts. Benefits of Homemade Weights Creating DIY fitness equipment like homemade weights offers several distinct advantages: Cost-effective: Making your weights is significantly cheaper than buying gym equipment, providing a frugal solution without compromising your fitness goals. Customization: Easily adjust the weights to match your current strength level and gradually increase as you gain progress. Environmental Impact: Repurposing household items reduces waste and promotes sustainable practices. Flexibility: Allows you to switch between various types of exercises easily, accommodating a full-body workout regime. Space-saving: Homemade weights can be easily stored, making them ideal for small workout areas. For those interested in further DIY projects that focus on repurposing everyday items, our article on craft ideas using household items will offer numerous inspirations. Workout Tips Start Light If you’re new to using homemade weights, begin with lighter weights to establish form and avoid injury. Gradually increase the weight as you become more comfortable. Stay Consistent Commit to a regular workout schedule to see results. Incorporate both strength training and cardio for a balanced routine. Exercise Variety Utilize homemade weights for a range of exercises such as bicep curls, tricep extensions, squats, and lunges. Mixing up your workouts prevents monotony and engages different muscle groups. Safety First Always prioritize safety by ensuring the weights are securely fastened and the handles remain sturdy. Regularly inspect your equipment and repair if necessary. Ultimately, assembling effective workout equipment at home doesn’t have to break the bank. With a bit of creativity and elbow grease, you can transform simple household items into powerful fitness tools. For more DIY project ideas that combine functionality and innovation, explore our guide on upcycling an old entertainment center into something new and exciting.

DIY crafts on a rustic table
Uncategorized

Homemade Mod Podge for Craft Projects

Introduction Craft enthusiasts rejoice Homemade Mod Podge is here to save the day! For anyone who loves creating beautiful works of art, crafting can sometimes come at a cost. Store-bought craft supplies, while convenient, can be expensive and contain ingredients that might not always align with your preferences. One staple in the crafting world is Mod Podge—a multi-purpose adhesive that acts as glue, sealer, and finish all in one. However, what if you could make your own DIY craft supplies at home without breaking the bank? Enter the world of homemade Mod Podge! In this comprehensive guide, we will show you how to create your very own homemade Mod Podge, share its benefits, and offer some creative project ideas to get your crafting juices flowing. If you’re a seasoned crafter looking for budget-friendly alternatives or a DIY enthusiast eager to learn, this step-by-step guide will be a fantastic addition to your crafting toolkit. Also, don’t forget to check out our [simple craft ideas with household items](https://myhomediyguide.com/simple-craft-ideas-household-items/) for more inspirations! Ingredients Before diving into the step-by-step instructions, let’s first gather all the necessary ingredients you will need to create your homemade Mod Podge. The best part is that these ingredients are likely already sitting in your pantry or can be found at any local store for an affordable price. Basic Ingredients White school glue (like Elmer’s) Water Optional Additives Varnish or acrylic sealer for a shiny finish Essential oils for a pleasant scent Food coloring for a tinted mod podge Cornstarch for an extra-thick consistency With these simple ingredients, you can whip up a batch of homemade Mod Podge suited for a variety of crafts and projects. Step-by-Step Instructions Now that you have all the necessary ingredients, it’s time to get started with the creation of your homemade Mod Podge. Follow these straightforward steps to prepare your own craft adhesive: Step 1 Prepare Your Workspace Before beginning your project, ensure you have a clean and organized workspace. Lay down some newspaper or a protective covering to prevent any spillage. Gather all materials, including an empty jar or bottle with a lid for storing your Mod Podge. Step 2 Measure and Mix Measure equal parts white school glue and water. For example, combine 1 cup of glue with 1 cup of water. Pour both into your jar or bottle. Mix the two by shaking the closed jar or stirring with a stick or spoon until thoroughly combined. Step 3 Customize Your Mod Podge This is where your creativity comes into play! Customize your homemade Mod Podge according to your crafting needs: Add 1-2 teaspoons of varnish or acrylic sealer for a glossy finish. Mix in a few drops of essential oils like lavender or peppermint for a pleasant aroma. Incorporate a small amount of food coloring if you desire a tinted mod podge. For a thicker consistency, mix in 1-2 tablespoons of cornstarch. Step 4 Store and Use Once your homemade Mod Podge is perfectly blended and customized, securely seal the jar or bottle. Store it in a cool and dry place, away from direct sunlight. It should last several months when stored properly. Now you’re ready to use your homemade Mod Podge for various craft projects! Benefits of Homemade Mod Podge Curious about why you should switch to homemade Mod Podge? Here are several compelling benefits that highlight why making your own at home is a fantastic choice: Cost-effective: Crafting can sometimes be a costly hobby. Creating your own Mod Podge is significantly more affordable than purchasing the store-bought version. Customization: By making your own, you can adjust the consistency, scent, and appearance to suit your specific projects and preferences. Eco-friendly: Using reusable containers and ingredients you already have on hand can reduce your craft-related waste. Safe ingredients: You know exactly what goes into your homemade Mod Podge, making it a safer option for those who prefer natural crafting supplies or have sensitivities. For those looking to continue crafting in an eco-friendly manner, consider exploring our [DIY natural lubricant at home](https://myhomediyguide.com/diy-natural-lubricant-at-home/) guide to discover additional eco-conscious projects. Craft Project Ideas With your homemade Mod Podge ready to go, it’s time to dive into some exciting craft projects! Here are some creative ideas to try out using your new crafting staple: Personalized Decor Jars Transform ordinary mason jars into stunning decorative pieces with your homemade Mod Podge. Apply a layer to the jars and adhere decorative paper, fabric, or even dried flowers for a personalized touch. Photo Transfer onto Wood Bring cherished memories to life by transferring your favorite photos onto wooden surfaces. With a simple coat of homemade Mod Podge, adhere the photo printed on regular paper, and allow it to dry before gently rubbing off the paper backing to reveal the image. Custom Coasters Create unique coasters that add style to your home. Use tiles, cork, or cardboard as the base and layer on images, artwork, or fabric, finished with your homemade Mod Podge for a waterproof seal. Decoupage Furniture Revamp old or inexpensive furniture by decoupaging decorative patterns, magazine cutouts, or wallpaper onto the surfaces. Seal with multiple layers of homemade Mod Podge for a long-lasting finish. Creative Jewelry Pieces Unleash your creativity by crafting eye-catching jewelry. Use your homemade Mod Podge to bond paper, fabric, or dried flowers onto bases like metal pendants or wooden earrings. Looking for more jewelry craft inspiration? Check out our guide on [homemade electroplating jewelry projects](https://myhomediyguide.com/homemade-electroplating-jewelry-projects/) for detailed instructions on creating stunning pieces with an affordable twist. If you’re in need of more inspiration, you can also explore our [creative DIY ideas for old tree stumps](https://myhomediyguide.com/creative-diy-ideas-for-old-tree-stumps/) to find even more ways to beautify your home with nature-inspired projects. Conclusion Congratulations! You’ve mastered the art of creating homemade Mod Podge—a versatile and cost-effective DIY craft supply perfect for a wide array of projects. By taking a do-it-yourself approach, you not only save money but also contribute to a more sustainable and environmentally friendly crafting process. Whether you’re a beginner or a seasoned crafter,

DIY home office with reclaimed wood desk.
Uncategorized

DIY Home Office Setup: Budget-Friendly Tips

## Introduction Creating a functional and stylish home office on a budget is a dream for many homeowners and DIY enthusiasts. The good news is that it doesn’t require a substantial financial investment. In fact, with a little creativity and some smart planning, you can transform a corner of your home into a productive workspace without breaking the bank. In this article, we’ll explore various tips and tricks for setting up a DIY home office that not only meets your practical needs but also enhances your living space. Working from home has become increasingly common, and having a designated workspace can greatly impact your productivity and comfort. By focusing on budget-friendly solutions and incorporating home improvement ideas, you can create a space that inspires creativity and concentration. Let’s dive into some ideas and practical steps to help you set up your own DIY home office. ## Budget-Friendly Setup Ideas ### Choose the Right Spot One of the first steps in setting up a DIY home office is choosing the right spot in your home. Consider areas that are underutilized or could serve a dual purpose. A nook in the living room, a section of the bedroom, or even part of a well-lit hallway can be transformed into an office space. Look for zones that offer minimal distractions and plenty of natural light. ### Use Existing Furniture Before purchasing new furniture, evaluate what you already own. An old table, a sturdy bookshelf, or even an entertainment center can be repurposed into office furniture. Upcycling is not only budget-conscious but also environmentally friendly. For more inspiration, check out our guide on how to upcycle an old entertainment center to suit your office needs. ### Go Vertical with Storage Maximize vertical space by installing shelves to house documents, books, and office supplies. This approach saves on floor space while ensuring everything you need is within reach. Look for affordable shelving solutions that can either be mounted on walls or standalone units that complement your décor. ### DIY Desk Solutions Building your own desk can save money and be a fun project. Simple solutions include using sawhorses with a wooden or glass top, or repurposing a door. These options are often more affordable than buying a new desk and allow for customization to fit your personal style and space requirements. ### Personalize with Decor A home office should be a reflection of your personality while fostering productivity. Personalize your space with décor that motivates you. This could include artwork, plants, and unique light fixtures. For those interested in getting creative, consider some simple craft ideas using household items to add a personal touch to your workspace. ### Keep Cables Organized An organized workspace free of cable clutter increases efficiency and aesthetics. Invest in cable organizers, clips, or even DIY cable management solutions to keep your desk tidy. This simple step can transform an average office into a well-ordered setup. ## Materials & Tools Needed Once you have your layout planned, gather the necessary materials and tools: ### Essential Materials Desk (either a repurposed table or a DIY solution) Chair (look for ergonomic options within your budget) Shelves (wall-mounted or standalone) Lighting (desk lamp or overhead light) Decor items (plants, artwork, organizers) Paint or wallpaper (optional for aesthetic enhancements) Cable organizers ### Tools Drill and drill bits Screwdriver Measuring tape Level Stud finder (for mounting shelves) Paintbrushes or rollers (if painting) ## Step-by-Step Guide ### Step 1: Plan Your Layout Start by sketching your desired layout, considering the space you have available and your office needs. Factor in the location of power outlets and natural lighting when deciding where your desk and other elements will go. ### Step 2: Prepare Your Space Clear your chosen area of any clutter or unnecessary furniture. Clean the space thoroughly, as this will make assembling your office furniture easier and more efficient. ### Step 3: Assemble Your Desk For a DIY desk, lay out your chosen surface on sturdy supports such as sawhorses or filing cabinets. Ensure your setup is stable and at a comfortable height for working. Secure the top to the supporting elements if necessary for added stability. ### Step 4: Install Shelving Wall-mounted shelves are a great way to save floor space. Use a stud finder to locate structural studs in the wall, then use a drill and appropriate fixtures to mount your shelves securely. Ensure they are level and capable of supporting the weight of your items. ### Step 5: Set Up Lighting Good lighting is essential for reducing eye strain and improving focus. Position a desk lamp or install an overhead light that provides ample illumination across your workspace without casting harsh shadows. ### Step 6: Organize Office Supplies Use containers and organizers to keep your desk tidy and efficient. Group similar items together, and label storage containers for easy identification. Consider using a drawer unit or desktop organizer to maximize your desk’s surface area. ### Step 7: Add Personal Touches Incorporate personal elements like family photos or motivational artwork. A few potted plants can add a touch of nature and help improve air quality. Customize the space to reflect your personality while maintaining a clean, clutter-free environment. ### Step 8: Cable Management Use cable clips, ties, or trays to keep cords organized and off the floor. This not only enhances the aesthetic of your office but also prevents potential hazards. ## Conclusion Setting up a DIY home office on a budget is more achievable than you might think. With a focus on repurposing what you already own, creatively utilizing space, and making thoughtful purchases, you can create a workspace that is both functional and stylish. Don’t forget to explore other resources and ideas, such as our affordable DIY home security solutions, to continue enhancing your home environment. A well-designed home office can boost productivity and contribute positively to your overall work-life balance.

DIY gnat spray with natural ingredients in kitchen
Uncategorized

How to Make a Homemade Gnat Spray

## How to Make a Homemade Gnat Spray Gnats can be an annoying pest both indoors and outdoors. These tiny flying insects are often found in kitchens or around plants, especially if the environment is warm and humid. Thankfully, there’s a natural and eco-friendly way to keep them at bay without resorting to harsh chemicals. In this article, we’ll guide you step-by-step on how to make a DIY gnat spray using natural ingredients that are safe for your home and garden. ### Ingredients Creating an effective natural pest control solution requires minimal ingredients that are both easily accessible and eco-friendly. Below are the key ingredients you’ll need to prepare your DIY gnat spray: – **Water**: Acts as the base for the solution, diluting other concentrated ingredients. – **White vinegar or apple cider vinegar**: Effective for repelling and killing gnats due to its strong acidity. – **Essential oils**: Options like peppermint, eucalyptus, or tea tree oil provide a pleasant scent and have natural insect-repelling properties. – **Liquid dish soap**: A small amount helps the solution stick to surfaces and pests, increasing effectiveness. – **Spray bottle**: A clean spray bottle for applying the mixture efficiently. ### Benefits of Natural Sprays Opting for natural sprays instead of chemical-laden solutions offers several advantages: Eco-friendly: Natural ingredients ensure that you’re not introducing harmful chemicals into your home or environment. Safe for children and pets: Most natural sprays are non-toxic, making them safer than synthetic alternatives. Cost-effective: Ingredients for DIY sprays are often inexpensive and already available in most households. Multi-purpose: Many natural sprays can also double up as cleaning agents or can be tweaked to address different pest problems. ### Step-by-Step Instructions Now, let’s dive into making your homemade gnat spray with these simple steps: Step 1 Prepare Your Work Area To start, ensure you have a clean work area. This helps to avoid contamination and ensures you’re measuring and mixing ingredients correctly. Gather all your ingredients and tools before beginning the process. Step 2 Mix the Base Solution In your spray bottle, combine one cup of water with a half-cup of white or apple cider vinegar. The vinegar’s acidity will disrupt the gnat’s ability to survive, making it a vital ingredient in the solution. Step 3 Add Essential Oils Add 10-15 drops of your selected essential oil. Essential oils like peppermint and eucalyptus are particularly effective due to their strong-scented repellant properties. Not only will these oils help in repelling gnats, but they will also leave a pleasant aroma in your home or garden. Step 4 Incorporate Dish Soap Add a few drops of liquid dish soap to the mixture. The soap reduces surface tension, allowing the solution to stick better to surfaces and gnats. It also enhances the gnat spray’s ability to trap and kill these pesky insects. Step 5 Shake Well Secure the lid on the spray bottle and shake well until all ingredients are thoroughly mixed. It is important to shake it before each use as the ingredients may settle over time. ### Application Tips Applying your homemade gnat spray correctly will ensure its effectiveness. Here are some tips to maximize your DIY pest control efforts: Regular Application: For both indoor and outdoor use, spray the solution in areas where gnats are prevalent. This includes plant soil, near waste bins, and around windows. Protect Plants: If using near plants, avoid over-saturation as too much vinegar may harm some plant species. Test a small area first to ensure plant safety. Focus on Hotspots: Identify gnat hotspots such as fruit bowls, kitchen drains, or damp areas, and apply the spray liberally in these areas. Enhance Your Strategy: Combine your gnat spray strategy with other [natural pest control](https://myhomediyguide.com/diy-japanese-beetle-spray-for-gardens/) tactics to maintain a pest-free environment effectively. In conclusion, using a DIY gnat spray as a natural pest control solution is not only an effective way to keep your home and garden gnats-free, but it’s also an environmentally responsible choice. With simple, readily available ingredients, you can create a sustainable solution that complements your green living efforts. For more creative ideas to enhance and protect your home, explore some of our other articles, such as these [affordable DIY home security solutions](https://myhomediyguide.com/diy-home-security-affordable-solutions/) or how to [create a homemade lava lamp](https://myhomediyguide.com/how-to-make-a-homemade-lava-lamp/), both of which add a touch of DIY magic to everyday life.

DIY home security scene with tools.
Uncategorized

DIY Home Security: Affordable Solutions

Introduction Ensuring the safety of our homes and loved ones is a priority for everyone. However, investing in elaborate security systems can be expensive. Fortunately, there are affordable DIY home security solutions that can offer peace of mind without breaking the bank. Through a series of innovative ideas and practical tips, you can fortify your dwelling using simple tools and technology. In this article, we’ll walk you through various budget-friendly security measures such as cameras, alarms, and locks to enhance the safety of your home. Whether you’re an experienced DIYer or a beginner, our comprehensive guide will help you tackle home security DIY projects like a pro. DIY Security Tips Assessing Your Home’s Security Needs Before diving into DIY home improvement projects related to security, it’s vital to assess what your home truly needs. Conduct a thorough walk-through of your property, taking note of any vulnerable spots such as poorly lit areas, weak doors, or easily accessible windows. This assessment will guide you in prioritizing what needs immediate attention and what can be enhanced over time. Maximize Lighting Criminals are often deterred by well-lit areas. Consider installing motion-detecting lights around the exterior of your home. These lights are simple to install and can significantly increase your home’s security presence. Solar-powered options are available, making them an eco-friendly choice as well. Fortify Entrances The most common entry points are doors and windows. Reinforce door frames with longer screws and add a deadbolt for enhanced security. Window locks are an affordable way to secure sliding or easily accessible windows. For additional peace of mind, add window alarms that emit a loud sound when triggered by movement or vibration. Security Cameras Installing security cameras can act as a great deterrent to potential intruders. Opt for systems that offer real-time monitoring and alerts to your smartphone. Many affordable DIY home security camera kits are now available that are easy to install with minimal wiring. Ensure you place cameras at key points such as the front and back doors and other common access routes. Tools & Products Essential Tools for DIY Home Security Projects To embark on your DIY home improvement journey focusing on security, gathering the right tools is crucial. Here’s a list of basic tools you may need: Electric drill and screwdriver set Hammer and nails Measuring tape Level for straight installations Wire cutters and strippers for camera installations Ladder for outdoor installations Recommended Security Products Incorporating affordable technology can complement traditional security measures: Smart locks: These replace traditional keys and can be controlled via smartphone apps. Motion sensor lights: Ideal for external areas, these lights activate upon detecting movement. DIY security camera kits: Easy-to-install kits that offer video surveillance and smartphone connectivity. Window sensors: Affordable sensors that alert you to any unauthorized window movements. Get Creative with Basics For those who enjoy crafting, repurposing and upcycling household items can lead to creative security solutions around the home. If you’re interested in such projects, check out our simple craft ideas using household items. Step-by-Step Guide Installing Motion Sensor Lights Choose your locations: Identify the vulnerable areas around your home that require illumination. Prep the area: Ensure the surface is clean and dry. Use your measuring tape and level to mark the installation spots. Install the mounting brackets: Use a drill to secure the brackets in place. Follow the manufacturer’s instructions closely. Attach the light fixture: Once the brackets are secured, fasten the light fixture onto the brackets. Connect the wiring: If not using solar, safely connect the wiring as per instructions, ensuring all connections are sealed to prevent water damage. Test the lights: Adjust the sensor sensitivity and test to ensure the lights activate as expected. Setting Up a DIY Security Camera System Determine coverage areas: Based on your initial security assessment, decide where to place cameras for maximum coverage. Mount the cameras: Use the provided mounts or brackets to secure cameras, ensuring they are stable and set at optimal angles. Connect to a power source: If you’re opting for wired versions, route the cables safely, avoiding tripping hazards. Sync with your app: Most models come with a mobile application that allows you to monitor feed. Download the app and follow the syncing instructions. Configure alerts: Set up notification preferences for motion detection and other alerts to keep you informed in real-time. Installing a Smart Door Lock Remove the old lock: Unscrew the existing lock and remove it from the door. Insert the new smart lock: Align the new lock’s components with your door’s existing holes. Secure the fixture: Use screws to ensure the lock is tightly fastened to the door structure. Connect to Wi-Fi: Follow the specific lock model’s instructions to connect it to your home’s Wi-Fi network. Download the lock app: Install the application related to your smart lock for easy management and remote access. Test the lock: Confirm the functionality of the lock via the app, ensuring it locks and unlocks as expected. Final Tips While DIY home security solutions are highly effective, routine maintenance and vigilance are critical to sustaining their functionality. Make sure to replace batteries regularly in all devices and perform routine checks to ensure they are in working order. In addition to technological measures, fostering a community watch with your neighbors can further enhance safety. For those looking for more creative home improvement projects or unique DIY endeavors, explore some of our other guides. You may find inspiration with our creative DIY ideas for old tree stumps or learn more about breathing new life into your space with easy DIY spring decor. In conclusion, securing your home doesn’t have to involve costly installations. With the right tools, products, and a can-do attitude, you can effectively safeguard your property with ease. By taking the time to implement these affordable DIY home improvement strategies, you’ll create a safer and more secure environment for you and your family.

Scroll to Top