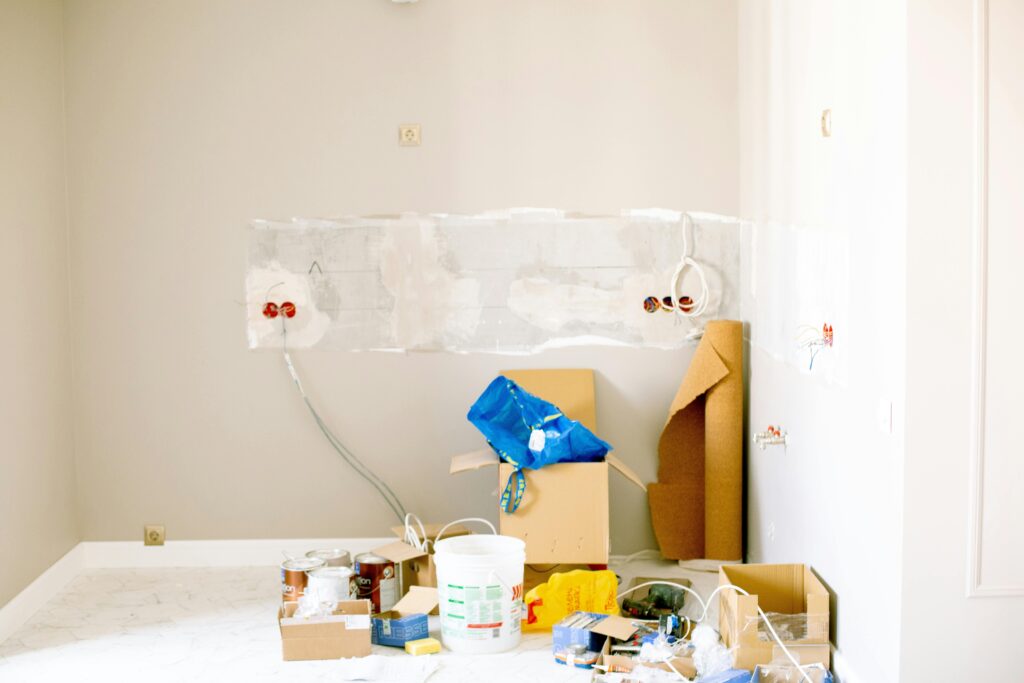
Introduction Embarking on home improvement DIY projects is a fulfilling way to enhance your living space while showcasing your creativity. Whether you’re a seasoned DIY enthusiast or just beginning your journey, there are countless opportunities to transform your home with simple yet impactful craft projects. From creating personalized wall art to building custom shelving units, these DIY projects not only elevate the aesthetic appeal of your home but also add functionality and value. In this guide, we’ll explore a variety of creative DIY craft projects that contribute to home improvement, providing you with the inspiration and instructions needed to bring your vision to life. Craft Project Ideas 1. Personalized Wall Art Wall art is a fantastic way to express your personality and style within your home. Instead of purchasing expensive pieces, consider creating your own personalized wall art. This project allows you to customize colors, themes, and designs to perfectly match your home décor. 2. Floating Shelves Floating shelves are not only functional but also add a modern touch to any room. They provide a stylish way to display books, plants, and decorative items without taking up floor space. Building your own floating shelves can be a rewarding DIY project that enhances both storage and aesthetics. 3. Customized Lighting Fixtures Lighting plays a crucial role in setting the mood and ambiance of your home. By customizing lighting fixtures, you can create unique pieces that serve as both practical light sources and eye-catching décor elements. From pendant lights to lampshades, there are endless possibilities for personalized lighting. 4. Upcycled Furniture Transforming old or unused furniture through upcycling not only promotes sustainability but also gives your home a distinctive look. Whether it’s repainting a dresser, reupholstering chairs, or adding new hardware, upcycled furniture can significantly improve the appearance of your living spaces. 5. Decorative Mirrors Mirrors can make a space feel larger and more open while adding a touch of elegance. Creating decorative mirrors with unique frames or incorporating them into gallery walls can be a stunning addition to your home improvement arsenal. Tools & Materials Needed Before diving into your home improvement DIY projects, it’s essential to gather the necessary tools and materials to ensure a smooth and successful process. Here’s a general list that covers most of the projects mentioned: Measuring tape Level Hammer or drill Screws and nails Paint and brushes Sandpaper Paintbrushes and rollers Wood boards or other materials specific to each project Decorative accents such as beads, ribbons, or fabric Safety gear like gloves and goggles Depending on the specific DIY project you choose, you may need additional materials. For detailed material lists tailored to each project, refer to our guide on easy DIY projects to improve home value. Step-by-Step Guide Project 1: Personalized Wall Art Creating personalized wall art is a straightforward project that allows you to unleash your creativity. Here’s how to get started: Choose Your Design: Decide on a theme or design that complements your home décor. This could be abstract patterns, nature-inspired motifs, or geometric shapes. Gather Materials: You’ll need a canvas or sturdy backing board, acrylic paints, brushes, painter’s tape, and any additional decorative elements like stencils or sponges. Prepare the Canvas: Lay out your canvas on a protected surface. Use painter’s tape to create clean lines or patterns on the canvas. Begin Painting: Start applying your chosen colors within the taped sections. Experiment with different techniques such as blending or layering to add depth to your artwork. Add Decorative Elements: Once the base layer is dry, incorporate any additional elements like stencils or text to personalize your piece further. Finish and Protect: After completing the painting, allow it to dry completely. Consider applying a clear sealant to protect your artwork from dust and fading. Hang and Display: Find the perfect spot to display your personalized wall art, adding a unique touch to your home’s interior. For more creative wall decorating ideas, check out our post on creative cardboard crafts for home decor. Project 2: Floating Shelves Floating shelves are a stylish and practical addition to any room. Here’s a step-by-step guide to building your own: Measure and Plan: Decide on the dimensions and placement of your floating shelves. Use a measuring tape and level to mark where the shelves will be mounted on the wall. Cut the Wood: Based on your measurements, cut the wood boards to the desired length. Sand the edges to ensure a smooth finish. Mount the Brackets: Install the mounting brackets on the wall at the marked spots. Ensure they are level and securely attached to support the weight of the shelves. Attach the Shelves: Slide the cut wood boards onto the mounted brackets. Secure them in place with screws for added stability. Decorate and Organize: Once the shelves are installed, arrange your books, plants, or decorative items to enhance the visual appeal of the space. Finishing Touches: Paint or stain the shelves to match your room’s color scheme, adding a personalized touch to your home improvement project. If you’re looking for more storage solutions, explore our DIY room design tips for small spaces. Project 3: Customized Lighting Fixtures Custom lighting can transform the ambiance of any room. Follow these steps to create your own unique lighting fixtures: Select a Base: Choose an existing lamp or fixture that you want to customize. Alternatively, start with a plain lampshade or light fixture base. Gather Materials: Depending on your design, you may need materials such as fabric, ribbons, beads, paint, or decorative trims. Prepare the Fixture: If you’re painting the fixture or lampshade, ensure it is clean and free from any dust or debris. Apply a primer if necessary. Apply Decorations: Using your chosen materials, decorate the fixture. This could involve wrapping fabric around the base, attaching beads, or painting intricate designs. Let it Dry: Allow any paint or adhesive to dry completely before handling the fixture. Assemble and Install: Once decorated, reassemble the fixture if needed and install it in the desired location. Connect it to the