Author name: liran.m.work@gmail.com

Hispanic woman making DIY pine sol.
Uncategorized

How to Make Homemade Pine Sol

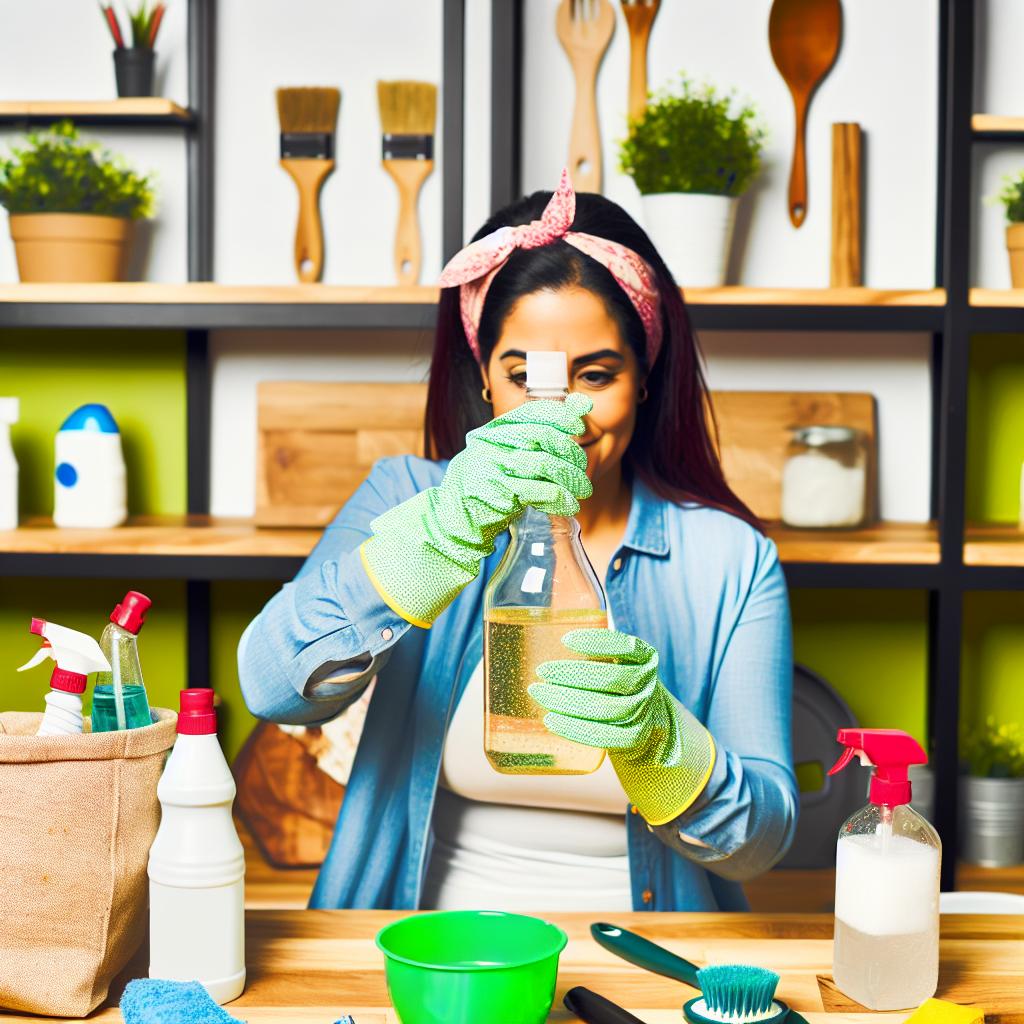
Introduction As more people shift towards eco-friendly lifestyles, the demand for natural DIY cleaning solutions has seen a significant rise. Enter homemade Pine Sol, an economical and environmental way to keep your home sparkling clean. This DIY project not only gives you control over what ingredients are used but also provides an opportunity to create a safer environment for your family. Unlike commercial cleaning products, homemade Pine Sol contains no harsh chemicals, making it an ideal choice for eco-conscious individuals. In this detailed guide, we will explore how to make homemade Pine Sol, highlighting its uses, benefits, and the best ways to store it for long-lasting effectiveness. Ingredients Before diving into the process of making homemade Pine Sol, it’s essential to gather all the necessary ingredients. These components are easily accessible and contribute to the solution’s cleaning prowess without compromising on quality. Water: Acts as the primary solvent. Pine essential oil: Provides the characteristic scent while boasting antibacterial properties. Liquid Castile soap: A natural soap that adds grease-cutting power. White vinegar: A natural disinfectant that helps cut through grime. Lemon essential oil (optional): Enhances the fresh scent and offers additional antibacterial qualities. For accurate measurement, keep a measuring cup and tablespoons on hand. You may also require a spray bottle for convenient application. Step-by-Step Instructions Now that you have your ingredients ready, let’s start creating your homemade Pine Sol. Follow these steps for a successful DIY cleaning solution. Prepare the Base: In a clean pitcher, mix two cups of water with half a cup of white vinegar. Stir gently to ensure they blend well, forming the base of your homemade cleanser. Add Liquid Castile Soap: Measure one tablespoon of liquid Castile soap and add it to the water-vinegar mixture. Stir the mixture until the soap is fully dissolved. Incorporate Essential Oils: Add 20 drops of pine essential oil followed by ten drops of lemon essential oil if used. The essential oils contribute their antibacterial properties and create the recognizable pine scent. Final Mix: Ensure all elements are well combined. Pour the solution into a spray bottle for easy application, or store it in an airtight container if you plan to use it later. Shake Before Use: Before using your homemade Pine Sol, give the bottle a good shake. This re-emulsifies the oils and ensures an even distribution of ingredients. Uses and Benefits Homemade Pine Sol is incredibly versatile and boasts numerous benefits. Here are some of the ways you can use this solution in your home: Surface Cleaning: Excellent for cleaning countertops, cabinets, and other surfaces without damaging them. Floor Cleaning: Compatible with most hard floor surfaces, delivering a natural shine. Bathroom Cleaning: Use it to clean sinks, bathtubs, and toilets for a fresh-smelling bathroom. Window Cleaner: Works effectively to give windows a streak-free shine. Besides its versatility, homemade Pine Sol offers several advantages over its commercial counterpart: Environmentally Friendly: Uses biodegradable components compared to chemical-based store products. Cost-Effective: Uses affordable ingredients easily sourced from local grocery stores. Customizable Scent: Control the intensity and aroma of your cleaner with different essential oils. For other environmentally friendly projects, check out our guide on natural homemade beetle spray for your garden. Storage Tips Proper storage of your homemade Pine Sol is crucial to maintaining its effectiveness and ensuring a long shelf life. Follow these tips for optimal storage: Store in a Cool Dark Place: Keep your cleaning solution in a pantry or cabinet away from direct sunlight. Light and heat can degrade the essential oils, diminishing the cleaner’s effectiveness. Use Airtight Containers: An airtight glass container or spray bottle will preserve the freshness of the essential oils and prevent evaporation. Label and Date: Clearly label your container with the ingredients and date of creation. This helps track its potency over time, as homemade solutions typically last up to six months when stored properly. Keeping your DIY project organized extends to other household tasks. Explore our tips on creating organized spaces through projects like upcycling old entertainment centers. Conclusion Creating your own homemade Pine Sol is not only a fulfilling DIY project but also a step towards a healthier lifestyle. By using natural ingredients, you’re making a conscious choice to avoid harmful chemicals while ensuring that your home stays clean and fresh. This commitment to eco-friendly practices extends beyond cleaning. Engage in more DIY home improvement projects on a budget by visiting our comprehensive guide on DIY home improvement ideas. By integrating these simple yet effective DIY solutions into your daily routines, you contribute to a more sustainable environment without compromising on cleanliness.

DIY home gym in living room.
Uncategorized

How to Build a DIY Home Gym

## How to Build a DIY Home Gym Building a DIY home gym is a fantastic project that allows you to customize your workout space according to your fitness goals and budget. With the rising popularity of at-home workouts, crafting a gym right at home can save you time and money while offering convenience and privacy. This guide will explore how to design a DIY home gym using homemade weights and other cost-effective equipment options. We’ll also share workout tips and important safety precautions for your DIY fitness space. ## Necessary Equipment Creating a home gym requires careful planning and selection of equipment based on your fitness goals. Here’s a list of must-have equipment that you can either purchase or fashion from materials at home: ### Basic Equipment Start your DIY home gym with these fundamental pieces of equipment: Yoga Mat: Essential for exercises and stretching. Resistance Bands: Versatile tools for strength training. Jump Rope: Great for cardiovascular workouts. Stability Ball: Useful for core workouts and balance exercises. Foam Roller: Ideal for muscle recovery and flexibility improvement. ### Advanced Equipment If you have extra space and resources, consider adding these: Adjustable Dumbbells: Offer varied weight options in one compact solution. Alternatively, consider DIY options as detailed later. Bench: Needed for weightlifting and other exercises. You can repurpose an old sturdy bench or build one using wood. Pull-Up Bar: Can be installed on a strong door frame or fabricated using metal pipes. Kettlebells: Versatile for strength and cardio workouts. Homemade versions can be created using concrete. Cardio Machine: If space allows, include a treadmill, stationary bike, or rower. Otherwise, engage in outdoor running or cycling. For more budget-friendly home improvement ideas, check out our [DIY Home Improvement Ideas on a Budget](https://myhomediyguide.com/diy-home-improvement-ideas-budget/). ## DIY Weight Ideas Creating homemade weights is an ingenious way to cut costs and personalize your home gym. Below, we’ll explore various ideas for crafting weights using everyday materials. ### Homemade Dumbbells Dumbbells are crucial for strength training. Here’s how to make them: Materials Needed: Two plastic bottles of the same size Sand, gravel, or cement Duct tape Strong pipe or wooden dowel for the handle Instructions: Fill each bottle with sand, gravel, or wet cement (let the cement dry before using). Secure the caps tightly. Tightly tape the bottles to each end of the handle using duct tape ensuring they are evenly balanced. Ensure sturdiness by wrapping additional tape around the contact points. ### Concrete Kettlebells Kettlebells can also be created at home using concrete: Materials Needed: An empty basketball, football or a balloon Concrete mix A section of sturdy PVC pipe or metal tubing for the handle Instructions: Cut a small opening in the basketball or use a balloon for smaller sizes. Mix the concrete and pour it into the ball or balloon. Insert the pipe into the concrete and let it set in a stable position until the concrete cures. Once the concrete has set remove the outer mold. ### DIY Weight Plates Weight plates can be crafted using concrete: Materials Needed: Concrete mix A large flat mold (e.g. old buckets or food storage containers) Metal pipe section for hole (optional for bar usage) Instructions: Prepare the concrete mix according to package instructions. Pour it into the mold and place a pipe segment in the center to create the hole. Allow the concrete to set fully before removing it from the mold. Upcycle unused items at home to find more creative DIY projects that can complement your home gym. ## Workout Tips Equipped with your custom gym setup, it’s time to maximize your workouts. Implement the following tips to reach your fitness aspirations: ### Establish a Routine Consistency is crucial when exercising at home. Design a balanced routine incorporating: Strength Training: Focus on different muscle groups on different days. Cardio Sessions: Engage in jump rope, running, or HIIT to boost your heart health. Flexibility Workouts: Incorporate yoga or pilates to enhance flexibility. ### Set Realistic Goals Start small with achievable targets. Gradually increase intensity as you gain strength and stamina. Track your progress to stay motivated. ### Mix It Up Avoid workout monotony by incorporating a variety of exercises. Switch between bodyweight exercises, resistance band workouts, and weights. For more on transforming spaces creatively, see our section on [DIY Fall Decor Ideas to Cozy Up Your Home](https://myhomediyguide.com/diy-fall-decor-ideas-to-cozy-up-your-home/). ## Safety Precautions Safety is paramount when creating and using a DIY home gym. Here are essential safety tips to ensure your workouts remain accident-free. ### Inspect Equipment Regularly Regularly check your homemade weights and equipment for any signs of wear or instability. Tape and fasteners can loosen over time. ### Prioritize Proper Form Maintaining proper form during exercises reduces injury risk. Consider online tutorials or a virtual session with a trainer. ### Establish a Safe Workout Area Dedicate a spacious, unobstructed area for workouts. Ensure your home gym setup doesn’t interfere with regular household activities. ### Stay Hydrated Proper hydration boosts performance and reduces cramp risks. Keep a water bottle handy, especially during intense sessions. ### Warm Up and Cool Down Start with a light warm-up before exercising to prepare your muscles. Similarly, conclude with stretching to aid recovery. Enhance your home innovation skills by exploring how to grow your own organic solutions at home with our article on [Natural Homemade Beetle Spray for Your Garden](https://myhomediyguide.com/natural-homemade-beetle-spray-garden/). ## Conclusion Creating a DIY home gym using homemade weights is both rewarding and cost-effective. With the right materials and some creativity, you can craft a functional fitness space that meets your exercise needs. Whether your focus is strength training or cardio, establishing a routine that incorporates a variety of exercises will help you stay motivated and progress toward your fitness goals. Always prioritize safety and inspect your equipment regularly to ensure a safe workout environment. For more ingenious home DIY ideas, continue exploring our blog and embark on your next project with confidence.

Asian woman painting chair, man trimming wallpaper.
Uncategorized

DIY Home Improvement Ideas on a Budget

DIY Home Improvement Ideas on a Budget Home improvement projects can sometimes feel daunting, especially when budget constraints come into play. The good news is that you can achieve stunning transformations without breaking the bank. With a bit of creativity and some well-thought-out strategies, DIY home improvement can be both fun and cost-effective. In this comprehensive guide, we will delve into a range of budget-friendly ideas, the essential tools and materials you’ll need, step-by-step instructions, and some final tips to ensure your DIY home improvement projects are a success. Budget-Friendly Ideas In this section, we will explore a variety of DIY home improvement ideas that will help you create a beautiful living space without spending a fortune. From simple décor updates to more involved projects, there’s something for every level of DIY enthusiast. 1. Paint Refresh One of the most effective and inexpensive ways to give your home a fresh look is to repaint. Whether you’re tackling a single room or the entire house, a new coat of paint can dramatically change the appearance of your space. Focus on accent walls to save on paint costs. Consider neutral colors to enhance the resale value of your home. 2. Upcycle Furniture Upcycling old furniture can be a rewarding and budget-friendly way to revitalize your home. If you have an old entertainment center gathering dust, read our guide on upcycling old entertainment centers for creative ideas. 3. Install a Backsplash A new backsplash can completely change the look of your kitchen without requiring a full renovation. Peel-and-stick tiles are a budget-friendly option that offers an array of styles and finishes. 4. Create Custom Artwork Create your personal artwork or crafts to give your home a unique flair. Cardboard crafts for home décor are a great way to personalize your space economically. Check out our cardboard crafts guide for inspiration. 5. Smart Home Enhancements Transform your home into a smart home without breaking the bank. Simple additions like smart plugs and bulbs can significantly change your home’s functionality. See our smart home on a budget guide for more ideas. Tools & Materials Before diving into your DIY home improvement projects, gathering the right tools and materials is crucial. Here’s a list of essential items that will help you get started: Basic Tool Kit Hammer Screwdriver set Measuring tape Utility knife Pliers Level Painting Supplies Paint rollers and brushes Painter’s tape Drop cloths Paint tray Hardware and Fasteners Nails and screws Wall anchors Sandpaper Wood glue Decorative Materials Peel-and-stick tiles Fabric Craft supplies Frames and canvas Step-by-Step Instructions Now that you have some ideas and the necessary tools and materials, let’s move on to some step-by-step instructions for a few specific projects. 1. DIY Painted Accent Wall Materials Needed Paint Roller and brush Painter’s tape Drop cloth Instructions Start by choosing a wall and a color that complements your existing décor. Prepare the wall by cleaning it thoroughly. Use painter’s tape to mask off edges, baseboards, and any other areas you don’t want to paint. Lay down a drop cloth to protect your floors. Start with a paintbrush to cut in around the edges and corners. Use a roller for the larger areas, applying paint in even, smooth strokes. Allow the first coat to dry and apply a second coat if needed. Remove the painter’s tape before the paint is fully dry to avoid peeling. 2. Upcycled Furniture Project Materials Needed Old furniture piece Sandpaper Paint or stain Primer (if needed) Sealer Brush or roller Instructions Start with a piece of old furniture that you want to upcycle. Clean it thoroughly. Sand the surfaces to remove old finishes and create a smooth surface for painting. Apply primer if necessary, allowing it to dry according to the instructions. Paint or stain the furniture piece in your chosen color or finish. Once the paint or stain is dry, apply a sealer to protect your work. Allow the sealer to dry fully before using the furniture. 3. Peel-and-Stick Backsplash Installation Materials Needed Peel-and-stick tiles Utility knife Measuring tape Level Ruler Instructions Measure the area where you want to install the tiles to determine how many you’ll need. Clean the surface to ensure good adhesion. Use a level and a ruler to draw guidelines where you’ll place the tiles. Peel the backing off one tile and carefully press it onto the wall, starting from one corner. Continue to add tiles, aligning them carefully to maintain straight lines. Use a utility knife to cut tiles to fit around edges and outlets. 4. Custom Artwork Creation Materials Needed Canvas or cardboard Paints or markers Brushes Frames Instructions Choose a design or pattern for your artwork. Prepare your canvas or cardboard by cleaning and priming if necessary. Start painting or drawing your design on the canvas. Allow the artwork to dry completely. Frame the finished piece and hang it in your desired location. 5. Simple Smart Home Upgrade Materials Needed Smart plug Smart light bulbs Wi-Fi connection Smartphone Instructions Start with a smart plug. Plug it into an outlet, and then plug an appliance into the smart plug. Download the corresponding app and follow the setup instructions. Similarly, replace your old light bulbs with smart bulbs. Use the app to program schedules, control devices from your phone, and even use voice commands if compatible with smart assistants. Final Tips Embarking on a DIY home improvement journey can be incredibly rewarding. Here are a few final tips to ensure your projects run smoothly and yield the best results. 1. Plan Ahead Before starting any project, take the time to plan out every step. This will not only save you time but also help you stay within budget. 2. Stay Organized Keep your work area organized. Gather all tools and materials before you start, and clean up as you go to make the process more efficient. 3. Learn New Skills Take advantage of online tutorials and resources to learn new skills that could be beneficial for your projects. For example, learning how

Diverse group upcycling old entertainment center
Uncategorized

How to Upcycle Old Entertainment Centers: DIY Ideas

How to Upcycle Old Entertainment Centers: DIY Ideas Is your old entertainment center gathering dust in the corner? It might be time to give it a second life. Upcycling not only breathes new life into outdated furniture but also aligns perfectly with sustainable living. In this comprehensive guide, we’ll dive into various DIY ideas and upcycling projects to transform your old entertainment center into a masterpiece. Read on to discover how creativity and a bit of elbow grease can turn your once-forgotten piece into a functional and stylish home feature. Upcycling Ideas Turn It into a Chic Bar Station For those who enjoy entertaining, transforming an old entertainment center into a chic bar station is an ideal upcycling project. Remove the TV shelf and drawers, add wine racks, and use the top for mixing drinks and displaying glassware. Create a Desk Workspace With remote work becoming more common, why not repurpose your entertainment center into a functional desk? This process can involve removing unnecessary shelves, repainting, and adding storage for office supplies to create a productive work environment. Upgrade to a Cozy Pet Station Your furry friends deserve some TLC too! Convert your old entertainment center into a pet station by creating cozy sleeping areas, food storage, and a few playful elements to keep them engaged. Design a Stylish Crafting Station If you’re a DIY enthusiast, turn the entertainment center into a stylish crafting station. With ample storage and table space, it can be the perfect area to house your crafting materials and complete your projects. Fashion a Play Kitchen for Kids Let your creativity shine by converting the entertainment center into a play kitchen for your children. Paint it with bright colors, add a toy stove and sink, and turn it into a delightful play area that stirs their imagination. Create a Home Library or Reading Nook For book lovers, repurpose the entertainment center into a charming home library or reading nook. Arrange the shelves to hold your favorite reads, and use the space to relax and unwind with a good book. Materials Needed Before diving into your chosen project, make sure you have the following materials on hand: Sandpaper Paint and paintbrushes Primer Screws and screwdrivers Wood filler Wood glue Measuring tape Drill Ruler Decorative hardware (handles, knobs, etc.) Storage bins or baskets Additional shelves (optional) Step-by-Step Instructions 1. Designing Your Upcycled Piece Firstly, sketch your design idea for your upcycled entertainment center. Taking the time to visualize your project will help you identify the materials and modifications you need. 2. Preparing the Entertainment Center Before making any changes, clean the entertainment center thoroughly. Remove any hardware like knobs and handles. Use sandpaper to smooth out surfaces and get rid of the old finish. 3. Making Necessary Modifications Depending on your project, you may need to remove certain parts of the entertainment center. For example, if you’re creating a desk, you might remove some shelves, whereas if it’s a bar station, you may want to add wine racks and glass holders. For step-by-step instruction on DIY electroplating to add a metallic touch to your hardware, visit our complete guide on DIY electroplating at home. 4. Repair and Sand Inspect the structure for any damages. Use wood filler to fix holes and cracks. After the filler dries, use sandpaper to smooth out the repairs and ensure the entire surface is ready for priming and painting. 5. Priming and Painting Apply a coat of primer to the entire entertainment center to ensure the paint adheres properly. Once the primer is dry, paint according to your design — be it bright colors for a kid’s kitchen or elegant shades for a reading nook. 6. Add Functional Elements Install any additional features you want, such as hooks, racks, or a pegboard for organizing crafting supplies. For pet stations, add cushions and storage bins for toys. For additional storage ideas using cardboard, explore our cardboard crafts for home decor. 7. Final Assembly and Decorating Once the paint is dry, reassemble the entertainment center with the added features. Attach decorative hardware and arrange the functional components. Decorate it as per your aesthetic preferences to complete the transformation. Tips for Customization Incorporate Sustainable Materials Using sustainable materials in your upcycling projects not only helps the environment but also adds a unique touch to your furniture. Consider materials like reclaimed wood, bamboo, and recycled metal for additional elements. Use Decorative Elements Add personality and flair to your upcycled piece by incorporating decorative elements. This can include stencils, wallpaper, or fabric to line the shelves. Customize the knobs and handles to achieve the desired look. Simplify Storage Solutions Make practical use of your entertainment center by integrating easy storage solutions. Storage bins, baskets, and pull-out shelves can help you stay organized while maintaining a clutter-free appearance. Experiment with Textures and Colors Don’t be afraid to play with different textures and colors to make your piece stand out. Blend various materials and patterns to create a stunning focal point in your home. Incorporate Modern Tech Solutions For those who appreciate modern convenience, consider integrating smart home features. Check out our DIY smart home on a budget guide for smart home tech inspirations. Conclusion Upcycling your old entertainment center into a functional and stylish home feature is a rewarding project that epitomizes sustainability and creativity. By following our guide, you can breathe new life into an outdated piece of furniture, making it both beautiful and practical. Whether you’re creating a bar station, workspace, pet nook, or craft station, the possibilities are endless. So gather your materials, roll up your sleeves, and get started on your upcycling journey. For more DIY inspiration and home improvement projects, explore our resources on crafting, decorating, and sustainable living. Happy upcycling! If you’re dealing with pests or need more sustainable home solutions, check out our guides for DIY gnat spray and homemade beetle spray. For more casual and fun DIY projects, don’t miss articles like how to make homemade slime for kids or

Asian woman making homemade gnat spray.
Uncategorized

Easy DIY Gnat Spray for Indoor and Outdoor Use

Easy DIY Gnat Spray for Indoor and Outdoor Use Gnats, the tiny flying insects, can be an annoying problem both inside and outside your home. They seem to appear out of nowhere and quickly become a nuisance around your kitchen, plants, and outdoor leisure areas. This article walks you through creating an effective and eco-friendly homemade gnat spray, perfect for DIY pest control enthusiasts looking for natural solutions. Let’s dive into the ingredients, benefits, step-by-step instructions, and application tips for your homemade gnat spray. Ingredients To create your homemade gnat spray, gather the following natural ingredients: Apple cider vinegar Liquid dish soap Water Essential oils (lemongrass, eucalyptus, peppermint, or lavender) Spray bottle These common household ingredients are not only effective in combating gnats but are also safe for your family and pets, making them ideal for eco-conscious readers. Now, let’s explore the benefits of using a DIY gnat spray. Benefits of DIY Gnat Spray Eco-Friendly and Safe Using natural ingredients means you avoid the harsh chemicals found in commercial insecticides that can be harmful to the environment, your health, and your pets. For instance, apple cider vinegar is biodegradable and non-toxic, making it a perfect base for your gnat spray. Cost-Effective Creating your homemade gnat spray is significantly cheaper than purchasing store-bought alternatives. Most of the ingredients are already in your kitchen, reducing the need for extra expenses. Customizable With essential oils, you can customize the scent of your spray. Essential oils like peppermint, lavender, and eucalyptus not only repel gnats but also leave a pleasant aroma in your home. Easy to Make The process of making a DIY gnat spray is simple and quick, making it a convenient solution for busy homeowners and DIY enthusiasts who need a fast and effective pest control method. Step-by-Step Instructions Step 1: Prepare the Vinegar Solution Start by pouring apple cider vinegar into a spray bottle. Vinegar’s scent attracts gnats, making it an effective bait. Step 2: Add Liquid Dish Soap Add a few drops of liquid dish soap into the spray bottle. The soap breaks the surface tension of the vinegar, causing gnats to sink and drown when they come in contact. Step 3: Dilute with Water Fill the rest of the spray bottle with water. This dilution makes the solution less pungent and easier to spray around the house. Step 4: Add Essential Oils Add 10-20 drops of essential oils to the mixture. Choose from lemongrass, eucalyptus, peppermint, or lavender. These oils not only repel gnats but also mask the strong vinegar odor. Step 5: Shake Well Secure the spray bottle’s cap and shake well to ensure all ingredients are thoroughly mixed. Your homemade gnat spray is now ready for use! Application Tips Indoor Use When applying your gnat spray indoors, consider the following tips: Focus on areas where gnats are typically seen, such as around houseplants, trash cans, sinks, and fruit bowls. Spray the solution directly onto visible gnats and around infested areas. Reapply the spray every few days to maintain its effectiveness. Keep windows and doors closed to prevent more gnats from entering. For more indoor DIY projects, check out our guide on DIY smart home solutions. Outdoor Use For outdoor application, follow these suggestions: Spray the solution around outdoor seating areas, patios, and gardens where gnats are prevalent. Apply the spray in the early morning or late evening when gnats are most active. Avoid spraying directly on plants, as the vinegar can be harmful to foliage. Instead, target the soil and surrounding areas. Use the spray around doorways and windows to prevent gnats from entering your home. Find more natural pest control solutions in our article on homemade beetle spray for the garden. Conclusion With your homemade gnat spray, you can effectively tackle unwelcome gnats in both indoor and outdoor environments. The natural ingredients ensure safety, affordability, and eco-friendliness, aligning with a conscious lifestyle. Keep the gnats at bay while also enjoying a pleasant aroma from the essential oils. For more DIY tips and projects to enhance your home, explore our articles on creating high-end dollar tree decorations, high-end dollar tree DIY home decor, and vibrant cardboard crafts, cardboard crafts for home decor. Remember, DIY pest control can be both fun and functional. With these simple steps, you’re well on your way to a gnat-free home!

South Asian woman sewing DIY tube top at home.
Uncategorized

DIY Tube Top: Easy Fashion from Home

DIY Tube Top Easy Fashion from Home Are you looking to up your fashion game without breaking the bank? With a little creativity and some basic materials, you can create a stunning DIY tube top right from the comfort of your home. In this comprehensive guide, we’ll walk you through everything you need to know to create your own fashionable, custom tube top. From gathering materials to detailed, step-by-step instructions, and even ideas for customization, we’ve got you covered. Let’s get started on this exciting DIY fashion journey! Materials Needed Before diving into the crafting process, it’s essential to gather all the necessary materials. Thankfully, creating a DIY tube top doesn’t require a lot of expensive supplies. Here’s what you’ll need: Fabric Stretchy fabric like cotton or jersey (about 1 yard or meter) Optional: contrasting fabric for trim or decoration Sewing Supplies Sewing machine or needle and thread Scissors Measuring tape Sewing pins Elastic (1/2 inch to 1 inch wide) Additional Materials Marking chalk or fabric pen Iron and ironing board Optional: fabric glue or hot glue gun With these materials in hand, you’re ready to create your custom tube top. Let’s move on to the step-by-step instructions. Step-by-Step Instructions 1. Taking Measurements Start by measuring yourself to ensure a perfect fit. You’ll need the following measurements: Bust circumference Underbust circumference Desired length of the tube top (from under your armpit to where you want the top to end) Write down these measurements, as you’ll use them later for cutting the fabric. 2. Cutting the Fabric Lay your fabric on a flat surface. Using your measurements, draw a rectangle on the fabric, adding an extra inch for seam allowance on all sides. Cut out the rectangle with scissors. For the elastic, cut two pieces: one for the top of the tube and one for the bottom. These should be about 2 inches less than your bust and underbust measurements, respectively, to ensure a snug fit. 3. Sewing the Hem Fold the top and bottom edges of the fabric inward by about 1/2 inch and press with an iron. Pin the fabric in place to keep it secure. Sew along the folded edges to create a hem, leaving enough space to insert the elastic. 4. Inserting the Elastic Attach a safety pin to one end of the elastic and thread it through the hem casing at the top of the tube. Once the elastic is fully threaded through, sew the ends together. Repeat this step for the bottom hem. 5. Sewing the Side Seam Fold the fabric in half with the right sides facing each other and pin the side edges together. Sew along the pinned edge to form the tube shape. Make sure to backstitch at the beginning and end to secure the seam. 6. Trying On Your New Tube Top Turn your tube top right side out and try it on to ensure a good fit. Adjust as needed by taking in the side seam or trimming away excess fabric. Customization Tips One of the best parts of DIY fashion is the ability to customize your creations. Here are some ideas to make your tube top uniquely yours: Adding Trim or Lace Give your tube top a delicate touch by sewing lace or trim along the top and bottom edges. This is a great way to add a feminine flair and enhance the overall appearance of your top. Fabric Paint or Patches Use fabric paint or iron-on patches to create patterns, designs, or even quotes on your tube top. This is an excellent way to express your personality and style. Decorative Straps If you prefer some extra support, consider adding decorative straps to your tube top. You can use ribbon, braided fabric, or even beaded strands for a unique look. Creating a Matching Set Expand your DIY fashion project by creating a matching skirt or shorts to go with your tube top. This way, you can have a complete custom outfit. Once you’ve mastered the basics, the possibilities for customization are endless. Feel free to experiment and let your creativity shine! Conclusion Creating your DIY tube top is a fun and rewarding way to add a personalized touch to your wardrobe. With just a few inexpensive materials and a bit of time, you can craft a fashionable and comfortable tube top that perfectly fits your style. If you enjoyed this project, you might also like these other DIY fashion and home décor ideas: DIY Electroplating at Home – Complete Guide, Cardboard Crafts for Home Decor, and DIY Fall Decor Ideas to Cozy Up Your Home. Be sure to check them out for more inspiration and creative projects. Happy crafting, and enjoy your new DIY tube top!

South Asian man and Hispanic woman DIY pest control in lush garden.
Uncategorized

Natural Homemade Beetle Spray for Your Garden

Natural Homemade Beetle Spray for Your Garden If you’re an eco-conscious gardener, you’ve likely pondered natural ways to protect your garden. Beetles can wreak havoc on your plants, but you needn’t resort to harmful chemicals to deter them. A homemade beetle spray can be just as effective while being kinder to the environment. Imagine having a bountiful garden, free from pests, where every leaf is healthy and vibrant. Achieving this is possible with simple ingredients and some DIY spirit. Keep reading to discover how you can create your own homemade beetle spray using organic materials. Ingredients Creating an effective homemade beetle spray involves using ingredients you likely already have at home or can easily find. Here are some essentials: Garlic: Garlic has a strong smell that repels many pests, including beetles. Hot Peppers: The capsaicin in hot peppers is irritating to many insects. Castile Soap: This helps the spray adhere to the plants and the beetles. Water: Acts as a base for mixing all the ingredients. Neem Oil (optional): Neem oil is an excellent natural pesticide and can be added for extra strength. Depending on your preference and what’s available, you can also include essential oils like peppermint or eucalyptus, which have strong pest-repelling properties. Benefits of Natural Sprays Natural pest control solutions offer several advantages: Eco-Friendly: By using organic ingredients, you reduce the ecological footprint of your gardening habits. Safe for Beneficial Insects: Unlike chemical pesticides, natural sprays are less likely to harm beneficial insects like bees and ladybugs. Non-Toxic: Safe for pets, humans, and plants, reducing the risk of toxicity in your garden. Cost-Effective: Most of the ingredients are inexpensive and commonly found in household kitchens. Choosing natural methods aligns perfectly with a commitment to sustainability and responsible gardening. For more eco-friendly ideas, you might find our post on DIY fall decor ideas interesting. Step-by-Step Instructions Let’s dive into the process of making your own homemade beetle spray. Gather Ingredients: Collect garlic cloves, hot peppers, Castile soap, water, and neem oil if using. Prepare the Garlic and Peppers: Blend 10 garlic cloves and 2 hot peppers with water. This emulsifies their pest-repellent properties. Strain the Mixture: Pour the blended mixture through a strainer or cheesecloth to remove any solid particles. Mix with Soap and Water: In a large spray bottle, combine the strained liquid with 2 tablespoons of Castile soap and fill the rest with water. Add a teaspoon of neem oil if desired. Shake Well: Ensure all ingredients are thoroughly mixed by shaking the bottle vigorously. Label the Bottle: Clearly label your mixture to avoid any confusion and store it in a cool, dark place when not in use. This simple yet effective recipe yields a potent beetle deterrent while maintaining an eco-friendly approach. For additional DIY projects, our guide on cardboard crafts for home decor offers more creative ideas. Application Tips Applying your homemade beetle spray correctly ensures maximum effectiveness. Here are some tips: Test First: Before applying the spray to your entire garden, test it on a small area to ensure it doesn’t harm your plants. Early Morning or Late Evening: Apply the spray during these times to avoid sun scorch on the plants. Cover All Surfaces: Make sure to spray both the top and underside of leaves where beetles often hide. Reapply Regularly: Natural sprays may need more frequent applications, especially after rain. Monitor Plant Health: Keep an eye on your plants for any signs of stress or damage and adjust the frequency of application accordingly. Each garden is unique, and environmental factors can affect how well your homemade spray works. Don’t be afraid to adjust the ingredients or application methods based on your observations. For additional guidance on other areas of home improvement, check out our article on DIY smart home solutions. Final Thoughts Embracing natural pest control like a homemade beetle spray not only protects your garden but also contributes positively to the environment. By using easily accessible organic ingredients, you can create an effective, non-toxic solution that safeguards your plants and supports a balanced ecosystem. Combining this with other eco-conscious DIY projects, like those discussed in our High-End Dollar Tree DIY Home Decor article, you can cultivate a home and garden that are both beautiful and sustainable. Happy gardening!

Man supervising DIY electroplating process in garage.
Uncategorized

DIY Electroplating at Home: A Complete Guide

DIY Electroplating at Home: A Complete Guide Are you fascinated by the idea of giving your old tools a new shine, or adding a metallic touch to your DIY crafts? Electroplating can be a fantastic home DIY project for anyone willing to explore the world of metal finishing. This guide will walk you through the entire process of DIY electroplating at home, ensuring you understand the materials, tools needed, safety precautions, and step-by-step procedures. Materials & Tools Before diving into the electroplating process, let’s gather all the necessary materials and tools. Having everything ready will make the process smooth and enjoyable. Materials Electrolyte solution (depending on the metal you want to plate) Metal object to be plated Metal anode (same type of metal as the electrolyte) Conductive wire Distilled water Household vinegar Baking soda Rubbing alcohol Tools DC power supply or batteries Plastic or glass container Protective gloves Safety glasses Measuring cups Sandpaper or steel wool Safety Precautions While electroplating at home can be a fun project, it’s crucial to prioritize safety. Here are some key safety measures: Always wear protective gloves and safety glasses to prevent any contact with harmful chemicals. Work in a well-ventilated area to ensure that you are not inhaling any harmful fumes. Keep all chemicals and electrical components away from children and pets. Always follow the manufacturer’s instructions on handling chemicals and setting up the power supply. Step-by-Step Process Follow these detailed steps to achieve a successful DIY electroplating project: Step 1: Clean the Object Start by thoroughly cleaning the metal object you plan to plate. This helps in removing any dirt, grease, or rust that can hinder the electroplating process. Use sandpaper or steel wool to scrub off any rust or tarnish. Then, wash it with household vinegar and baking soda, and rinse with distilled water. Finally, wipe it down with rubbing alcohol for a clean, residue-free surface. Step 2: Prepare the Electrolyte Solution The electrolyte solution varies depending on the type of metal you are plating. Here are common solutions for different metals: Copper: Mix one part copper sulfate with five parts distilled water. Nickel: Mix one part nickel sulfate with eight parts distilled water. Gold: Use a gold plating solution available in DIY kits. Ensure you follow the appropriate measurements and mix well. Pour the solution into the plastic or glass container. Step 3: Set Up the Electroplating Circuit Position the metal object (cathode) and the metal anode (same type of metal as the electrolyte) properly: Attach a conductive wire to the metal object. Connect the other end to the negative terminal of the DC power supply or battery. Attach another wire to the metal anode and connect it to the positive terminal of the DC power supply or battery. Submerge both the metal object and the anode into the electrolyte solution, ensuring they don’t touch each other. Step 4: Start the Electroplating Process Switch on the DC power supply or battery and set the voltage according to the metal you are plating: Copper: 3-6 volts Nickel: 5-7 volts Gold: 3-5 volts The electroplating process can take anywhere from a few minutes to several hours, depending on the object’s size and desired plating thickness. Regularly check the progress and ensure the object is consistently submerged. Step 5: Rinse and Polish Once you are satisfied with the plating, turn off the power supply and carefully remove the metal object from the solution. Rinse it thoroughly with distilled water to remove any electrolyte residue. Finally, polish it with a soft cloth to bring out the shine. Before & After Examples Here are some before and after examples to illustrate the transformation that electroplating can bring to your DIY projects: Example 1: Old Keys Before: An old, rusty key. After: A shiny, copper-plated key. Example 2: Worn-out Jewelry Before: A tarnished silver ring. After: A bright, gold-plated ring. Example 3: Decorative DIY Crafts Before: A plain metal craft piece. After: An eye-catching, nickel-plated craft piece. Conclusion DIY electroplating can be a rewarding and engaging project that offers endless possibilities for home décor and small DIY projects. With the right materials, tools, and safety precautions, you can transform mundane items into stunning pieces that add character and charm to your home. Looking for more DIY project ideas? Check out our other articles like Cardboard Crafts for Home Décor, DIY Smart Home on a Budget, and How to Make Homemade Slime for Kids. For seasonal inspiration, don’t miss our DIY Fall Décor Ideas to Cozy Up Your Home, and if you encounter any sticky messes during your projects, learn how to create a Homemade Goo Gone DIY Solution. Happy DIYing!

Crafting table with DIY cardboard crafts
Uncategorized

Cardboard Crafts for Home Décor

Cardboard Crafts for Home Décor Creativity knows no bounds when it comes to transforming everyday materials into stunning home décor. One of the most versatile and eco-friendly materials you can use is cardboard. With a bit of imagination and effort, you can upcycle cardboard into various decorative items that add charm and personality to your living space. In this article, we will explore numerous innovative cardboard craft ideas for home décor, provide detailed step-by-step instructions, and share tips for customizing your projects. By the end of this guide, you’ll be inspired to start your cardboard crafting journey! Project Ideas The possibilities with cardboard crafts are endless. Here are some of the most popular and creative ideas to inspire you: Cardboard Wall Art Geometric Shapes Cardboard Collage 3D Wall Sculptures Cardboard Furniture Minimalist Shelves Cardboard Chair Storage Boxes Decorative Items Cardboard Picture Frames Customized Vases Wall Clocks Materials Needed Before diving into your cardboard crafts, gather the essential materials: Cardboard (various thicknesses) Craft knife or utility knife Ruler and measuring tape Pencil or marker Hot glue gun and glue sticks Acrylic paints and brushes Decorative paper or fabric Scissors Mod Podge or any craft adhesive Step-by-Step Instructions Cardboard Wall Art Geometric Shapes Geometric shapes are simple yet effective ways to create modern wall art. Follow these steps to make your own: Choose the shapes you want to create (triangles, hexagons, etc.). Draw the shapes on the cardboard using a ruler and pencil. Cut out the shapes carefully with a craft knife. Paint the shapes in your desired colors and let them dry. Arrange the shapes on the wall to create an interesting pattern. Use double-sided tape or adhesive putty to secure them. Cardboard Collage A cardboard collage can be a fantastic way to express your creativity. Here’s how: Collect pieces of decorative paper, fabric, or old magazines. Cut the cardboard into a large base shape (square or rectangular). Arrange and glue different elements onto the cardboard base to form a cohesive collage. Use Mod Podge to seal and protect the collage. Allow it to dry thoroughly before hanging it on the wall. 3D Wall Sculptures Adding a three-dimensional element to your wall décor can make a significant impact. Follow these steps: Design your sculpture on paper first. This can be abstract shapes or a specific object. Cut the cardboard according to your design, creating multiple layers for added depth. Glue the layers together with a hot glue gun to build your sculpture. Paint and decorate as desired. Mount the sculpture on the wall using nails or strong adhesive. Cardboard Furniture Minimalist Shelves Shelves made of cardboard can be both functional and stylish. Here’s a step-by-step guide: Measure and cut the cardboard to the desired shelf dimensions. Reinforce the pieces by gluing multiple layers together. Create supports by cutting smaller pieces of cardboard and gluing them between the shelf layers. Paint or decorate the shelves to match your room’s aesthetic. Install the shelves on the wall using strong brackets or wall mounts. Cardboard Chair Constructing a chair out of cardboard might sound challenging, but it’s quite feasible. Follow these detailed steps: Sketch the design of the chair on paper, including the backrest, seat, and legs. Cut out each piece from sturdy cardboard, ensuring precise measurements. Layer and glue the cardboard pieces together to achieve the desired thickness. Assemble the chair by gluing all the pieces together according to your design. Test the chair for stability and reinforce any weak points with additional cardboard or glue. Decorate the chair with paint, fabric, or other materials to enhance its appearance. Storage Boxes Storage boxes are essential for organizing and can be made easily with cardboard. Here’s how: Determine the size of the storage box and cut the cardboard accordingly for the base, sides, and lid. Fold and glue the sides to the base to form the box. Reinforce the edges with additional strips of cardboard and glue. Decorate the box using paint, fabric, or decorative paper. Let the box dry completely before using it for storage. Decorative Items Cardboard Picture Frames Framing your photos with handmade cardboard frames can add a personal touch. Follow these steps: Measure and cut out a rectangular piece of cardboard for the frame. Cut out the center of the rectangle to fit the size of your photo. Create a backing for the frame by cutting an additional piece of cardboard. Decorate the frame with paints, beads, ribbons, or other embellishments. Attach the photo to the backing and secure it to the frame with glue or tape. Mount the frame on the wall or place it on a tabletop. Customized Vases Make unique vases out of cardboard to showcase your flowers beautifully. Here’s how: Cut out rectangular strips of cardboard to form the sides of the vase. Bend and glue the strips together to form a cylindrical or rectangular shape. Create a bottom piece and glue it to the sides to complete the vase. Decorate the vase with paint, fabric, or other crafting materials. Ensure the vase is entirely dry before using it to hold artificial flowers or as a decorative piece. Wall Clocks Create a functional yet stylish wall clock using cardboard. Here’s a detailed guide: Decide on the size and shape of your clock and cut out the cardboard accordingly. Create a hole in the center for the clock mechanism. Decorate the clock face using paint, numbers, and other embellishments. Attach the clock hands and mechanism according to the manufacturer’s instructions. Mount the clock on the wall and adjust the time. Tips for Customization Customization is key to making your cardboard crafts truly unique. Here are some tips to help you personalize your creations: Use vibrant colors: Choose bold and bright colors to make your projects stand out. Incorporate textures: Add fabric, paper, or textured paint to give your crafts a unique feel. Mix and match: Combine different cardboard thicknesses and shapes for a more dynamic look. Personal touches: Include initials, names, or favorite quotes to make

DIY smart home projects on a budget.
Uncategorized

DIY Smart Home on a Budget

DIY Smart Home on a Budget Welcome to myhomediyguide.com DIY home improvement ideas blog. Today we’re diving into transforming your home into a smart home without breaking the bank. Smart home devices can make life easier, increase energy efficiency, and enhance security. But, acquiring the latest tech often comes with a hefty price tag. Fear not – we have budget-friendly solutions that will help you automate your home systems affordably and effectively. We will also cover step-by-step installation guides and energy-saving tips to make your DIY smart home project a success. Affordable Smart Home Devices Creating a smart home on a budget starts with selecting cost-effective devices. Here’s a list of affordable smart home devices that don’t compromise on quality: Smart Plugs Smart plugs are a great starting point for home automation. They allow you to control plugged-in devices from your smartphone, integrate with voice assistants like Alexa and Google Assistant, and can even help monitor energy usage. These simple and inexpensive devices can turn any standard appliance into a smart device. Smart Bulbs Switching to smart bulbs can significantly enhance your smart home experience. Smart bulbs offer features like remote control via smartphone apps, scheduling, color-changing options, and compatibility with voice assistants. Brands like Philips Hue and TP-Link provide some affordable yet reliable options. Smart Thermostats Though a bit pricier than other smart devices, smart thermostats are a worthwhile investment. They help in reducing energy consumption by allowing programmable heating and cooling schedules and remote access. Consider models like the Google Nest Thermostat E, which are budget-friendly and packed with features. Security Cameras Safeguarding your home is essential, and smart security cameras do just that without costing a fortune. Brands like Wyze and Eufy offer affordable indoor and outdoor cameras with features like motion detection, night vision, and cloud storage. Smart Doorbells Smart doorbells add an extra layer of security and convenience. They let you see and speak to visitors remotely. Look for budget-friendly options like the Ring Video Doorbell (2nd Gen) or the Eufy Video Doorbell. Smart Locks Enhance your home’s security with a smart lock. These devices allow keyless entry and remote operation. Affordable models like the August Smart Lock and Wyze Lock offer excellent features without a premium price tag. Smart Speakers Smart speakers, such as the Amazon Echo Dot or Google Nest Mini, serve as the hub of your smart home devices. They enable voice control and automation of your smart devices while providing entertainment and information at your command. Step-by-Step Installation Installing smart home devices is easier than you might think. Let’s break down the installation process for various devices: Installing Smart Plugs Download the app associated with your smart plug (such as Kasa for TP-Link plugs). Plug the smart plug into an outlet and connect it to a device (like a lamp). Open the app, follow the setup instructions, and connect the smart plug to your home Wi-Fi network. Rename the plug for easy identification (e.g., “Living Room Lamp”). Control the device using the app or integrate it with your voice assistant. Setting Up Smart Bulbs Screw in the smart bulb into a compatible lighting fixture. Download the corresponding app (like Philips Hue or TP-Link Kasa). Follow the app instructions to connect the bulb to your Wi-Fi network. Customize the settings (brightness, color, and schedules) through the app. Integrate with your smart home ecosystem using voice commands if supported. Installing a Smart Thermostat Turn off power to your existing thermostat at the breaker box. Remove the old thermostat and label the wiring. Install the new smart thermostat’s baseplate and connect the wires. Attach the new thermostat to the baseplate and power it on. Download the manufacturer’s app and follow the setup instructions to connect the thermostat to your home Wi-Fi. Program the thermostat according to your schedule and preferences. Setting Up Smart Security Cameras Choose appropriate locations for the cameras covering entry points and blind spots. Mount the cameras using the included hardware and ensure they have power. Download the camera’s app (like Wyze or Eufy) and follow the setup steps to connect to Wi-Fi. Customize the settings for motion detection, notifications, and recording. Check camera feeds and adjust angles for optimal coverage. Installing a Smart Doorbell Turn off power to your existing doorbell from the breaker panel. Remove your old doorbell and disconnect the wires. Mount the smart doorbell base and connect the wires following the manufacturer’s instructions. Attach the smart doorbell unit to the base and secure it in place. Restore the power and download the doorbell’s app to complete the setup. Connect the doorbell to Wi-Fi and customize settings for notifications and video recording. Setting Up a Smart Lock Remove the existing deadbolt from your door following the instructions provided by the smart lock manufacturer. Install the new smart lock’s hardware, ensuring the deadbolt aligns with the door frame. Attach the smart lock’s components on both sides of the door. Install batteries and power on the smart lock. Download the corresponding app and follow the setup instructions to connect to your home Wi-Fi or Bluetooth. Customize settings and add authorized users for access control. Energy-Saving Tips Implementing a smart home on a budget goes hand-in-hand with energy efficiency. Here are some tips to maximize energy savings: Optimize Thermostat Settings Set your smart thermostat to adjust temperatures when you’re away from home or sleeping. Utilize the scheduling feature to reduce energy consumption while maintaining comfort. Aim for 68°F in winter and 78°F in summer for optimal savings. Automate Lighting Use smart bulbs to automate lighting schedules and reduce wasted energy. Set lights to turn off when not in use, or use motion sensors to activate lights only when needed. Dimming lights can also save energy while setting a cozy ambiance. Monitor and Control Appliances Smart plugs can help monitor the energy usage of connected devices. Set schedules to turn off appliances when not in use, and avoid standby power consumption by fully powering down devices. Leverage Power Strips Use smart

Scroll to Top