Author name: liran.m.work@gmail.com

Hispanic woman electroplating jewelry at home workshop.
Uncategorized

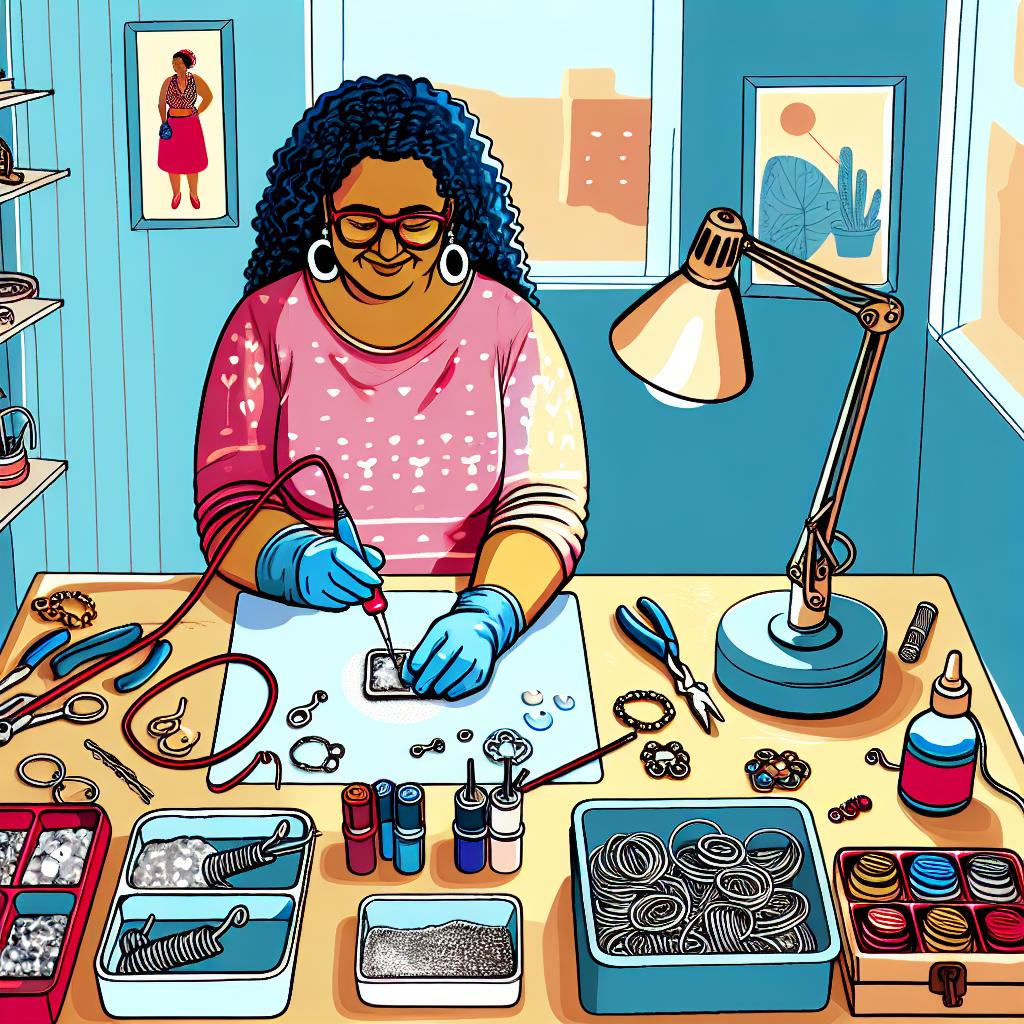
Homemade Electroplating for Jewelry Projects

Introduction Have you ever looked at your handmade jewelry and wished it had just a touch more shine? Or maybe you are a DIY enthusiast eager to experiment with new techniques to elevate your creative projects? Enter homemade electroplating—a fun, intricate process that can give your jewelry pieces a professional finish without stepping into a high-end workshop. This method involves coating a metal object with a thin layer of another metal using an electric current, offering an ideal solution for those keen on enhancing the look of their DIY jewelry. In this comprehensive guide, we will discuss DIY electroplating, focusing particularly on transforming homemade jewelry projects into polished works of art. Before we dive in, you might want to explore other exciting DIY projects that can utilize easy-to-find household items. Here are some fun ideas: [simple craft ideas](https://myhomediyguide.com/simple-craft-ideas-household-items/) that can be easily assembled at home. Materials Needed To embark on your electroplating adventure, you will need some essential materials. Gathering the right supplies is crucial to ensure that your DIY electroplating project runs smoothly. Here is what you will need: Power Supply: A simple DC power supply is necessary, ideally with adjustable voltage settings. Battery chargers or old phone chargers with modified alligator clips can work too. Anode Metal: This is the metal you want to coat your objects with. For instance, use copper anodes for copper plating. Cathode Object: The jewelry piece you wish to plate. Electrolyte Solution: A solution to allow the metal to dissolve and coat the item. For copper plating, you might use a copper sulfate solution. Conductive Wire: Wires to connect your electrical elements together. Alligator Clips: To connect the wires to both the power supply and the objects. Beaker or Container: A non-metallic basin to hold the electrolyte solution and the items during the plating process. Cleaning Agents: Items such as acetone, brush, or a mild abrasive are necessary to clean your jewelry before plating. Protective Gear: Gloves and goggles are crucial for safety. Step-by-Step Guide Step 1: Prepare Your Work Area Setting up a safe and organized workspace is the foundation of a successful DIY electroplating job. Ensure you have adequate ventilation, as fumes can be released during the process. Cover your work surface with plastic sheets or old newspaper to prevent any damage from spills. Having a tidy setup will not only ease the plating process but will also help in achieving a professional finish on your homemade jewelry. Step 2: Clean the Jewelry Cleaning the jewelry is a crucial step often underestimated. Your homemade jewelry pieces must be free of dirt, grease, and tarnish. Use a mild abrasive material or acetone to remove any residue that might interfere with the electroplating. If you are into upcycling, perhaps you’ve encountered thorough preparation steps. You might find parallels with our [upcycle old entertainment center guide](https://myhomediyguide.com/upcycle-old-entertainment-center/), which also emphasizes the importance of pre-treatment to achieve the best results. Step 3: Assemble the Electroplating Setup Next, it is time to set up your electroplating apparatus. Fill your non-metallic container with the electrolyte solution suitable for the metal you are plating. Attach the alligator clip to the cathode (your jewelry piece) and connect the other end to the negative (-) terminal of your power supply. Connect the anode metal to the positive (+) terminal. Immerse both the cathode and anode into the solution, ensuring they don’t touch each other. This setup is pivotal to ensure a successful plating process. Step 4: Start the Plating Process Turn on the power supply and closely monitor the ongoing process. The current will facilitate the transfer of metal ions from the anode to your jewelry piece. Keep track of time—depending on your desired thickness, the process can take anywhere from a few minutes to an hour. Regularly inspect your piece to prevent overplating, which could lead to an uneven finish. Step 5: Final Touches Once satisfied with the plating thickness, turn off the power supply and remove your jewelry. Rinse the piece well with water to clean off any excess electrolyte solution and dry it with a soft cloth. This final finish can be compared to how a stunning result is achieved in our [easy DIY spring decor guide](https://myhomediyguide.com/easy-diy-spring-decor-to-refresh-your-home/), where attention to detail creates a refreshing transformation. Safety Precautions Working with electricity and chemicals poses risks. Therefore, safety precautions are indispensable: Protective Gear: Always wear gloves and safety goggles to protect your hands and eyes from harmful chemicals and electrical hazards. Ventilation: Ensure your workspace is well-ventilated to disperse fumes produced during electroplating. Avoid Contact: Prevent any direct contact with your skin when working with chemicals to avoid burns or irritation. Tools: Handle all electrical connections cautiously to avoid shocks and shorts. Disposal: Dispose of chemicals safely as per local regulations to minimize environmental impact. By adhering to these precautions, you can prevent accidents and ensure the process remains a rewarding experience. If you enjoy hands-on DIY activities, you might be interested in crafts that incorporate safety tips. Check out our [homemade lava lamp guide](https://myhomediyguide.com/how-to-make-a-homemade-lava-lamp/) for another safe and fun DIY project you can try at home. Before & After Photos Taking before-and-after photos of your projects is not just gratifying but serves as a valuable learning tool for your DIY electroplating journey. While capturing these transformations, consider lighting and angles to showcase your jewelry pieces at their best. If you’re familiar with documenting your projects, you will know it is similar to capturing the changes in our [DIY Japanese beetle spray for gardens](https://myhomediyguide.com/diy-japanese-beetle-spray-for-gardens/), illustrating effective results against pests. Before photos should detail the jewelry with its original surface. After the electroplating, your newly transformed jewelry should shine in all its metallic glory. Use these photos to analyze the effectiveness of your process and share your handiwork with fellow DIY enthusiasts. Comparisons like these offer a sense of satisfaction and motivation while experimenting with more complex DIY tasks. With these guidelines, you are now ready to experiment and excel in homemade electroplating for your jewelry projects. Embrace creativity while

Woman creating DIY remedy at home.
Uncategorized

How to Create a DIY Vicks Vapor Rub

How to Create a DIY Vicks Vapor Rub With the change of seasons comes the inevitable cold and flu season. Many people reach for over-the-counter remedies for relief, but you can make a homemade Vicks Vapor Rub using natural ingredients found in your kitchen and local health store. Not only is this DIY project cost-effective, but it’s also free from potentially harmful chemicals found in some commercial products. Let’s dive into creating a soothing, fragrant vapor rub packed with therapeutic benefits. Ingredients Before you begin your homemade Vicks Vapor Rub journey, gather the following ingredients known for their healing properties. This DIY home health remedy will make you appreciate your resourcefulness. Coconut Oil: Acts as a carrier oil with excellent moisturizing properties. Beeswax: Adds texture and firmness to your rub while providing a protective barrier on the skin. Essential Oils: Eucalyptus, peppermint, and lavender oils are the Holy Trinity for respiratory relief. They bring soothing, antifungal, and antibacterial properties. Olive Oil: Another nourishing oil that helps blend and carry the essential oils effectively. Optional ingredients include camphor oil if you seek a stronger rub, though be cautious with its use, especially around young children. Benefits of Homemade Vicks Vapor Rub Creating a DIY vapor rub at home has numerous benefits over store-bought options. Let’s take a closer look at why this homemade approach stands out. Natural Ingredients Your homemade rub is free from chemical preservatives, synthetic fragrances, and petroleum-based ingredients common in commercial vapor rubs. This ensures that sensitive skin remains irritation-free. Cost-Effective Producing your vapor rub can save money in the long run. With your initial investment in beeswax and essential oils, you’ll create multiple batches for the price of one store-bought bottle. Tailored to Your Needs Customize the essential oils and their strength according to your preferences. If you prefer a milder eucalyptus aroma, adjust the quantity to suit your aroma profile and seeking therapeutic benefit. Gentle on Skin Since you’re using natural oils, your DIY rub will be kinder and gentler, reducing the risk of skin irritation, unlike some commercial products. Step-by-Step Instructions Creating your homemade Vicks Vapor Rub is simple with these step-by-step instructions. Gather Your Ingredients: Start by assembling all your ingredients within reach, ensuring you have the necessary tools, such as a double boiler, stirring spoon, and a storage container. Prepare Your Base: Measure ¼ cup of coconut oil and 1 tablespoon of beeswax into the double boiler. Gently melt them over low heat, stirring to combine. Incorporate Olive Oil: Once melted, add 2 tablespoons of olive oil to the mixture. This provides additional smoothness to your rub. Add Essential Oils: Remove the mix from heat and let it cool slightly before adding 20 drops of eucalyptus oil, 10 drops of peppermint oil, and 10 drops of lavender oil. Stir well to ensure the oils are evenly distributed. Pour into Storage Containers: Carefully pour your mixture into a glass or metal container with a tight-fitting lid. Label your container with the date and essential oils used. Allow your homemade rub to cool and solidify completely before using. Apply sparingly on the chest, back, throat, and soles of feet when needed. Precautions While your homemade Vicks Vapor Rub is gentle, keep these precautions in mind: Children and Pets: Essential oils like peppermint can be too strong for young children or pets. Always consult with a healthcare professional before using extensively on young ones or around animals. Patch Test: Perform a patch test before applying to a large area of skin to ensure no allergic reaction occurs. Wait 24 hours to confirm suitability. Avoid Eyes and Sensitive Areas: Avoid applying the rub near the eyes, nose, or any broken skin to prevent irritation. Storage: Store your DIY vapor rub in a cool, dark place to maintain its effectiveness over time. In conclusion, making a homemade Vicks Vapor Rub is not only straightforward but a rewarding DIY project that promotes natural wellness at home. Embrace this personalized approach for better health and financial savings. Also, explore our other home health ideas, such as making a DIY natural lubricant at home, and continue enhancing your DIY skills. Whether navigating the beauty of aromatherapy or upcycling projects like upcycling old entertainment centers, there’s always a new avenue to explore in the world of home DIY.

Upcycling wooden entertainment center with tools.
Uncategorized

How to Upcycle an Old Entertainment Center

Introduction With sustainability becoming a core focus in modern living, many homeowners are discovering the joy and environmental benefits of upcycling. Old furniture, particularly large pieces like entertainment centers, can take up significant space and may no longer fit our modern styling or needs. Instead of sending these hefty items to the landfill, why not consider transforming them into something fresh and functional? In this comprehensive guide, we will explore how to upcycle an old entertainment center, offering you practical DIY ideas and inspiration to create innovative home décor pieces that breathe new life into your home. This guide will delve into a variety of project ideas, from turning your entertainment center into a classy home bar to repurposing it as a functional storage solution. Plus, we will arm you with the necessary tools and materials, provide clear step-by-step instructions, and offer tips for customization. By the end of this article, not only will you have reduced your carbon footprint, but you’ll also have a stunning, unique piece of furniture that complements your home’s aesthetic. Project Ideas Upcycling an old entertainment center opens a world of possibilities in home décor. Here are some fantastic DIY ideas to get you started: 1. Home Bar Transform your outdated entertainment center into a sophisticated home bar. The ample shelving and storage space can be perfect for organizing bottles, glasses, and bar accessories. 2. Kids’ Play Kitchen Create a fun play area for your little ones by converting the entertainment center into a play kitchen. With a little paint and some crafting supplies, you can construct a miniature kitchen complete with faux sink and stove. 3. Office Workspace Convert your entertainment center into a compact office workstation. Utilize the shelves for storing books, files, and office supplies, and modify the top to accommodate a computer or laptop. 4. Craft Station For craft enthusiasts, an old entertainment center can be repurposed into a dedicated craft station. Organize your materials and create a central spot to unleash your creativity. 5. Pet Station Design a cozy area for your pets by turning the entertainment center into a pet station. It can be equipped with storage for pet toys, food, and an area for lounging. Tools & Materials Before embarking on your upcycling project, gather the necessary tools and materials. Here is a list of essentials that you will likely need: Essential Tools Power drill Screwdriver (Phillips and flat-head) Electric sander Paintbrushes and rollers Measuring tape Pencil and notepad Hammer Paint stripper (if needed) Clamps Handsaw or power saw Materials Sandpaper (various grits) Primer and paint or wood stain Wood filler Screws and nails Wood glue Decorative knobs or handles Shelf brackets (if installing new shelves) Contact paper or wallpaper (for decorative finishes) Storage bins or baskets Step-by-Step Instructions Step 1: Planning and Prepping The first step in any successful DIY project is planning. Take a moment to assess your entertainment center’s structure and think about your desired end result. Measure the dimensions and sketch a rough layout of your new design. Planning is an opportunity to get creative with DIY ideas and ensure that your project is feasible. Step 2: Disassembly Begin by carefully disassembling non-essential components of the entertainment center. Use a screwdriver to remove doors, shelves, and other removable parts. This step allows you to work on the individual components without any obstacles. Step 3: Sanding With the components disassembled, use an electric sander to smooth out surfaces. Start with a coarse-grit sandpaper to remove old paint or varnish, and then finish with a finer grit to ensure a smooth surface for priming and painting. Step 4: Repair and Reinforce Inspect the structure for any damage or weak points. Use wood filler to address any holes or scratches. If you find any structural weaknesses, reinforce those areas using screws or wood glue. Ensure that the entertainment center is sturdy and safe for its intended purpose. Step 5: Priming and Painting Apply a coat of primer to all surfaces that will be painted. Once the primer is dry, paint the entertainment center in your chosen color. Use high-quality paint or wood stain for a durable, attractive finish. Remember to allow adequate drying time between coats. Step 6: Re-assembly and Modification Begin reassembling your entertainment center by installing new components according to your planned design. This may include cutting new shelves, attaching additional storage solutions, or reinstalling the original components in new configurations. Step 7: Finishing Touches Add decorative details such as knobs, handles, or embellishments to personalize your upcycled piece. You might also consider adding wallpaper or contact paper to shelf backs for a splash of color and pattern. Tips for Customization Customizing your upcycled entertainment center can be a fulfilling experience that ensures your project fits perfectly with your home décor. Here are some tips to help you with personalization: Incorporate Recycled Materials Consider using recycled materials for added eco-friendliness. Old pallet wood or discarded metal fittings can contribute unique textures and character to your project. Blend Function and Style Keep functionality in mind. Whether you’re creating a bar or a pet station, ensure that your design fits the practical needs of the new function while still maintaining a stylish appearance. Get Inspired by Other DIY Projects Seek inspiration from other DIY upcycling projects. Check out unique craft ideas or creative projects that can provide new perspectives and ideas for your own furniture makeover. Seasonal Decor Enhancements Customize your upcycled piece with seasonal decorations. This is an excellent way to keep your home feeling fresh and current throughout the year. Discover some easy spring décor ideas to get started. Upcycling is a brilliant way to breathe new life into furniture while championing sustainability. By repurposing your old entertainment center, you contribute to environmental conservation and get a chance to enjoy a rewarding creative process. As you embark on this journey, remember that the possibilities are as endless as your imagination. Happy upcycling!

Hands making DIY natural lubricant at home.
Uncategorized

How to DIY a Natural Lubricant at Home

Introduction In the quest for more natural living, DIY projects have gained notable popularity, including those focused on personal care solutions. Among these projects, creating a natural lubricant stands out as both practical and eco-friendly. This guide will walk you through the process of crafting your own natural lubricant at home. Understanding how to DIY a natural lubricant not only empowers you with the knowledge of what goes into your product but also caters to those with specific allergies or sensitivities to commercial products. We will explore the ingredients needed, step-by-step instructions for creating it, the benefits of using a natural lubricant, precautions to take, and answer some frequently asked questions. Whether you’re a DIY health enthusiast or someone simply exploring natural options, this guide will provide the insights you need to make an informed and conscious choice. Ingredients Before diving into the creation process, gathering high-quality, natural ingredients is essential. Here’s what you’ll need: Coconut Oil: Known for its moisturizing properties and long-lasting lubrication. Ensure it’s 100% pure, unrefined, and organic. Aloe Vera Gel: Offers a soothing and hydrating effect, it’s an ideal ingredient for a gentle lubricant that does not irritate. Vitamin E Oil: Acts as a preservative and is beneficial for the skin due to its antioxidant properties. Essential Oils (optional): For fragrance and added relaxation. Opt for skin-friendly varieties such as lavender or chamomile. Ensure they’re 100% pure and skin-safe. Beeswax (optional): Can be added to thicken the mixture if a solid form is desired for specific applications. These ingredients are widely available at health food stores, online, or in pharmacies. Choosing organic versions will ensure your lubricant remains as natural and safe as possible. Step-by-Step Instructions Step 1: Prepare Your Workspace Before you begin creating your natural lubricant, ensure your workspace is clean and free from any potential contaminants. Sterilize your equipment, including glass bowls and stirring utensils, and ensure your hands are washed thoroughly. Step 2: Mix the Base Ingredients In a sterilized glass bowl, start with about 1 cup of coconut oil as your base. Add 1/4 cup of aloe vera gel to the coconut oil. Aloe vera gel adds a light, smooth consistency that complements the coconut oil perfectly. Mix the ingredients using a whisk until thoroughly combined to ensure uniformity. Step 3: Incorporate Additional Ingredients Add a few drops of vitamin E oil to your mixture. This will help extend the shelf-life of your natural lubricant while enriching it with skin-nourishing properties. If you prefer a specific fragrance, consider adding 3-4 drops of your chosen essential oil. Test the mixture on a small skin patch to ensure no allergic reactions occur before adding large amounts. Optionally, melt a small amount of beeswax and stir it into the mixture if a thicker consistency is desired. This step is applicable if you need a balm-like texture, e.g., for massages. Step 4: Store Your Product Once all ingredients are well combined, transfer your natural lubricant into a sterilized glass jar. Avoid plastic containers to prevent any chemical reactions over time. Label your jar with the contents and date of preparation for easy identification and tracking. Store in a cool, dry place to maintain product integrity. Proper storage can give your product a longer shelf-life—often up to six months. Benefits The benefits of using a natural lubricant DIY approach are numerous, particularly for those mindful of ingredients or with allergies: Customizable: Tailor your ingredient list to include or exclude components based on personal preferences or skin sensitivities. Transparency: You have full control and knowledge of what goes into your personal care products, ensuring all-natural and safe usage. Cost-Effective: Producing your natural lubricant at home can significantly reduce costs compared to store-bought options. Eco-Friendly: Choose sustainable, environmentally friendly ingredients and avoid heavy packaging waste typical of commercial products. Moisturizing Benefits: Natural ingredients like coconut oil and aloe vera hydrate while lubricating, benefiting your skin in the long term. Precautions While DIY natural lubricants offer many perks, specific precautions should be considered: Allergies: Conduct a patch test before full usage. Apply a small amount to your skin and monitor any reactions over 24 hours. Shelf-Life: Natural products often lack the preservatives of commercial varieties, so monitor for changes in smell or color as an indication of spoilage. Compatibility: Oil-based lubricants, like coconut oil, are not compatible with latex condoms, potentially causing breakage. Essential Oils: Use essential oils sparingly and ensure they are safe for topical application to avoid sensitivities or skin irritation. Always keep in mind that some natural ingredients may cause discomfort or allergic reactions in sensitive individuals. Personalizing your lubricant allows you to eliminate potential irritants. FAQ Can I store my natural lubricant at room temperature? Yes, you can store it at room temperature as long as it is kept in a cool, dry place. Avoid areas with direct sunlight or heat exposure, which can affect the consistency and longevity of your product. Is it safe to mix different essential oils? Mixing essential oils can offer varied therapeutic benefits. However, ensure each oil is individually safe for your skin and experiment with small patches before widespread use. Learn more about how to make homemade Vicks Vapor Rub if you need guidance on combining oils safely. Can I add more beeswax for a thicker product? Yes, increasing the beeswax content will create a thicker consistency. It’s best to add gradually and stir well, testing your mixture’s thickness to achieve the desired texture. If you’re exploring crafting ideas, check out simple craft ideas with household items. How long will my DIY lubricant last? When stored correctly, your natural lubricant can last approximately 4 to 6 months. However, this varies based on the ingredients used and storage conditions. Regularly inspect your product for any changes, particularly in scent or color, as these indicate spoilage. Are all oils safe for DIY lubricants? Not all oils are safe for all skin types. Avoid highly processed oils or those with added chemicals. Opt for organic, cold-pressed, and minimally processed oils.

Diverse hands crafting on wooden table.
Uncategorized

Simple Craft Ideas with Household Items

## Simple Craft Ideas with Household Items ### Introduction Crafting is a delightful way to bond with family, encourage creativity in kids, and make beautiful homemade items without breaking the bank. Using simple crafts made from household items not only fosters innovation but also offers a sustainable way to recycle and repurpose everyday materials. This guide will introduce you to some engaging home crafts that require little more than items you probably already have on hand. Perfect for families looking for an enjoyable and low-cost activity, these craft projects are designed to spark creativity and provide hours of fun. ### Project Ideas Creating crafts at home doesn’t have to be complicated or expensive. With these simple craft ideas, you can transform ordinary household items into extraordinary projects. #### 1. Toilet Paper Roll Animals Turn leftover toilet paper rolls into charming animal figures. This project is not only fun for kids, but it also helps in improving their fine motor skills. #### 2. Plastic Bottle Planters Give your old plastic bottles a new lease on life by turning them into quirky planters. These are perfect for small indoor plants or herbs. #### 3. CD Sun Catchers Repurpose old CDs into dazzling sun catchers that will cast beautiful reflections in your home. #### 4. Painted Rock Cacti Ideal for families in urban environments, these painted rock cacti add a splash of greenery without the need for watering. #### 5. Egg Carton Flowers Transform egg cartons into a colorful bouquet of flowers that can brighten up any room. ### Materials Needed Before jumping into the projects, gather your materials. Most of these items are easy to find in your home, making them perfect for spontaneous crafting sessions. – Toilet paper rolls – Acrylic paints – Paintbrushes – Scissors – Plastic bottles – Craft knives – Old CDs – String or fishing line – Smooth rocks – Green, white, and black paint – Egg cartons – Glue – Craft paper or construction paper – Markers – Pipe cleaners ### Step-by-Step Instructions #### Toilet Paper Roll Animals **Materials:** Toilet paper rolls, acrylic paints, paintbrushes, glue, construction paper, markers, scissors. 1. **Prepare the Base:** Start by painting the toilet paper roll in a base color of your choice. Allow it to dry completely. 2. **Create Features:** Using construction paper, cut out features like ears, wings, or facial features depending on the animal you wish to create. 3. **Assemble the Animal:** Glue the cut-out features onto the painted roll. Use markers to add details like eyes, noses, or patterns. 4. **Add Final Touches:** Finish by painting finer details or adding embellishments as desired. #### Plastic Bottle Planters **Materials:** Plastic bottles, scissors or craft knife, acrylic paints, paintbrush, soil, small plants or herbs. 1. **Cut the Bottle:** Use scissors or a craft knife to cut the plastic bottle in half. The bottom half will serve as your planter. 2. **Design and Paint:** Paint the exterior of your bottle half, adding designs or leaving it a solid color. 3. **Prepare for Planting:** Once dry, fill the bottom of the bottle with soil and plant your chosen seeds or small plants. 4. **Water and Place:** Water lightly and place your planter in a sunny area. #### CD Sun Catchers **Materials:** Old CDs, markers, scissors, string or fishing line. 1. **Create Patterns:** Use markers to draw patterns or designs on the shiny side of the CD. 2. **Cut the Design:** Carefully cut the CD into different shapes or leave it whole depending on your chosen design. 3. **Attach the String:** Thread the string through the hole of the CD or attach it to your cut-out shapes. 4. **Hang and Display:** Hang your CD sun catchers in windows or outdoors where they can catch the light. #### Painted Rock Cacti **Materials:** Smooth rocks, green, white, and black acrylic paint, paintbrushes, terracotta pot or container, sand or soil. 1. **Select Rocks:** Choose smooth, rounded rocks that mimic the shape of cacti. 2. **Paint the Base:** Paint the entire rock in green, allowing it to dry completely. 3. **Add Details:** Use white and black paints to add details such as spines and highlights. 4. **Assemble:** Place the painted rocks in a terracotta pot filled with sand or soil to complete the look. #### Egg Carton Flowers **Materials:** Egg cartons, scissors, acrylic paints, paintbrushes, pipe cleaners, glue. 1. **Cut the Cartons:** Cut out individual egg cup sections from an egg carton to use as flower petals. 2. **Paint the Petals:** Paint the cut-out sections in various colors to resemble flower petals. 3. **Assemble the Flowers:** Poke a pipe cleaner through the center of the flower to serve as the stem. 4. **Display:** Arrange your crafted flowers in a vase or jar for a decorative touch. ### Tips for Customization – **Mix and Match:** Encourage your children to mix and match colors and embellishments for a personalized craft. – **Experiment with Materials:** Don’t hesitate to incorporate other household materials like buttons, beads, or yarn for added texture. – **Seasonal Themes:** Adapt these crafts to suit different seasons or holidays by changing colors or adding themed elements. – **Incorporate Learning:** Use these projects as teaching tools by discussing recycling, creativity, and the importance of reusing materials. ### Conclusion Crafting with household items is not only an enjoyable activity but also an opportunity to teach kids about resourcefulness and sustainability. With these simple crafts, you can create homemade decorations, engage your family’s creativity, and spend quality time together. For more creative DIY ideas, you might want to explore [how to make a homemade lava lamp](https://myhomediyguide.com/how-to-make-a-homemade-lava-lamp/) or try your hand at [diy japanese beetle spray for gardens](https://myhomediyguide.com/diy-japanese-beetle-spray-for-gardens/) to keep your green space thriving. Dive into crafting with enthusiasm and see the beautiful transformations that are possible with simple household items!

DIY workspace with homemade lava lamp.
Uncategorized

How to Make a Homemade Lava Lamp

Introduction Lava lamps have been captivating audiences for decades with their hypnotic displays of moving colors and shapes. Imagine capturing that mesmerizing effect right in your own home with a homemade lava lamp. This exciting DIY science project is perfect for parents and kids looking for a fun and educational activity that brings together creativity and a dash of scientific exploration. With simple materials you probably already have at home, you can create a stunning piece of décor that not only looks cool but also teaches fundamental principles of science. In this guide, we’ll take you through the science behind lava lamps, the materials you’ll need, and step-by-step instructions to create your own. Plus, we’ll explore some fun variations to customize your lava lamp experience. Science Behind Lava Lamps Before diving into the making of a homemade lava lamp, it’s essential to understand how they work. The classic lava lamp involves two main components: wax and a clear liquid, typically oil and water. When heated, the wax expands and rises because it’s less dense than the surrounding liquid. Upon cooling, it contracts and sinks back down. This cycle continues as long as the lamp is on, creating the captivating motion we all enjoy. The homemade version simplifies these components but operates on similar principles. You’ll be using oil, water, and a few other household items to mimic the effect. This DIY science project is a fantastic way to introduce children to fundamental concepts like density, polarity, and the interaction between different liquids. Materials Needed Creating a homemade lava lamp requires only a handful of household items. Here’s what you’ll need: A clear bottle or glass jar with a lid Vegetable oil or baby oil Water Food coloring Alka-Seltzer tablets or any effervescent antacid tablets A flashlight or small lamp for illumination (optional) These simple materials will allow you to explore the science behind lava lamps while enjoying a delightful hands-on project. If you enjoy crafting with common household items, you might also be interested in making homemade Pine-Sol. Step-by-Step Instructions 1. Prepare the Container Start by filling your clear bottle or jar about three-quarters full with oil. Vegetable oil works well, but for a clearer lamp, you might consider using baby oil. 2. Add Water Fill the remaining quarter of the bottle with water. You’ll notice that the water sinks to the bottom of the oil, and the two liquids won’t mix. This is due to their different densities and polarities. 3. Add Color Add a few drops of food coloring to the water. Since food coloring is water-based, it will sink through the oil and color the water at the bottom. You can choose any color you like, or even mix different colors for a unique effect. 4. Create the Lava Effect Break an Alka-Seltzer tablet into a few pieces, then drop one piece into the bottle. Watch as the reaction begins. The tablet will create carbon dioxide gas bubbles, which will carry some of the colored water upwards into the oil. As the gas escapes, the water will sink back down. This creates the classic lava lamp effect. 5. Add Light To make your homemade lava lamp even more enchanting, illuminate it from below using a flashlight or a small lamp. This will enhance the colors and movement, making the experience even more magical. Exploring such simple experiences at home allows kids to see how fascinating science can be. If you’re looking for more ways to involve children in hands-on activities, check out our easy DIY spring décor ideas. Fun Variations Once you’ve mastered the basic DIY science project of a homemade lava lamp, why not experiment with some fun variations? Here are a few ideas to get you started: Change the Colors Try using different food coloring combinations to alter the appearance of your lava lamp with each experiment. You can create a stunning mix by combining colors like red and blue for a purple shade or yellow and red for orange. Play with Proportions Experiment with different water-to-oil ratios or even add glitter to the mix for an extra sparkle. The varying proportions will change the speed and size of the bubbling effect. Themed Lava Lamps Use colored oils or even glow-in-the-dark paint for fun party themes or a spooky Halloween effect. This could lead to an exciting science-related décor project, complementing your next themed event. If you’re inspired to take your DIY projects further, consider upcycling projects or learn how to upcycle old entertainment centers into something new. Scented Lava Lamp Add a few drops of essential oils to your lava lamp for a calming or invigorating scent. While this won’t affect the scientific process, it adds an aromatic dimension to your creation. Conclusion Creating homemade lava lamps is not just an engaging activity for parents and kids but also an excellent way to introduce basic scientific principles in a fun and tangible way. With simple materials and easy-to-follow steps, you can enjoy this magical decoration in your own home. Plus, the various fun tweaks and changes you can make allow for endless creativity and learning. If you’re enthusiastic about more DIY science projects, consider trying out additional experiments like DIY Japanese beetle spray for gardens or making homemade Vicks Vapor Rub. These projects not only enhance your DIY skills but also enrich your home with personalized and creative crafts.

Hispanic man transforming tree stump into décor.
Uncategorized

Creative DIY Ideas for Old Tree Stumps

## Creative DIY Ideas for Old Tree Stumps Transforming old tree stumps into functional and beautiful pieces for your home or garden is an exciting and rewarding DIY project. Whether you are looking for new furniture, planters, or sculptures, reusing tree stumps is a sustainable way to add both aesthetic and ecological value to your spaces. In this article, we will cover creative DIY ideas for tree stumps, discuss the tools and materials you’ll need, provide detailed step-by-step instructions, and finally wrap up with some thoughts on how these projects can enhance your home décor. ## Project Ideas ### 1. Tree Stump Garden Furniture Enhance your garden’s charm by creating beautiful furniture from old tree stumps. They can be transformed into tables, benches, or stools, offering a natural and rustic look that blends seamlessly with outdoor surroundings. ### 2. Stump Planters Bring a touch of whimsy to your garden by turning tree stumps into planters. They provide excellent natural drainage for plants and can be as simple or elaborate as you wish. ### 3. Stump Sculptures Unleash your creativity with tree stump sculptures. From abstract forms to animal figures, these unique pieces can be a focal point in your garden or yard. ### 4. Stump Bird Baths Invite birds into your garden by creating a birdbath from an old tree stump. This project not only serves a functional purpose but also enhances your garden’s wildlife ecosystem. ### 5. Tree Stump Side Table A tree stump side table is a chic addition to any living space. Its organic shape and natural appeal can complement any interior style, adding warmth and character. ## Tools and Materials To carry out these projects, you will need the following tools and materials: – Chainsaw or hand saw – Sandpaper (various grits) – Power drill – Chisel – Hammer – Wood sealant or paint – Outdoor varnish (for outdoor projects) – Soil and plants (for planters) – Accessories like cushions or fabric for furniture projects ## Step-by-Step Instructions ### Tree Stump Garden Furniture #### Materials Needed: – One or more tree stumps – Sandpaper (80 to 220 grit) – Outdoor varnish or wood sealant – Optional: paint or stain for color #### Instructions: 1. **Prepare the Stump:** Begin by cutting the tree stump to an appropriate height for your intended piece of furniture using a chainsaw or hand saw. 2. **Smooth the Surface:** Use sandpaper to smooth out the top and sides of the stump. Start with a coarser grit and gradually move to finer grits until you achieve a smooth finish. 3. **Apply Finish:** If you prefer a natural look, apply a clear outdoor varnish. For a colored finish, use wood stain or paint. Let it dry completely. 4. **Add Comfort:** For stools or chairs, consider placing a cushion on top for seating comfort. Secure it with outdoor fabric adhesive if needed. ### Stump Planters #### Materials Needed: – Hollowed-out tree stump – Soil – Plants or flowers of your choice #### Instructions: 1. **Hollow the Stump:** Use a chisel and hammer to hollow out the center of the stump, leaving about an inch of wall thickness all around. 2. **Fill with Soil:** Add potting soil to the hollowed area, filling it up to about an inch from the top. 3. **Plant Your Flora:** Choose a variety of plants or flowers that fit your climate and garden design, and plant them in the soil. 4. **Maintain Your Planter:** Water the plants regularly and ensure the planter is placed in a well-drained area. ### Stump Sculptures #### Materials Needed: – Tree stump – Carving tools – Sandpaper – Weatherproof paint (optional) #### Instructions: 1. **Select Your Design:** Sketch your desired sculpture design on paper before starting. It can be helpful to have a visual guide. 2. **Carve the Stump:** Use carving tools to shape the stump into your chosen design. Take your time and carefully carve out the details. 3. **Smooth the Sculpture:** Once carved, use sandpaper to smooth rough edges and surfaces. 4. **Paint or Stain (Optional):** If you wish to add color, use weatherproof paint or stain, ensuring it’s suitable for outdoor use. 5. **Seal the Sculpture:** Apply a sealant to protect your sculpture from the elements, especially if it will be placed outdoors. ### Stump Bird Baths #### Materials Needed: – Large tree stump – Tile or stone bird bath basin – Outdoor adhesive #### Instructions: 1. **Level the Top:** Ensure the top of your tree stump is flat and level to securely hold the bird bath basin. 2. **Secure the Basin:** Use outdoor adhesive to attach a pre-made bird bath basin on top of the stump. 3. **Decorate:** Add decorative stones or small statues around the base of the stump to enhance visual appeal. 4. **Maintain the Bird Bath:** Regularly clean the basin and refill it with clean water to keep the birds happy and healthy. ### Tree Stump Side Table #### Materials Needed: – Medium-sized tree stump – Sandpaper – Wood finish (varnish or paint) – Hairpin or wooden table legs – Screws #### Instructions: 1. **Prepare the Stump:** Sand the top and sides of the stump until smooth to touch. 2. **Apply Finish:** Coat the stump with wood varnish or paint, allowing it to dry between coats if needed. 3. **Attach Legs:** Use a power drill to attach hairpin or wooden table legs to the bottom of the stump. 4. **Position Your Table:** Place your new side table in your desired location, ready to use. ## Final Thoughts Repurposing an old tree stump is a perfect way to blend functionality with creativity in your DIY projects. By crafting garden furniture, unique sculptures, or practical planters, you can breathe new life into these natural elements while enhancing your home décor. If you enjoyed these projects, you might want to explore other DIY home improvement ideas [here](https://myhomediyguide.com/diy-home-improvement-ideas-budget/). Also, for those pesky garden pests you might encounter, consider making your own [homemade beetle spray](https://myhomediyguide.com/diy-japanese-beetle-spray-for-gardens/). For more inspiration on refreshing your home with

DIY health project with homemade solution.
Uncategorized

How to Make Your Own Homemade Vicks Vapor Rub

Introduction As the weather turns colder and the flu season lurks around the corner, many of us reach for over-the-counter cold remedies. One popular choice for relieving symptoms of colds and congestion is Vicks Vapor Rub. However, have you ever considered making your own homemade Vicks Vapor Rub? Not only can you customize the scent and ingredients to suit your personal preferences, but you can also ensure that only natural ingredients touch your skin. This article will guide you through the process of creating a DIY health remedy that rivals store-bought products, boasting fewer additives and chemicals. Ingredients Making your own vapor rub at home is not only cost-effective but also relatively straightforward. Below, you’ll find a list of ingredients that are key to creating an effective and soothing homemade vapor rub. Each component is beneficial in its own right and known for its therapeutic properties. Coconut Oil Acts as a moisturizing base. Helps in blending all ingredients smoothly. Beeswax Provides a semi-solid consistency to the rub. Acts as a barrier on the skin. Essential Oils Eucalyptus Oil: Known for relieving nasal congestion and sinus issues. Peppermint Oil: Has a cooling effect that can help relieve headaches and muscle pains. Lavender Oil (optional): Promotes relaxation and sleep. Optional Additions Camphor Crystals: Intensifies the decongestant properties. Step-by-Step Instructions Ready to begin? Follow these simple steps to create your own personalized homemade Vicks Vapor Rub: Melting the Base: In a double boiler, combine ½ cup of coconut oil and 2 tablespoons of beeswax. Heat gently until fully melted. Mixing Essential Oils: Once melted, remove the mixture from heat and allow it to cool slightly. Add 10 drops of eucalyptus oil, 5 drops of peppermint oil, and 3 drops of lavender oil (if using). Stir thoroughly. Adding Optional Ingredients: If desired, add a small amount of camphor crystals for added potency. Ensure crystals are fully dissolved and mixed in. Pour and Set: Pour the mixture into a clean jar or tin. Allow it to cool and set completely before use, approximately 2-3 hours. Benefits Creating your own vapor rub not only encourages the use of natural home remedies but also allows for a deeper understanding of the benefits of each ingredient. Let’s explore why a homemade version may be superior to store-bought products: No Unnecessary Additives The homemade version avoids synthetic chemicals and preservatives found in many commercial products. This ensures that your skin only comes in contact with pure, natural ingredients. Customizable Scents and Strength By adjusting essential oil ratios, you can tailor the vapor rub to your precise needs and preferences. Prefer more peppermint? Simply add more drops! Environmentally Friendly Utilizing reusable containers for your vapor rub contributes to reducing plastic waste — an eco-conscious choice that aligns with other sustainable DIY practices. Usage Tips Once your homemade vapor rub is ready, it’s important to understand the best use practices to maximize its benefits: Apply Sparingly: A small amount goes a long way. Apply a thin layer to your chest, back, and throat. Foot Application: For night-time relief, rub some vapor rub on your feet and cover with socks. This can enhance absorption. Steam Inhalation: Add a small amount to a bowl of hot water. Inhale the steam to help clear nasal passages. Precautions Despite the natural ingredients, there are a few precautions to keep in mind when using homemade vapor rub: Patch Test Before first use, perform a patch test to ensure no allergic reaction occurs. Apply a small amount inside your elbow and wait 24 hours. Avoid Eyes Ensure that you keep the vapor rub away from your eyes and mucous membranes as it can cause irritation. Child Safety Be cautious using vapor rubs on children under two years old. Their skin is more sensitive, and strong essential oils may cause irritation. Creating a DIY health solution like homemade Vicks Vapor Rub ensures you know exactly what you’re applying to your skin. This kind of empowerment in choosing natural home remedies can extend to other areas of your living space as well, such as incorporating easy DIY spring decor to refresh your home or learning how to make homemade Pine-Sol for your cleaning needs.

Asian woman making DIY beetle spray
Uncategorized

DIY Japanese Beetle Spray for Gardens

Introduction The allure of an elegant and flourishing garden can be diminished by the presence of pests such as Japanese beetles. These pesky insects can devastate your plants, leaving them in a state of ruin. While chemical pesticides are an option, many eco-conscious gardeners are turning to natural solutions to maintain the health of their gardens. In this detailed guide, we will explore the benefits and process of creating a DIY Japanese Beetle Spray for Gardens using natural ingredients. This homemade beetle spray offers an effective and environmentally-friendly approach to DIY pest control that helps keep your plants safe without harming the ecosystem. Natural Ingredients The key to creating an effective homemade beetle spray lies in using natural ingredients that are both safe for the environment and potent against pests. The ingredients below have been chosen for their pest-repelling properties, ensuring that your garden remains vibrant and healthy: Garlic: Known for its strong scent, garlic is a natural insect repellent that affects the nervous system of pests. Neem Oil: Extracted from the seeds of the neem tree, neem oil is a powerful natural insecticide that interrupts the life cycle of insects. Cayenne Pepper: The capsaicin in cayenne pepper deters pests due to its pungency. Dish Soap: A mild dish soap acts as an emulsifier to combine the ingredients and helps the spray adhere to plant leaves. Water: The base for the spray that dilutes the other ingredients to safe and effective levels. Other Considerations When choosing ingredients for your homemade beetle spray, consider the overall health of your garden plants. Some ingredients might be more suitable depending on the kinds of plants you wish to protect. Additionally, using organic versions of these ingredients can further enhance the eco-friendliness of your spray. Benefits There are numerous advantages to using a natural DIY Japanese Beetle Spray for Gardens. Here are some compelling reasons to opt for this eco-friendly pest control solution: Environmentally Friendly: Unlike synthetic pesticides, natural ingredients do not contribute to soil and water pollution. Non-Toxic to Pollinators: Essential pollinators like bees and butterflies are not harmed, ensuring a thriving garden ecosystem. Cost-Effective: Most ingredients are readily available and affordable, making it easy on the pocket. Customizable: You can adjust the concentrations of ingredients to tailor the effectiveness according to the severity of the infestation. Pet and Child Safe: Without harsh chemicals, this spray is safe for homes with pets and children. Step-by-Step Instructions Creating your own homemade beetle spray is straightforward and requires only a few simple steps. Follow the guide below to make your own effective DIY pest control solution: Begin by crushing 4-5 cloves of garlic in a mortar and pestle or blend them to form a paste. In a bowl, add the garlic paste to 2 cups of water and let it steep overnight. This creates a potent garlic solution. Strain the garlic infusion using a cheesecloth or fine sieve to remove solid particles. Combine the garlic water with 1 tablespoon of neem oil and 1 teaspoon of cayenne pepper, stirring thoroughly. Add 1 teaspoon of mild dish soap to act as an emulsifier, ensuring that all ingredients blend well and adhere to leaves. Pour the mixture into a spray bottle, shaking well to ensure consistency before application. Optional Additions You may consider incorporating other natural additives to enhance the effectiveness of your spray. Adding a few drops of peppermint or lavender essential oils can amplify the repellent properties while imparting a pleasant fragrance. Application Tips For optimal results, it is essential to apply your homemade beetle spray correctly. Here are some key tips to keep in mind: Spot Test: Before full application, test the spray on a small section of a plant to ensure there isn’t any adverse reaction like leaf burn. Timing: Apply the spray in the early morning or late afternoon to prevent the sun from evaporating the spray too quickly. Coverage: Ensure comprehensive coverage by spraying the top and undersides of leaves where beetles are often found. Frequency: For serious infestations, use the spray every few days. Generally, reapply after heavy rain or watering. Storage: Store any leftover spray in a cool dark place for up to a week. Shake well before each use to remix the ingredients. In implementing these strategies, you will be well on your way to naturally protecting your garden from Japanese beetles. For those interested in more eco-friendly solutions, check out our guide on DIY Gnat Spray for indoor and outdoor use. If you’re looking to further enhance your home with sustainable practices, our article on upcycling old entertainment centers offers creative and eco-friendly inspiration. For a deeper dive into all things DIY, explore tips on budget-friendly DIY home improvement ideas. Embrace the full potential of your garden and home with these eco-friendly DIY solutions for a healthy, sustainable lifestyle.

DIY spring decor with diverse creators.
Uncategorized

Easy DIY Spring Décor to Refresh Your Home

Easy DIY Spring Décor to Refresh Your Home As the chill of winter melts away, it’s time to breathe new life into your home with easy DIY spring décor. Not only does this fresh, seasonal touch invigorate your living space, but DIY home projects also provide a satisfying way to welcome warmth and sunshine. In this comprehensive guide, we will explore affordable, easy-to-do decorations that jazz up every room, giving your home the spring makeover it deserves. Décor Ideas by Room Living Room Your living room is the heart of your home, making it the perfect place to start with spring transformations. Consider the following ideas: Floral Pillow Covers: Swap out heavy, dark pillow covers for ones with light, spring-inspired floral prints. This simple change can instantly brighten the room. DIY Wall Art: Create wall art using pressed flowers and clear frames. This natural motif brings the beauty of blooming gardens inside. Upcycled Furniture: A fresh coat of paint on an old coffee table can add a pop of spring color. For inspiration, explore how to upcycle old entertainment centers for new uses. Kitchen Introduce hints of spring into your kitchen to make every culinary experience more delightful: Herb Planters: Personalized herb planters on a sunny windowsill are both practical and decorative. Imagine snipping fresh basil for your spring salads! Bright Tea Towels: Switch your kitchen towels to vibrant colors or prints to add a fun, delightful vibe. Cabinet Refacing: If you’re up for a small challenge, try painting or re-staining your cabinets to refresh old kitchen décor. Bedroom A spring-inspired bedroom can change how you start and end your day. Consider these ideas: Pastel Bedding: Swap out dark, heavy bedding for lighter materials and pastel colors that echo springtime serenity. Floral Arrangements: Utilize small vases on your bedside table with seasonal flowers for a fresh look. DIY Headboards: Consider creating a simple, inexpensive headboard with fabric and wood. For tips on home improvements, check out our DIY home improvement ideas. Bathroom Bring the fresh, airy feel of spring into often-overlooked bathrooms: Natural Elements: Incorporate wood and stone for an organic feel—think wooden soap dishes or pebble mats. Scented Candles: Opt for candles with scents like lavender or citrus, which can transport you to a blooming field right from your bathroom. DIY Bath Mats: Craft a unique bath mat with small pebbles attached to the base of a rubber mat for that spa-like touch. Outdoor Spaces The transition to spring naturally extends to your outdoor spaces: Garden Lanterns: Create whimsical outdoor lanterns with mason jars and fairy lights to enhance nighttime enjoyment. DIY Gnat Spray: Keep pesky bugs at bay with our DIY gnat spray guide. Vertical Gardens: Use old wooden pallets or ladder bookcases as vertical gardens to maximize space for spring planting. Materials Needed Collecting the right materials ensures you can dive straight into these DIY projects without hitches. Here’s a checklist: Spring-colored fabrics (e.g., pastels or florals) Mason jars and vases Fairy lights Wooden boards, stones, and small pebbles Acrylic paints and brushes Herb seeds or small plants Picture frames and pressed flowers Basic tools: hammer, nails, glue gun, and scissors Essential oils for homemade cleaners and scents: consider making your own homemade Pine-Sol for a fresh, clean scent Step-by-Step Guide Floral Pillow Covers Measure your pillows to determine fabric size, adding an inch to each side for seams. Cut your chosen floral fabric according to these dimensions. Sew the edges, leaving one side open for the pillow insertion. Turn the fabric inside out, insert the pillow, and sew the open end closed. DIY Wall Art with Pressed Flowers Select flowers with bright colors and interesting shapes. Press them between heavy books for at least one week to dry thoroughly. Arrange dried flowers in a clear frame, securing them with acid-free tape. Display your botanical art on living room walls or in hallways. Herb Planters Fill small pots with potting soil, leaving room for herb seeds or young plants. Plant your herbs according to package instructions, covering seeds lightly with soil. Water gently and place pots on a sunny windowsill. DIY Bath Mat with Pebbles Cut a rubber mat to fit your bathroom’s floor space. Use waterproof glue to attach small pebbles, arranging them to cover the entire mat. Allow the glue to dry completely before placing the mat in your bathroom. Customization Tips Customization allows you to imprint your personality into spring décor. Consider these tips: Color Palette: Choose a consistent color palette to provide cohesion to your decorations, such as pastels, bold brights, or earthy tones. Personalized Touches: Use stencils and fabric pens to add monograms or quotes on pillow covers and towels, adding a personal touch to your DIY spring décor projects. Mix and Match Patterns: Don’t shy away from mixing patterns like stripes and florals, especially in pillow covers, to add depth and interest. Sustainable Choices: Opt for eco-friendly materials and upcycle where possible—consider checking our post on how to upcycle old furniture for fresh ideas. Use of Space: Consider the unique layout and features of your home spaces. If you have a smart home, learn more on DIY projects like a DIY smart home on a budget which can enhance your living experience. Enhancing your living space with spring DIY projects provides not only a visual uplift but also brings joy in seeing the fruits of your creativity executed beautifully. Enjoy your DIY home projects, and let every room blossom this spring!

Scroll to Top