Author name: liran.m.work@gmail.com

A person making a pineapple smoothie with whipped cream in a blender jar indoors.
Uncategorized

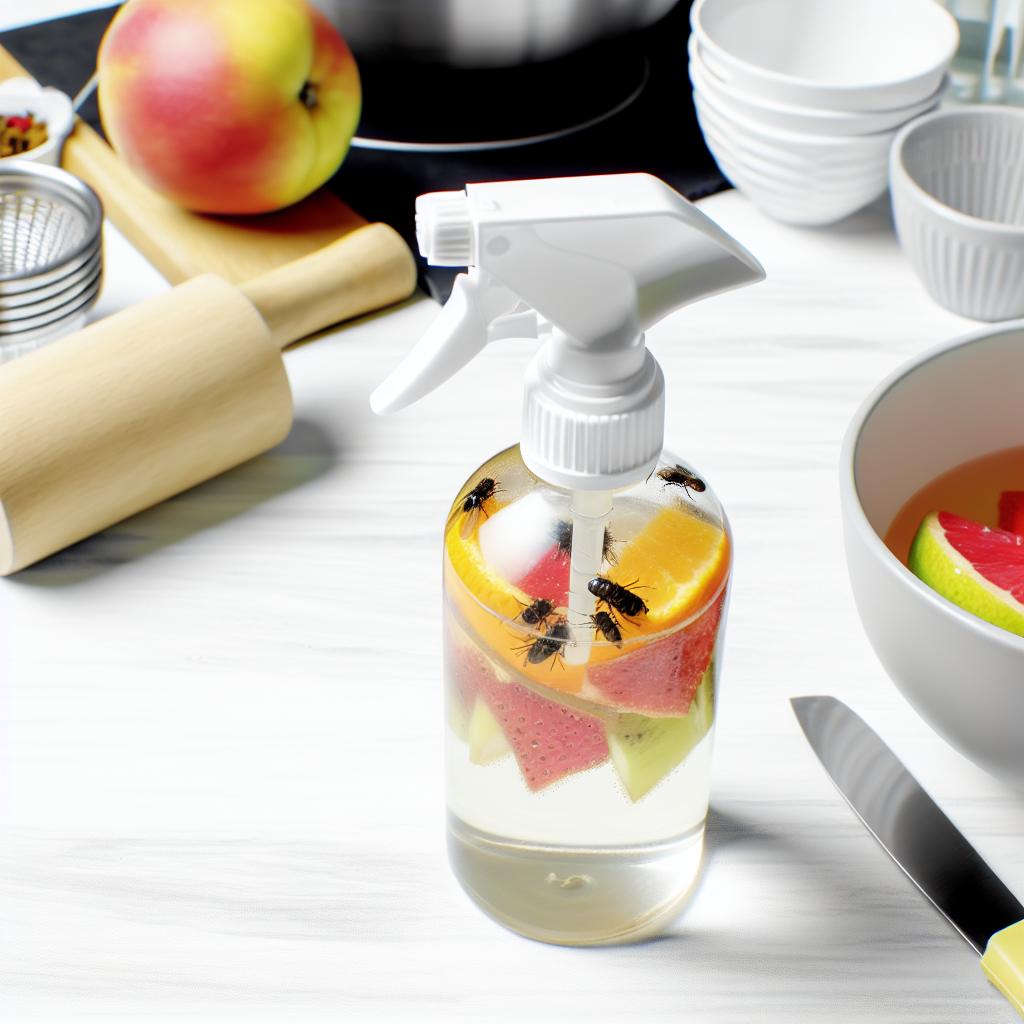
DIY Homemade Gnat Spray Natural Effective Recipe

Introduction Gnats can be a persistent nuisance in any home, especially during warmer months. These tiny flying pests not only cause irritation with their incessant buzzing but can also contaminate food and leave behind unsightly residues. While there are numerous commercial products available to tackle gnat infestations, many homeowners are increasingly seeking natural and eco-friendly alternatives. Enter the homemade gnat spray – a simple, effective, and safe solution for DIY pest control enthusiasts. In this guide, we’ll walk you through creating your own homemade gnat spray using readily available ingredients, highlighting the benefits of natural sprays, and providing practical application tips to keep your home gnat-free. Ingredients Creating a homemade gnat spray is both economical and straightforward. The key lies in combining natural ingredients that gnat pests find repellent or toxic, yet safe for humans and pets. Below are the common ingredients you’ll need: Apple Cider Vinegar: Acts as an attractant and base for the spray. Its strong scent lures gnats, making them more susceptible to the spray. Dish Soap: Reduces the surface tension of the vinegar, allowing the solution to adhere better to the gnats and ensuring they don’t escape once contacted. Water: Dilutes the mixture to ensure it’s safe for household use while maintaining effectiveness. Essential Oils: Oils like lemongrass, lavender, or eucalyptus enhance the repellent properties of the spray and provide a pleasant scent. Additionally, they offer antibacterial and antifungal benefits. A Spray Bottle: For easy application around the home. These ingredients not only work synergistically to repel and eliminate gnats but also ensure that the solution remains safe for use in various home environments. For those interested in expanding their DIY pest control arsenal, you might also explore our guide on creating homemade Japanese beetle spray for garden. Benefits of Natural Sprays Opting for a natural approach to pest control offers numerous advantages over conventional chemical-based products. Here are some of the primary benefits of using natural sprays like homemade gnat spray: Safety for Family and Pets Many commercial pest control solutions contain harsh chemicals that can pose risks to children, pets, and even adults with sensitivities. Natural sprays use ingredients that are generally recognized as safe, minimizing the risk of adverse health effects. Environmental Friendliness Chemical pesticides can have detrimental effects on the environment, including contaminating water sources and harming beneficial insects like bees and butterflies. Natural sprays break down more easily in the environment, reducing pollution and preserving ecological balance. Cost-Effective Homemade solutions often cost a fraction of their commercial counterparts. Ingredients like vinegar and dish soap are inexpensive and readily available, making DIY pest control accessible to all. Avoidance of Resistance Pests can develop resistance to chemical pesticides over time, rendering them less effective. Natural sprays often combine multiple active ingredients, making it harder for pests like gnats to develop resistance. Customizable and Versatile DIY pest control allows you to tailor solutions to your specific needs. Whether you prefer certain scents or have particular sensitivities, you can adjust the ingredients to best suit your household. For more versatile DIY projects, check out our easy DIY home automation projects. Step-by-Step Guide Creating your own homemade gnat spray is simple and requires minimal effort. Follow these steps to prepare an effective spray that keeps gnats at bay: Step 1: Gather Your Ingredients Ensure you have all the necessary ingredients and a clean spray bottle. Gathering everything beforehand will make the process smoother and more efficient. Step 2: Measure the Ingredients Using a measuring cup, combine: 1 cup of apple cider vinegar 1 cup of water 1-2 teaspoons of dish soap 10-15 drops of your chosen essential oil Step 3: Mix the Solution In a clean container, pour the apple cider vinegar and water. Add the dish soap, which helps the spray cling to surfaces and insects. Finally, incorporate the essential oil of your choice. Stir gently to combine, ensuring the ingredients are well-mixed without creating too many bubbles. Step 4: Transfer to Spray Bottle Carefully pour the mixture into a spray bottle using a funnel to prevent spills. Ensure the spray bottle is clean to avoid any unwanted reactions with previous contents. Step 5: Label the Bottle For safety and future reference, label your spray bottle with its contents and date of preparation. This is especially useful if you have multiple DIY solutions in your home. With these steps completed, your homemade gnat spray is ready for use. For those interested in other DIY solutions, explore our guide on DIY natural fruit fly spray for kitchens. Application Tips To maximize the effectiveness of your homemade gnat spray, proper application is key. Here are some tips to ensure your DIY pest control efforts are successful: Target Infested Areas Identify areas where gnats are most prevalent, such as near fruit bowls, trash cans, drains, or houseplants. Focus your spraying efforts on these hotspots to quickly reduce gnat populations. Regular Application Consistency is crucial. Apply the spray every few days or as needed, especially during peak gnat seasons. Regular use will help keep gnats from returning and prevent new infestations from taking hold. Proper Storage Store your spray in a cool, dark place when not in use to preserve its efficacy. Shake the bottle gently before each use, as natural ingredients can sometimes settle or separate over time. Use in Combination with Other Methods For a more comprehensive approach to DIY pest control, combine your gnat spray with other natural methods. This might include removing standing water, sealing food containers, or using sticky traps. Additionally, you can explore homemade sprays for other pests to create an all-encompassing pest management strategy. Avoid Overuse While natural sprays are safer than chemical alternatives, it’s still essential to use them responsibly. Avoid excessive spraying in confined areas to prevent overwhelming scents and potential discomfort to household members. Maintain Cleanliness Good hygiene practices complement your pest control efforts. Regularly clean surfaces, dispose of garbage promptly, and eliminate potential gnat breeding grounds to enhance the effectiveness of your homemade spray. Conclusion Dealing with
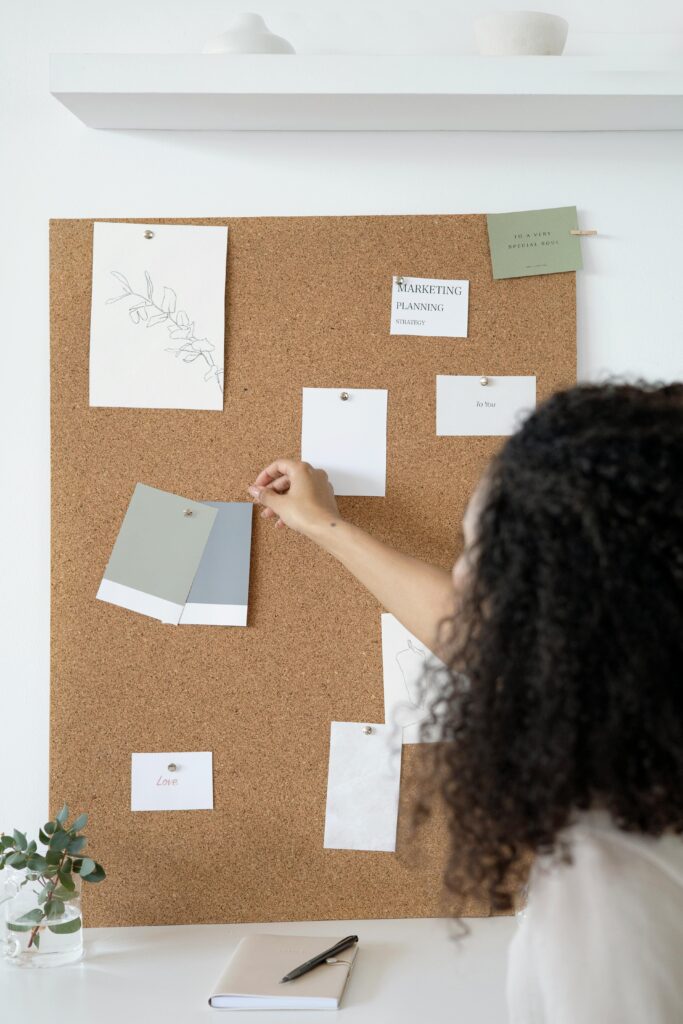
A woman arranges a mood board with design samples in a stylish, minimalist office environment.
Uncategorized

Top DIY Room Design Ideas for Small Spaces

“`markdown Introduction If you are living in a small space, every square inch counts. Whether it is a compact apartment or a cozy home, finding the right balance between creativity and functionality can be challenging. However, with the proper techniques for DIY room design, you can maximize your space without compromising on style or comfort. In this article, we will help you unlock the secrets to transforming small spaces into beautiful, functional living areas. We will explore innovative design ideas, essential materials and tools, and a comprehensive step-by-step guide. Plus, we will throw in some space-saving tips that will make life easier and more organized. Design Ideas Creating a chic, functional design in small spaces demands ingenuity. Here are some ideas that ensure both aesthetics and utility: Utilize Vertical Space Incorporate shelving units that reach the ceiling to make the most out of vertical space. Floating shelves are another stylish way to store items without cluttering valuable floor space. Choose Multi-Functional Furniture Furniture that serves more than one purpose is essential in a small room. For example, a sofa bed or a coffee table with built-in storage provides additional function without occupying extra space. Select a Light Color Palette Light colors can make a room feel more open and airy. Whites, pastels, and soft grays reflect natural light, creating the illusion of a larger space. Opt for Minimalist Design Less is more when it comes to small spaces. A minimalist approach, including reducing clutter and opting for clean lines, can make the room look larger. Implement Mirrors Strategic placement of mirrors can reflect light and create depth, making the room appear bigger and brighter. For budget-friendly decor solutions, explore our [DIY High-End Décor from Dollar Tree](https://myhomediyguide.com/create-diy-high-end-decor-dollar-tree/) guide. Materials & Tools Having the right materials and tools on hand will make your DIY projects more efficient and enjoyable. Here is a handy checklist: Paint and Primer: Choose light shades that expand space visually. Brushes and Rollers: Different sizes will accommodate various surfaces. Folding Furniture: Include pieces that can be tucked away when not in use. Wall Hooks and Brackets: Essential for installing shelves or hanging artwork. Measuring Tape: Precise measurements are crucial for small spaces. Level: Ensures installations are perfectly straight. Drill and Screwdriver: Vital for assembling furniture and installing wall fixtures. Storage Baskets: Offer stylish, compact storage solutions. Step-by-Step Guide Transforming your small room into a paradisiacal sanctuary doesn’t have to be daunting. Follow these detailed steps to make your vision a reality: Step 1: Plan Your Layout Start with a plan to figure out how you want to arrange the space. Consider the flow of movement, and make sure to leave enough space to walk around comfortably. Step 2: Prioritize Furniture Identify the essential furniture pieces you need. Opt for multifunctional items to maximize their utility. For more ideas, our [Easy DIY Projects to Improve Home Value](https://myhomediyguide.com/easy-diy-projects-improve-home-value/) post offers creative solutions. Step 3: Use Wall Space Wisely Think about creating vertical storage options to keep the floor area clear. Shelves, hooks, and cabinets mounted on walls are excellent options. Step 4: Paint It Right Choose paint colors that make rooms appear larger. Applying a fresh coat of light-colored paint enhances the room’s ambiance. Use a primer for better paint adhesion and finish. Step 5: Install Mirrors Mirrors are magic workers in small spaces. Position them opposite windows or near light sources to double the natural light effect. Step 6: Add Personal Touches Incorporate personal elements like photos or art that resonate with you. Feel free to reference DIY art ideas in our [Creative Cardboard Crafts for Home Décor](https://myhomediyguide.com/creative-cardboard-crafts-home-decor/) article. Step 7: Develop Smart Storage Solutions Incorporate storage solutions that are both functional and beautiful. Hidden storage, like under-bed compartments or wall-mounted cubes, are excellent options. Space-Saving Tips Making the most of your small space involves clever tricks that can help reduce clutter and boost functionality. Here are some practical tips: Embrace Foldability Opt for foldable furniture such as dining tables or cutting boards that can be stashed away easily when not in use. Incorporate Floating Elements Items like a floating desk or nightstand can free up floor space while still offering needed functionality. Maximize Corner Space Corners are often underutilized. Consider adding corner shelving, which can store books, plants, or knick-knacks. Utilize Underutilized Areas Think about spaces under the bed or above the door. These can become creative storage areas without adding clutter. Zone Your Space Give each area of your room a designated purpose, whether it is a reading nook or a work corner. This creates a sense of order and function. Think Beyond Traditional Furniture Sometimes conventional furniture may not fit well. Custom-build a piece if needed to fit your specific requirements and measurements. Keep it Clutter-Free Regular decluttering will help maintain an open and organized living area. Choose storage solutions that make it easy to stash away everyday items. For more décor and DIY inspiration, explore our extensive collection of [DIY Design Ideas for Home on a Budget](https://myhomediyguide.com/diy-design-ideas-home-budget/). The possibilities are endless when it comes to DIY room design for small spaces. With some creativity and the right guidance, your compact room can become a cozy, functional haven. Start small, think big, and watch as your space transforms to suit your lifestyle while reflecting your design aesthetic. “`

Diverse group crafting DIY decorations at home.
Uncategorized

How to Create DIY High-End Décor from Dollar Tree

Introduction Creating a high-end look for your home doesn’t have to break the bank. With some creativity and the right techniques, you can transform affordable items into elegant décor that rivals luxury brands. One of the best places to find hidden gems for such projects is your local Dollar Tree. This comprehensive guide will walk you through how to create DIY high-end décor from Dollar Tree items, offering strategies, materials, and step-by-step instructions to elevate your home décor on a budget. Whether you’re preparing for the holiday season or just want to update your space for everyday sophistication, these tips will help you achieve an upscale finish without draining your wallet. High-End Décor Ideas When thinking about high-end décor, certain styles and finishes come to mind, such as mirrored surfaces, metallic accents, and rich textures. Let’s explore some ideas that incorporate these elements using Dollar Tree finds: Mirrored Wall Art Mirrors add light and offer a sense of spaciousness to any room. With a few mirrored frames from Dollar Tree, you can craft a stunning piece of wall art that looks like it came straight from a designer showroom. Gold Leaf Accent Vases Transform plain glass vases into elegant gold-leafed accents. These can serve as beautiful centerpieces on a dining table or as stylish additions to a mantel. Velvet Cushions Update your living room with luxurious velvet cushions. By purchasing soft, plush fabrics and hypoallergenic filling, you can create comfy and chic pillows. Metallic Painted Planters Using metallic spray paint, turn simple plastic planters into sophisticated metallic décor pieces perfect for showcasing indoor plants or flowers. Chic Storage Boxes Stylish storage solutions are always in demand. Simple craft paper and metallic washi tape from Dollar Tree can turn ordinary boxes into chic organizational tools. To explore more ideas on how to add value to your home while embarking on DIY projects, visit our article on Easy DIY Projects to Improve Home Value. Materials Needed Before diving into these projects, gather your materials from Dollar Tree and other necessary supplies. Here is a general list of items you might need: Mirrored frames Glass vases Fabric (Velvet, if possible) Plastic planters Craft paper and washi tape Gold leaf sheets or gold spray paint Metallic spray paint Mod Podge or other crafting adhesives Paintbrushes Scissors Filling for cushions (cotton or hypoallergenic filling) Step-by-Step Instructions Mirrored Wall Art Purchase several mirrored frames from Dollar Tree. Decide on the number of frames needed based on the wall space you intend to cover. Select a layout for your mirrored tiles. They could form a pattern or be placed randomly for abstract art. Use command strips or adhesive hooks for mounting. Ensure each frame is level with the others to maintain a polished look. Once mounted, clean the mirrors to remove fingerprints for a sparkling finish. Gold Leaf Accent Vases Clean the glass vases thoroughly. Any dust or residue can affect the adhesive. Apply a thin layer of Mod Podge where you want the gold leaf to stick. Carefully press the gold leaf sheets onto the adhesive. Work slowly to avoid tearing the delicate leaf. Once dried, gently brush away excess gold with a clean, dry brush. Seal the leaf with another layer of Mod Podge for durability. Velvet Cushions Cut velvet fabric into two identical pieces, considering your desired pillow size. Allow for seam allowances. Sew three sides of the fabric together, inside out, using either a sewing machine or hand stitching. Turn the fabric right side out and fill with cushion filling. Secure the open side by sewing it shut or using fabric glue for a no-sew option. Arrange the cushions on your sofa or bed for a touch of opulence. Metallic Painted Planters Clean the plastic planters to ensure a smooth paint application. Apply primer to prepare the surface, allowing it to dry completely. Coat the planters with metallic spray paint, using even strokes to avoid drips. Allow them to dry completely before adding plants. Chic Storage Boxes Choose craft paper patterns that suit your home’s color palette. Cut the paper to fit the size of the box faces and adhere with Mod Podge. Add metallic washi tape for extra elegance on the edges or in patterns. Allow the boxes to dry completely before using them for storage. For more inspiration on DIY home design and décor, check out our guide on DIY Home Design Simple Décor Ideas for Beginners. Tips for Luxury Look Transforming budget décor into luxurious pieces is all about paying attention to detail. Here are some key tips: Choose the Right Materials: Opt for neutral colors or those with a touch of metallic sheen to impart a feeling of luxury. Focus on Texture: Incorporate a variety of textures, from shiny metallics to plush fabrics, to add depth and sophistication. Use Symmetry and Balance: When arranging art or décor items, symmetry adds order and elegance. Less is More: A clutter-free environment often feels more opulent. Select a few standout pieces rather than overwhelming a space with too many items. Lighting Matters: Well-placed lighting can make all the difference, highlighting your décor’s best features and setting a luxurious ambiance. To further enhance your home’s interior without spending a fortune, consider our article on DIY Design Ideas on a Home Budget. In conclusion, creating DIY high-end décor from Dollar Tree not only saves money but also instills a sense of personal accomplishment and opens the door to endless creative possibilities. By following these projects, you can seamlessly upgrade your home’s aesthetic and enjoy the look of luxury at a fraction of the cost. Happy crafting!

Gardener using DIY beetle spray in garden.
Uncategorized

Homemade Japanese Beetle Spray for Your Garden

Introduction Japanese beetles are a common menace for gardeners, particularly in North America. These invasive pests can wreak havoc on a variety of plants, leaving your garden looking bedraggled and sparse. While commercial pesticides are available, many gardening enthusiasts and homeowners are turning to more eco-friendly and organic solutions, not only to protect their plants but also to safeguard their surrounding environment. In this comprehensive guide, we’ll explore how to create a homemade beetle spray that effectively controls these pests, emphasizing the principles of natural pest control. Gardening offers a rewarding experience and a chance to connect with nature, fostering an appreciation for the delicate ecosystems surrounding us. By using natural sprays to protect your garden, you not only promote a healthier garden but also contribute to environmental conservation. This article will guide you through everything you need to know about making and using a homemade Japanese beetle spray, from understanding the ingredients to applying the solution effectively. Ingredients Crafting a homemade beetle spray involves sourcing natural ingredients that deter pests without causing harm to your plants or beneficial insects. Below, we delve into some of the key ingredients commonly used in homemade pest control solutions. Neem Oil: Known for its insecticidal properties, neem oil disrupts the life cycle of Japanese beetles without harming non-target insects. Dish Soap: An effective binding agent that helps the homemade spray adhere to the plants, thereby increasing its efficacy. Garlic: This pungent bulb deters many pests, including beetles, due to its strong odor and natural insect-repelling compounds. Peppermint Oil: This essential oil is not only fragrant but also repels beetles, thanks to its potent aroma and natural deterrent qualities. Water: Acts as the carrier for the other ingredients, facilitating easy spraying on plants. Using these ingredients, you can mix a homemade beetle spray that is safe, effective, and environmentally conscious. Benefits of Natural Sprays Opting for natural pest control solutions has numerous benefits, both for your garden and the wider ecosystem. Let’s explore some of the key advantages. Eco-Friendly: Natural sprays eliminate the need for chemical pesticides, reducing pollution and protecting soil health. Non-Toxic: These solutions are safe for pets and children, ensuring your garden is a healthy space for all family members. Preservation of Beneficial Insects: Unlike chemical pesticides, natural sprays tend to target only harmful pests, helping to preserve bees and other beneficial insects. Cost-Effective: Often using household items or easily sourced materials, homemade sprays are budget-friendly. Customizable: You can tailor your spray to meet specific pest control needs, using ingredients that work best in your environment. Embracing natural pest control is a sustainable approach to gardening that aligns with the principles of organic and eco-friendly living. For more ways to incorporate natural solutions into your home, check out our guide on DIY natural fruit fly spray for kitchens. Step-by-Step Guide Creating your own homemade Japanese beetle spray is a straightforward process. Follow these detailed steps to make an effective solution for your garden. Step 1 Gather Your Ingredients Ensure you have all the necessary ingredients at hand: 2 tablespoons of neem oil A few drops of dish soap 1 clove of garlic (crushed) 5 drops of peppermint oil 1 gallon of water Step 2 Prepare the Garlic Mixture Crush the garlic clove and let it steep in a cup of hot water for about an hour. This allows the water to absorb the natural insect-repelling compounds found in garlic. Step 3 Mix the Ingredients In a larger container, combine the neem oil, dish soap, peppermint oil, and the strained garlic water. Stir the mixture thoroughly to ensure all components are well integrated. Step 4 Add Water Pour the mixed ingredients into a spray bottle and add the remaining water. Shake well to blend the solution evenly. Application Tips Knowing how to apply your homemade beetle spray effectively is crucial for controlling Japanese beetles without damaging your plants. Here are some practical tips: When to Apply It’s best to apply the spray early in the morning or late in the evening when the sun is not too strong. This reduces the risk of leaf burn and ensures that the spray stays on the plants longer. How Often to Apply Apply the spray every few days, especially after rainfall, to maintain its effectiveness. Regular application helps keep the beetles at bay and manage their populations effectively. Targeted Application Focus on the plants most affected by Japanese beetles, targeting the leaves and flowers where these pests are most likely to feed. This ensures maximum impact of your natural pest control efforts. Safety Precautions Even though the spray is natural, it’s good practice to wear gloves and avoid contact with your eyes. Always test a small area first to ensure the spray doesn’t damage particular plants. With these tips in mind, your garden can flourish free from pesky Japanese beetles. Integrating homemade solutions like these into your gardening routine not only protects your plants but also contributes to a greener planet. For more budget-friendly home and garden ideas, explore our guide on DIY design ideas for your home on a budget, which is packed with creative projects to enhance your living space. Incorporating natural pest control measures into your gardening routine is not only beneficial for plant health but enriches the environment and supports biodiversity. This homemade beetle spray empowers you to fight Japanese beetles sustainably, giving you peace of mind and a thriving garden space.

DIY home renovation with diverse couple
Uncategorized

Easy DIY Projects to Improve Your Home’s Value

Introduction Embarking on a journey of DIY home improvement not only enhances the beauty and functionality of your living space but also significantly boosts your home’s value. For homeowners and DIY enthusiasts looking to add value to their property, simple home renovation projects can make a world of difference. Whether you’re preparing to sell or simply aiming to improve your living environment, this comprehensive guide provides an array of practical suggestions and step-by-step instructions for easy DIY projects. With a focus on affordability and effectiveness, these projects will help you transform your home without breaking the bank. Let’s explore some straightforward yet impactful ideas that will add charm and value to your haven. Project Ideas 1. Revamp Your Curb Appeal First impressions matter, and your home’s exterior is the first thing potential buyers will notice. Enhancing curb appeal is an excellent DIY home improvement project that can increase your property’s value. Consider the following ideas: Fresh Paint: Repainting the front door and window trims can make a significant difference. Landscaping: Planting flowers, trimming bushes, and adding a new layer of mulch can refresh your outdoor space. Outdoor Lighting: Installing solar-powered garden lights can highlight your landscape features and improve safety. 2. Update the Kitchen The kitchen is often regarded as the heart of the home, making it a key area for home renovation projects. A few strategic updates can modernize your space and boost its value: Cabinetry Makeover: Consider painting or refacing your cabinets for a fresh look. New Hardware: Upgrading cabinet handles and knobs can add a touch of elegance. Backsplash Installation: A new, stylish backsplash can transform your kitchen’s appearance. For more budget-friendly design tips, explore our DIY design ideas on a budget. 3. Enhance Bathroom Functionality Bathrooms can significantly influence a home’s resale value. Here are some DIY home improvement projects to consider: Vanity Refresh: Repaint or replace the vanity for a cleaner look. Tile Regrouting: Fresh grouting can make old tiles look new. Fixture Upgrades: Swap out old faucets and showerheads with modern, water-efficient options. If you’re interested in other simple yet effective updates, check out our guide on DIY home design ideas for beginners. 4. Create a Functional Home Office With the rise of remote work, having a functional home office is a major selling point. Transform a spare room or unused corner into a productive workspace: Furniture Selection: Choose ergonomic furniture that complements your space. Storage Solutions: Install shelves or a filing system to keep the area organized. Decorative Accents: Add personal touches like artwork or plants for inspiration. 5. Finish the Basement Transforming an unfinished basement into a usable space can significantly increase your home’s square footage and value. Consider these options: Drywall Installation: Create separate rooms or a large open space. Flooring Options: Install durable flooring options like laminate or carpet tiles. Lighting Setup: Enhance the space with bright lighting solutions. Budgeting Tips When undertaking DIY home improvement projects, budgeting is crucial to ensure you don’t overspend. Here are some tips for managing your renovation costs: Plan Ahead Create a detailed plan outlining the desired changes, materials needed, and estimated costs. This will help you avoid unexpected expenses. Research Materials Look for sales and discounts on tools and materials. Buying in bulk can often save money in the long run. DIY Labor While it might be tempting to hire professionals, doing the work yourself can dramatically cut down costs. Consider the complexity of the project and assess your abilities honestly. Prioritize Projects Focus on the areas that will give you the most return on investment. Kitchens, bathrooms, and curb appeal improvements are generally the most profitable. Utilize Online Resources Online platforms like forums and blogs (such as this one!) are treasure troves of information on DIY renovations and budget-friendly hacks. You might also enjoy our creative ideas for decorating using cardboard crafts. Step-by-Step Guide to a Successful DIY Renovation Step 1: Assess and Prioritize Begin by assessing the condition of different areas in your home and identifying which improvements will have the most impact. Prioritize projects based on your budget and the potential increase in property value. Step 2: Gather Required Tools and Materials Once you’ve settled on your projects, make a detailed list of the tools and materials required. For eco-friendly and effective DIY projects, you might find inspiration in our DIY natural spray solutions. Step 3: Execute with Care Follow trusted tutorials and guides, like those here at My Home DIY Guide, to ensure each step is done correctly. Ensure you work safely by using protective gear and adhering to safety guidelines, especially in projects involving electrical installations or heavy machinery. Step 4: Review and Revise Once your project is complete, review the results against your initial plans. If adjustments are necessary, make them. This ensures the final outcome aligns with your vision and adds value to your home. Step 5: Maintenance Some improvements may require ongoing maintenance to keep them in peak condition. Develop a schedule for tasks such as repainting or cleaning gutters to protect your investment. Final Thoughts Easy DIY home improvement projects are a rewarding way to enhance your living space and increase your home’s market value. By carefully selecting projects that offer the best return on investment, using cost-effective materials, and systematically following a step-by-step process, you can achieve stunning results. Whether you’re installing a homemade TV antenna or tackling a more extensive home makeover, these renovations can lead to substantial improvements in both functionality and aesthetics. We hope this guide has inspired you to start your next DIY home renovation project with confidence. For more creative ideas and practical advice, explore additional posts on our site, and watch your home transform with each thoughtful update.

Homemade TV antenna with DIY electronics projects.
Uncategorized

How to Make a Homemade TV Antenna

How to Make a Homemade TV Antenna: A Cost-Effective Solution for DIY Enthusiasts In an age where streaming services dominate, it’s easy to forget the reliable value of free over-the-air television. With the right setup, including a homemade TV antenna, you can enjoy a wide range of channels in stunning HD without any subscription fees. In this comprehensive guide, we’ll walk you through creating your very own DIY TV antenna using affordable materials. Whether you’re a DIY electronics hobbyist or simply looking to cut down on entertainment costs, this project is for you. Materials Needed for Your Homemade TV Antenna Before diving into this project, gather the necessary materials. Most can be found around your home or purchased inexpensively at a hardware store. Here’s what you will need: Coaxial Cable: At least 3 feet long with connectors on both ends. Balun Transformer (75 Ohm to 300 Ohm): This device connects the cable to your antenna. Sturdy Cardboard or Plywood: The base of your antenna, approximately 2 feet by 2 feet. Aluminum Foil: Enough to cover the base of your antenna. Wooden Dowel or Stick: To serve as a backbone for strength and support. Staple Gun or Tape: For securing the aluminum foil. Scissors: To cut the aluminum foil and other materials. Marker: To outline cut lines on the foil. Ruler or Measuring Tape: To measure and mark dimensions accurately. Step-by-Step Guide to Building Your DIY TV Antenna Step 1: Prepare the Base Begin by preparing the base of your antenna. Use the wooden dowel to reinforce the cardboard or plywood by attaching it to the back using glue or tape. This will give your antenna structure and stability, making it easier to handle and position. Step 2: Cut and Attach the Aluminum Foil Measure and cut the aluminum foil to cover one side of the base entirely. Using your marker, draw a zigzag pattern on the foil. Each zigzag should be about 3 inches wide and 4 inches high, similar to the shape of a lightning bolt. Carefully cut out this pattern. Once cut, spread out the foil over the base, ensuring the pattern remains unchanged. Use a staple gun or tape to secure the edges of the foil to the base snugly. Step 3: Attach the Balun Transformer Identify the center of your zigzag pattern where the peaks converge. Connect the balun transformer to the foil, ensuring each wire makes contact with the foil’s peaks. The balun will act as an interface that transmits the captured signals via the coaxial cable. Step 4: Connect the Coaxial Cable Take one end of the coaxial cable and connect it to the balun transformer’s output. This connection ensures signals are appropriately transferred from the foil to your TV. Secure the cable along the side of the antenna base, ensuring it doesn’t interfere with the foil pattern. Step 5: Position the Antenna Finding the right position is crucial for optimal reception. Place the antenna near a window or high up on a wall, avoiding obstacles like metal objects or thick walls that may interfere with signal strength. Consider experimenting with different placements to achieve the best reception. Tips for Optimizing Reception of Your DIY TV Antenna Test Multiple Locations Placement can significantly affect the performance of your homemade TV antenna. Move it around various rooms or spots within a room to find the location that offers the best reception. Higher positions, such as near ceilings or upstairs rooms, tend to provide better signal quality. Enhance with a Reflector Consider enhancing your antenna’s performance by adding an aluminum foil reflector. Position the reflector behind the antenna, such as attaching it to a piece of cardboard to direct more signals towards the antenna. This may further improve reception by reflecting stray signals back into the antenna’s receiving path. Regular Checks and Adjustments Signals may fluctuate based on weather conditions or even new constructions around your home. Regularly check your antenna’s positioning and adjust as needed to maintain optimal reception. Utilize a Signal Amplifier If you live far from broadcasting towers, or your reception remains unreliable, add a signal amplifier in line with your antenna setup. These devices help strengthen the received signals, providing better picture quality. For additional DIY projects that enhance your home’s functionality and aesthetics, explore our [DIY home automation projects](https://myhomediyguide.com/easy-diy-home-automation-projects/) and [affordable DIY design ideas](https://myhomediyguide.com/diy-design-ideas-home-budget/). Your homemade TV antenna is now ready to provide you with free TV access by capturing over-the-air signals. Embrace the joy of discovering new projects that improve your home. For more creative endeavors, check out our guide on [simple DIY home design for beginners](https://myhomediyguide.com/diy-home-design-simple-decor-ideas-for-beginners/). Creating a homemade TV antenna is not only a cost-effective project but also a satisfying achievement for any DIY enthusiast. Whether you’re aiming to improve your TV viewing experience or enjoy crafting your solutions, this project presents a valuable opportunity to harness your creativity and technical skills.

Woman painting wall in DIY project.
Uncategorized

DIY Design Ideas for Your Home on a Budget

Introduction Renovating your home doesn’t have to break the bank! Whether you’re tired of your current setup or simply eager to add a personal touch, DIY home design is an exciting endeavor that can breathe new life into your living space. With thoughtful planning and a sprinkle of creativity, you can achieve stunning transformations without emptying your wallet. This article will guide you through a range of budget-friendly design ideas, materials needed, step-by-step instructions, and tips for customization, blending style with affordability. Embarking on a DIY home improvement journey not only saves money but also gives you the freedom to tailor the aesthetics to suit your taste. From upgrading the living room to revamping the kitchen, enjoy the satisfaction of crafting spaces that reflect your personality and preferences. Read on for a treasure trove of ideas designed to inspire and empower homeowners looking for an affordable home design revolution. Budget-Friendly Design Ideas 1. Living Room Makeover The living room is often the focal point of a home, making it the perfect place to start your DIY home design adventure. Simplistic touches can make a striking difference: Paint an Accent Wall: Introduce a pop of color or an interesting pattern to a single wall. This technique draws attention and adds depth to your space. DIY Shelving Units: Build chic shelving with repurposed materials or inexpensive wood planks. These can house books, plants, or decorative items. Creative Lighting: Swap old fixtures for DIY lampshades made from wire, fabric, or even paper for an artistic touch. For more inspiration on easy yet impactful projects, explore our guide on simple décor ideas for beginners. 2. Kitchen Refresh The kitchen is the heart of every home, and a few strategic improvements can make it both functional and stylish: Cabinet Refacing: Instead of replacing cabinets, repaint them or add new hardware to provide a fresh look. Backsplash Update: Install an affordable tile backsplash or create one with peel-and-stick options for an instant upgrade. DIY Kitchen Accessories: Craft a fruit fly spray using natural ingredients by following our guide on DIY natural fruit fly spray. 3. Bedroom Brilliance Transform your bedroom into a dreamy retreat with these cost-effective tips: Headboard Hack: Design your headboard using reclaimed wood or even a printed fabric stapled to a foam board. Textured Throws and Pillows: Introduce texture through DIY cushion covers and blankets to add warmth and interest. Ambient Lighting Solutions: Use string lights or create homemade lamps using mason jars to add cozy lighting. 4. Bathroom Beauty Bathrooms don’t require a complete overhaul to feel spa-like: Mirror Framing: Frame the mirror with wood or a metallic finish to give it a designer look. Wall Art: Use creative cardboard crafts for bathroom decor. See our ideas on creative cardboard crafts. Organizational Hacks: Install open shelves and use decorative baskets to keep essentials handy and organized. Materials Needed To kickstart your DIY home improvement projects, gather the following materials and tools. This checklist is essential for versatility and functionality: Paint and Brushes/Rollers Wood Planks and Finishes Nails, Hammer, and Screws Glue Gun and Adhesive Tapes Drill and Screwdriver Set Fabric for Upholstery or Curtains Lighting Fixtures and Bulbs Wire or Ropes for Shelves/Lights Decorative Papers or Wrapping Sheets Peel-and-Stick Wall Tiles Baskets, Jars, and Storage Solutions Step-by-Step Instructions Paint an Accent Wall Materials Needed: Paint of chosen color, painter’s tape, roller or brush, drop cloth. Choose the wall you wish to accentuate. It could be a wall behind a major piece of furniture or that immediately grabs attention when entering the room. Lay down a drop cloth to protect your floor from paint splatters. Tape off edges, corners, and any other areas you want to protect with painter’s tape. Mix your paint thoroughly and begin applying it with even strokes using a roller or brush. Start from the top and work downwards. Allow the first coat to dry completely. Apply a second coat for consistency if necessary. Carefully remove the painter’s tape once the paint dries. Touch up any areas if required. DIY Shelving Units Materials Needed: Wood planks, brackets, drill, level, screws, sandpaper, paint or stain (optional). Determine the desired height and length for the shelves and cut wood planks accordingly. Sand the edges for a smooth finish. If you want to paint or stain your shelves, do so before installation. Let them dry completely. Use a level to mark where each bracket will be placed on the wall to ensure even alignment. Drill holes for brackets and insert screws to secure them to the wall. Place the wood planks on the brackets. Secure the planks to the brackets with screws if needed. Cabinet Refacing Materials Needed: Sandpaper, paint or stain, brushes, new hardware (knobs and handles), screwdriver. Remove all doors and drawers from the cabinets and unscrew existing hardware. Sand the surfaces thoroughly to remove any gloss. This helps the paint or stain adhere better. Clean surfaces to remove dust. Apply a coat of primer if you are using a light color over a dark base. Paint or stain the doors, drawers, and cabinet frames. Ensure even coverage with a second coat if necessary. Once dry, reattach hardware or replace it with new knobs and handles for a refreshed appearance. Reinstall doors and drawers. Enjoy your updated cabinets that appear brand new! Tips for Customization Personalize with Patterns and Textures Introduce various patterns and textures to reflect your personality in your home’s design. Consider using stencils for wall patterns, crocheted throw pillow covers, or woven wall tapestries for texture. Maximize Space with Functional Furniture Utilize furniture that offers storage solutions. Look for or craft multi-functional pieces like ottomans with hidden storage, fold-out desks, or bookshelves that double as room dividers for apartments. Seasonal Decor Adapting your decor seasonally keeps your home feeling fresh. Explore seasonal DIY crafts like fall decorations, as covered in our DIY fall decor ideas. Green Up Your Space Add greenery to your home with easy-to-maintain plants. DIY planters using household items and repurpose old containers

Bright kitchen with homemade fruit fly spray.
Uncategorized

DIY Natural Fruit Fly Spray for Kitchens

Introduction Fruit flies are a common and frustrating kitchen pest. They’re drawn to ripened fruits, vegetables, and sometimes even the trash can, making them particularly pesky invaders in the heart of your home. If you’re an eco-conscious homeowner seeking a natural and effective way to banish these tiny nuisances, a DIY natural fruit fly spray might be the perfect solution. In this guide, we’ll explore how to craft your own potent yet safe homemade fruit fly spray, designed to handle the job without harmful chemicals. We’ll delve into the ingredients, the benefits of using natural sprays, and provide a clear step-by-step guide for creating and applying your very own fruit fly repellent. Along the way, we’ll also share tips for effectively applying your DIY creation to ensure your kitchen remains fly-free. Ingredients The ingredients for making a homemade fruit fly spray are simple, natural, and often already available in your home. Here’s what you’ll need: Water: Serves as the base for your spray, providing volume and ease of application. White Vinegar: Acts as a natural fly repellent and cleaner. Apple Cider Vinegar: Also draws flies, allowing them to be trapped effectively. Lemon Essential Oil: Offers a refreshing smell and an effective deterrence against flies. Dish Soap: Assists in breaking the surface tension of the vinegar to trap the flies more efficiently. Spray Bottle: Essential for easy application in targeted areas of your kitchen. Benefits of Natural Sprays Opting for a DIY pest control solution over chemical-based products has numerous benefits: Eco-Friendly Natural fruit fly sprays are made from non-toxic, biodegradable ingredients that are safe for the environment, humans, and pets. This aligns with many homeowners’ desire to minimize their ecological footprint and reduces the potential harm caused by synthetic chemical sprays. Cost-Effective Many of the ingredients used in a DIY pest control spray are common household items, making this approach much more cost-effective than purchasing commercial fly repellents. In addition, you can make large batches at a fraction of the cost, ensuring you always have some on hand. Safe for Kitchen Environments Naturally-derived ingredients ensure that your kitchen remains free from harmful residues that can linger on surfaces, thus preserving the safety of food-preparation areas. This is particularly beneficial for families with children or pets who may inadvertently come into contact with sprayed surfaces. Customizable Scents By using essential oils, you can customize the aroma of your spray, offering not only a fly deterrent but also a pleasant kitchen fragrance. Lemon, lavender, and eucalyptus scents are popular choices that offer a refreshing aroma while deterring pests. Step-by-Step Guide Creating your own homemade fruit fly spray is a straightforward process. Follow these steps to ensure a potent and effective solution: Gather Your Ingredients: Assemble all necessary items, including water, white vinegar, apple cider vinegar, lemon essential oil, dish soap, and a spray bottle. Mix Base Ingredients: In a bowl, combine one cup of water with one cup of white vinegar. This forms the base of your fruit fly spray. Add Apple Cider Vinegar: Introduce half a cup of apple cider vinegar to the mixture. This will attract fruit flies to the spray, making it more effective. Incorporate Essential Oil: Add 10-15 drops of lemon essential oil. This not only enhances the effectiveness of the spray but also leaves a pleasant scent. Include Dish Soap: Add one teaspoon of dish soap to the mixture. This acts to break the surface tension so that flies are effectively trapped once they land. Transfer to a Spray Bottle: Use a funnel to pour the mixture into a spray bottle. Secure the lid and shake gently to combine thoroughly. Label Your Bottle: This is crucial for safety and ensures everyone knows its purpose. For more eco-friendly crafting and DIY projects, you might be interested in exploring our guide on Creative Cardboard Crafts for Home Decor. Application Tips To maximize the effectiveness of your DIY pest control solution, it’s important to apply it strategically within your kitchen: Identify Problem Areas Fruit flies are most commonly found near ripe fruits, produce storage, trash cans, and kitchen drains. These areas should be your initial spray targets. Regular Application Spraying should be done daily, particularly if you’re trying to eliminate an existing infestation. Reapply the spray every other day as a preventive measure even after you notice a decline in flies. Maintain Clean Surfaces Keeping your kitchen clean is crucial. Ensure that areas that attract fruit flies are cleaned regularly, removing any food residues that might attract them. This works hand-in-hand with the spray to reduce populations. Address the Source Dispose of overripe fruits promptly and ensure that trash bags are properly sealed. Using the spray regularly will maintain its deterrent effect over time. Combining this with practical maintenance, like drain cleaning and proper food storage, enhances the success rate. Exploring other DIY endeavors? Check out our article about DIY Home Design Simple Decor Ideas for Beginners for more homemade solutions and creativity. Conclusion Fruit flies may be a persistent nuisance, but with the right strategy and tools, you can easily control them. Crafting your own homemade fruit fly spray is an excellent way to tackle this pest problem naturally, ensuring both safety and effectiveness. By using eco-friendly ingredients, you create an environment in which you and your family can thrive, while effectively keeping flies at bay. Incorporating regular maintenance and cleanliness in your kitchen regime complements your DIY efforts, resulting in a stress-free, pleasant kitchen experience. For more intriguing DIY projects, including how to make a DIY Fog Juice for Halloween Fun, continue exploring our blog for inspiration and guidance.

Diverse group working on home automation projects.
Uncategorized

Easy DIY Home Automation Projects

Introduction In today’s fast-paced world, the convenience of home automation is more accessible than ever. Whether you’re a tech-savvy homeowner or an avid DIY enthusiast, integrating smart home technology into your living space can be both rewarding and surprisingly easy. This comprehensive guide dives into a variety of easy DIY home automation projects that combine technology with practicality, all while staying budget-friendly. From automating your lighting system to setting up a smart thermostat, these projects will elevate your home’s efficiency and comfort. As part of our series on DIY solutions, this article will guide you through various home automation DIY ideas. You will find the necessary tools and devices, along with detailed step-by-step guides, to help you achieve a smarter home. Our goal is to make sure these smart home DIY projects are clear and straightforward, ensuring successful implementation for any level of expertise. Whether you are interested in optimizing your energy use, security, or simply adding some futuristic flair to your home, read on to discover how you can get started. Automation Project Ideas Embarking on a home automation journey doesn’t need to be daunting. In fact, with a few clever ideas, you can transform your home into a modern masterpiece. Here are some creative yet simple project ideas to get you started: 1. Smart Lighting Control One of the most popular entry points into home automation is the smart lighting system. Implementing smart lighting allows you to control the ambiance of your home right from your smartphone. This project involves: Setting up smart bulbs or smart switches. Programming lighting scenes for different times of the day. Integrating motion sensors for automatic on/off functions. 2. Automated Thermostat If cutting down utility bills and optimizing energy usage sound appealing, installing a smart thermostat is for you. This project may include: Replacing your existing thermostat with a smart model. Setting schedules for heating and cooling based on your routine. Understanding energy usage patterns through mobile apps. 3. Smart Security System Enhancing your home’s security is another excellent automation idea. Introducing smart technology to your security system includes: Installing smart doorbells and cameras. Setting up smart locks for doors. Integrating your security devices into a centralized app for real-time monitoring. 4. Voice-Controlled Entertainment Adding voice control to your entertainment system is another exciting smart home project. This setup can involve: Connecting your TV and speakers to virtual assistants like Alexa or Google Home. Creating voice commands for seamless control over your favorite media. Automating your home cinema environment with adjustable lighting and curtains. 5. DIY Smart Garden Irrigation Automating your garden’s watering system can save time and conserve water. This project could include: Setting up a smart irrigation controller. Using weather data to modify watering schedules automatically. Monitoring outdoor conditions remotely via a smartphone app. Tools and Devices To implement these home automation projects, you’ll need some key tools and devices. Here’s a list of essentials to help you get started: Basic Tools Screwdriver set for easy installation. Wire strippers and crimpers for electrical connections. Drill and bits for mounting devices. Needle nose pliers for tight spaces. Essential Devices Here are some fundamental devices that are crucial for various smart home projects: Smart Lights: Philips Hue, LIFX, or equivalent brands offer plug-and-play conveniences. Smart Thermostat: Consider Nest or Ecobee thermostats for seamless integration. Security Cameras & Doorbells: Ring or Arlo systems are reliable choices. Smart Lock: August or Schlage smart locks for enhanced security. Virtual Assistants: Amazon Echo or Google Nest Home for voice control capabilities. Smart Irrigation System: Rachio or Orbit smart controllers for garden management. Connectivity and Control Stable Internet with good Wi-Fi coverage is crucial for home automation DIY installations. Consider Wi-Fi extenders or mesh systems to enhance connectivity. Ensure all devices are compatible with hubs or platforms like SmartThings or Apple HomeKit if you plan to expand your setup in the future. Step-by-Step Guide Project Example: Installing a Smart Thermostat Let’s dive into a practical guide for installing a smart thermostat, a project that balances ease, affordability, and impact. This step-by-step process will walk you through the installation, which typically takes one to two hours: Prepare Your Workspace Turn off the heating/cooling system at the circuit breaker. Gather your tools: Screwdrivers, drill, and the smart thermostat. Remove the Old Thermostat Take a picture of the existing wiring for reference. Unscrew and carefully detach the existing thermostat. Install the New Base Plate Attach the new base plate of the smart thermostat to the wall. Feed the old wires through the designated hole in the base. Use a level to ensure the base plate is properly aligned, then secure it with screws. Connect the Wires Reference the picture and connect the wires to their respective terminals on the smart thermostat. Make sure each wire is secure and there are no exposed wire strands. Attach the Thermostat Display Snap the thermostat display onto the base plate. Power On and Configure Turn the power back on at the circuit breaker. Follow the on-screen instructions to set up Wi-Fi connectivity and configuration. Download the appropriate app on your smartphone to control the thermostat remotely. Test the System Cycle through heating and cooling functions to ensure the system responds correctly. For more beginner-friendly décor projects, you can explore our article on DIY Home Design Simple Décor Ideas for Beginners which complements home automation projects splendidly. Cost and Time Estimates Budget Considerations Smart home projects can vary significantly in cost based on the level of complexity and the number of devices you plan to install. Here’s an overview: Smart Lighting: Costs can range from $20 per bulb to $200 for a complete system depending on brand and compatibility. Smart Thermostat: Typically ranges from $150 to $300. Smart Security Devices: Bundle deals often start at around $200. Voice-Controlled Systems: Virtual assistants range from $50 to $250 based on features. Smart Irrigation: Systems usually start at $100 and can reach $300 for premium models. Time Investment The time required to complete these projects ranges from a

Creative cardboard crafts for home décor.
Uncategorized

Creative Cardboard Crafts for Home Décor

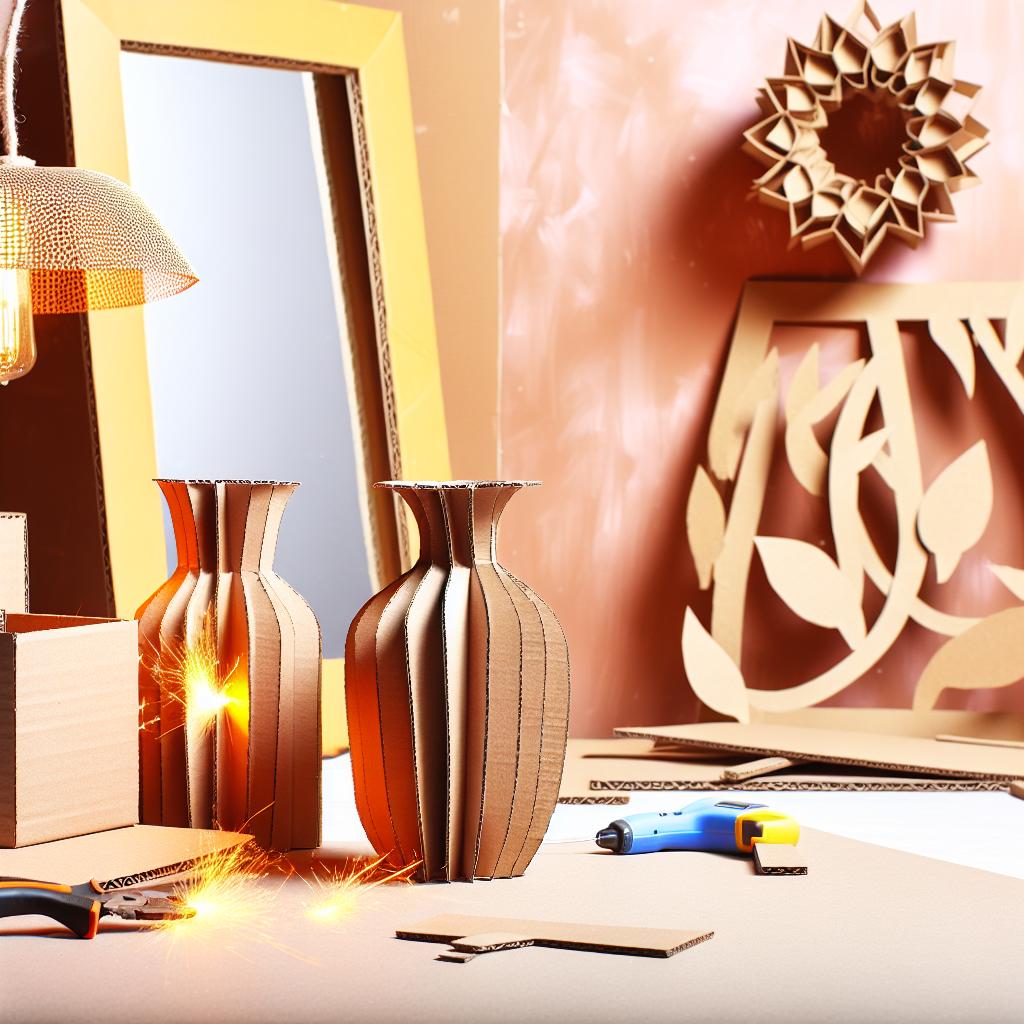
## Creative Cardboard Crafts for Home Décor In today’s world of sustainability and eco-conscious living, upcycling everyday materials into eye-catching home décor has become a popular trend. Among the materials that can be transformed into beautiful DIY home décor, cardboard stands out for its versatility, availability, and environmental benefits. Whether you’ve recently moved, online shopped more than usual, or just want to declutter the boxes piling up at home, cardboard crafts offer an excellent opportunity to create something unique and stunning. This comprehensive guide will walk you through creative cardboard crafts that not only enhance your home décor but also contribute towards reducing waste. As we explore various craft project ideas, keep in mind that each project is designed to be gentle on the environment, ensuring that you can create a greener, aesthetically pleasing home. Let’s dive into the world of cardboard crafts and discover how you can bring a touch of creativity to every corner of your house. ## Craft Project Ideas ### Wall Art Transform simple pieces of cardboard into spectacular wall art that can become the centerpiece of any room. Using stencils, paint, and a bit of creativity, you can craft geometric designs, abstract art, or personalized pieces that reflect your style. ### Cardboard Photo Frames Display your favorite memories with personalized cardboard photo frames. Use layers of cardboard to create depth, and decorate with paints, paper, or fabric for a unique touch. ### Textured Wall Panels Add dimension to a room with textured cardboard wall panels. Cut cardboard into various shapes and sizes, layer them artfully, and paint them in colors that complement your interior theme for an elegant, modern look. ### Plant Pots Cardboard plant pots offer an eco-friendly alternative for your indoor plants. They’re simple to craft and can be customized to match the décor of any room, making them perfect for any DIY home décor project. ### Jewelry and Makeup Organizer Keep your accessories tidy with a handmade cardboard organizer. These can range from simple trays to intricate designs with multiple compartments for jewelry or makeup storage. ### Table Décor Pieces From elaborate centerpieces to subtle, decorative figurines, cardboard can be molded into numerous table décor items to suit your aesthetic preferences. Try creating seasonal decorations that you can switch out throughout the year. After exploring these creative project ideas, let’s move on to understanding the materials required for these exciting cardboard crafts. ## Materials Needed Before starting any project, gathering the right materials is crucial for a smooth crafting process. Here’s a comprehensive list of materials you will need for your cardboard crafts: Cardboard: Collect cardboard from used boxes, packaging materials, or even discarded folders. The thickness of the cardboard might vary based on the project. Cutting Tools: A sharp crafting knife or scissors is essential for clean cuts. Consider using a cutting mat to protect your surfaces. Adhesives: Use eco-friendly glue or tape to assemble your pieces. For more permanent fixtures, consider an eco-friendly adhesive. Paints: Non-toxic acrylic paints work best for cardboard. They dry quickly and offer vibrant colors. Brushes and Sponges: Useful for painting and texturing your cardboard creations. Stencils: Easily create patterns and designs on your cardboard art pieces. Decorative Papers and Fabrics: Add flair with patterned paper or fabric for a more personalized touch. Varnish or Mod Podge: Seal your finished pieces with a layer of varnish or [homemade Mod Podge](https://myhomediyguide.com/homemade-mod-podge-craft-projects/) to enhance durability. Optional: Additional embellishments like beads, buttons, or sequins for decorative purposes. Gathering these materials will set you up for success in each project, ensuring you have everything you need for your creative journey. Next, we’ll move on to step-by-step instructions for each cardboard craft project. ## Step-by-Step Instructions ### Wall Art Creation 1. Preparation: Choose a design for your wall art, whether it is geometric, abstract, or themed. Sketch it out on paper first. 2. Cutting the Cardboard: Lay your cardboard flat and trace your design onto it. Use a crafting knife to cut out the shapes with precision. 3. Decorating: Paint your pieces using your selected color scheme. Acrylic paints work well here. Let them dry completely. 4. Assembly: Arrange your pieces on your intended wall space. You can experiment with the layout before fixing them with glue or tape. 5. Mounting: Once satisfied with the design, securely mount the pieces using wall-safe adhesive strips or small nails. ### Crafting Photo Frames 1. Frame Outline: Determine the size of your photo and cut 2 cardboard pieces, slightly larger than the photo, for the back and the front frame. 2. Window Cut-Out: On the front piece, cut a smaller window that matches the dimensions of your photo. 3. Decorate: Paint or cover the frames with fabric or decorative paper, giving it a unique finish. 4. Assemble the Frame:** Attach the photo to the back piece using glue, then attach the front frame using tape or glue around the edges. 5. Final Touches: Seal with a thin layer of Mod Podge if desired. Add embellishments like beads or buttons for additional charm. ### Making Textured Wall Panels 1. Select a Design: Decide on a geometric or abstract pattern. Draw it on your cardboard. 2. Cut and Layer: Cut out the design elements and create layers using thinner pieces of cardboard for depth. 3. Paint: Optional: Use textured paint or sponge painting techniques to add dimension. 4. Assembly: Secure layers in place with glue, creating depth with spacing where needed. 5. Install: Affix the finished panel to your wall using hooks or wall-safe adhesive strips. ### Crafting Cardboard Plant Pots 1. Choose Dimensions: Decide the size of your plant pot based on the plant you intend to pot. 2. Cut the Pieces: Cut panels for the sides and bottom. Ensure they fit snugly when assembled. 3. Assemble the Pot: Use an adhesive to secure the sides to the base, creating a box-like structure. 4. Waterproofing: Coat the inside with a waterproof sealant or line with plastic to protect from water. 5. Decorate: Paint the

Scroll to Top