December 10, 2024

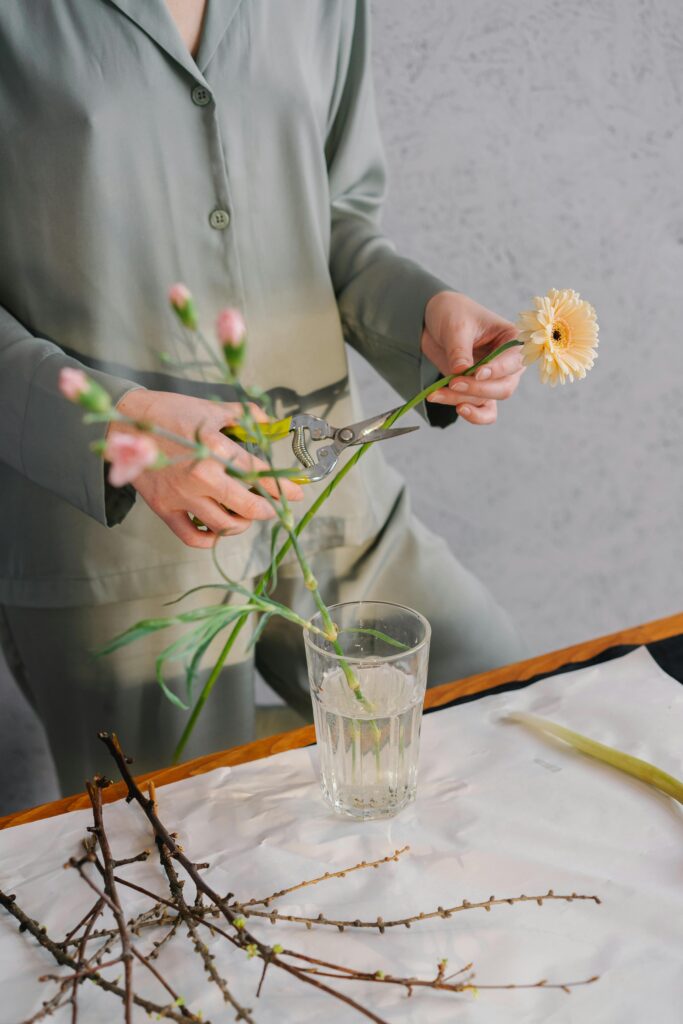
A woman in green outfit trimming flowers for a floral arrangement indoors.
Uncategorized

Effective DIY Natural Remedies for Common Household Problems

DIY Natural Remedies for Common Household Problems Maintaining a clean and comfortable home doesn’t have to rely on harsh chemicals or expensive products. By embracing DIY natural remedies, you can address everyday household issues in an eco-friendly and cost-effective manner. From eliminating stubborn odors to tackling pesky pests and removing tough stains, home DIY solutions offer safe alternatives that are both effective and sustainable. In this guide, we’ll explore common household problems and provide you with practical natural remedies to keep your home thriving. Common Household Problems Every home faces a variety of challenges that can disrupt the comfort and cleanliness of your living space. Some of the most common household problems include: Unpleasant odors lingering in the kitchen or bathroom Insect and pest infestations such as ants, mosquitoes, and gnats Stubborn stains on fabrics, carpets, and surfaces Mold and mildew growth in damp areas High levels of indoor allergens like dust and pet dander Addressing these issues promptly with natural remedies not only improves the hygiene of your home but also promotes a healthier living environment for you and your family. Natural Remedy Ideas Here are some effective DIY natural remedies to tackle the most common household problems: Eliminating Unpleasant Odors Baking Soda Deodorizers: Baking soda is a powerful odor absorber. Place open containers of baking soda in areas prone to smells, such as refrigerators, closets, and bathrooms. Lemon and Vinegar Cleaner: A mixture of lemon juice and white vinegar can neutralize odors while also cleaning surfaces. Essential Oil Air Fresheners: Combine water with your favorite essential oils in a spray bottle for a natural air freshener. Controlling Pests Naturally Homemade Gnat Spray: Use essential oils like eucalyptus and peppermint mixed with water to create a natural repelant spray. Diatomaceous Earth: Sprinkle diatomaceous earth around entry points to deter ants and other insects. Herbal Repellents: Plant herbs such as basil, mint, and lavender around your home to naturally repel pests. Removing Stubborn Stains White Vinegar Solution: White vinegar is effective for removing wine, coffee, and other organic stains from fabrics and carpets. Hydrogen Peroxide and Baking Soda: This combination works well on tough stains like blood and grease. Lemon Juice and Salt: Perfect for brightening stained clothes and removing rust spots from surfaces. Ingredients To create these DIY natural remedies, you’ll need a few basic ingredients that are often already available in your kitchen or can be easily purchased. Here’s a list of common ingredients used in the remedies mentioned: Baking Soda: A versatile household staple known for its odor-absorbing and cleaning properties. White Vinegar: An excellent natural cleaner and deodorizer. Essential Oils: Oils like lavender, peppermint, and eucalyptus add fragrance and have insect-repellent properties. Lemon Juice: A natural bleaching agent and deodorizer. Hydrogen Peroxide: Effective for removing tough stains and disinfecting surfaces. Diatomaceous Earth: A natural pest control agent that is safe for humans and pets. Salt: Useful for scrubbing and stain removal. Step-by-Step Guide Let’s dive into detailed instructions for a few of these home DIY solutions to help you get started with natural remedies in your household. 1. Baking Soda Deodorizer for the Refrigerator Ingredients: 1 box of baking soda Step-by-Step Guide: Open the box of baking soda and leave it standing in the back of your refrigerator. Replace the box every three months to ensure continuous odor absorption. You can also sprinkle some baking soda on a small plate and place it in the fridge for enhanced odor control. 2. Homemade Gnat Spray Ingredients: 1 cup of water 10 drops of eucalyptus essential oil 10 drops of peppermint essential oil Step-by-Step Guide: Pour the water into a spray bottle. Add the eucalyptus and peppermint essential oils. Shake well to combine the ingredients. Spray the mixture around areas where gnats are present, such as kitchen counters and bathroom sinks. Reapply daily or as needed to maintain pest control. 3. Lemon and Vinegar All-Purpose Cleaner Ingredients: 1 cup of white vinegar 1/2 cup of lemon juice 1 cup of water Spray bottle Step-by-Step Guide: Combine white vinegar, lemon juice, and water in a spray bottle. Shake well to mix the ingredients thoroughly. Spray the solution onto surfaces such as countertops, sinks, and tiles. Wipe clean with a cloth or sponge. 4. Hydrogen Peroxide and Baking Soda Carpet Cleaner Ingredients: 1 cup of hydrogen peroxide 2 tablespoons of baking soda 1 teaspoon of dish soap Spray bottle Step-by-Step Guide: In a spray bottle, combine hydrogen peroxide, baking soda, and dish soap. Shake the bottle gently to ensure all ingredients are well mixed. Spray the mixture directly onto the stained area of the carpet. Allow it to sit for about 15 minutes to penetrate the stain. Blot the area with a clean cloth or paper towel to absorb the cleaner and lift the stain. For persistent stains, repeat the process until the stain is fully removed. 5. Diatomaceous Earth Ant Barrier Ingredients: Food-grade diatomaceous earth Gloves Dust mask (optional) Step-by-Step Guide: Wear gloves to protect your hands and a dust mask to avoid inhaling the powder. Sprinkle a thin layer of diatomaceous earth around entry points such as windows, doors, and baseboards. Focus on areas where ants or other pests are commonly seen. The diatomaceous earth will create a barrier that dehydrates and deters pests effectively. Reapply after cleaning or heavy rainfall to maintain the barrier. Additional Tips for Effective DIY Home Solutions Implementing DIY natural remedies is a great way to maintain your home’s cleanliness and comfort. Here are some additional tips to enhance the effectiveness of your home DIY solutions: Regular Maintenance: Consistently using these remedies will prevent issues from becoming overwhelming. Proper Storage: Keep your homemade solutions in labeled containers to ensure easy access and safe usage. Experiment with Scents: Customize your remedies with different essential oils to create pleasant aromas tailored to your preferences. Safety First: Always test a small area before applying any solution to avoid potential damage to surfaces or fabrics. Combine with Other Projects: Pair your natural remedies with other creative
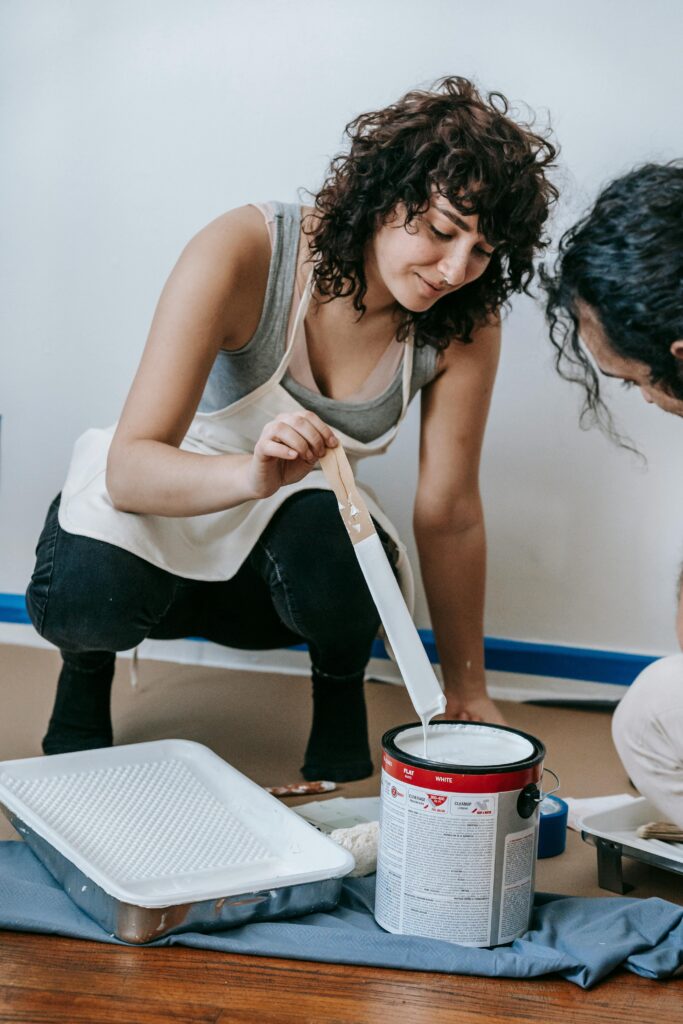
A couple working together on a home painting project, mixing paint indoors for renovation.
Uncategorized

Top DIY Home Improvement Projects You Can Complete This Weekend

DIY Home Improvement Hacks You Can Do This Weekend Are you looking to spruce up your living space without breaking the bank or spending countless hours on a project? Home improvement DIY enthusiasts rejoice! With the right ideas and a bit of determination, you can tackle several weekend projects that will transform your home in just a few days. Whether you’re a seasoned DIYer or a beginner, these small-scale home improvement projects are perfect for enhancing your space efficiently and affordably. Weekend Project Ideas 1. Refresh Your Space with a New Coat of Paint One of the simplest ways to breathe new life into any room is by applying a fresh coat of paint. Choose a color that complements your existing décor or go bold with an accent wall to make a statement. 2. Install Floating Shelves Floating shelves are both functional and stylish. They provide additional storage and display space without taking up floor space, making them ideal for small areas. 3. Upgrade Cabinet Hardware Swapping out old cabinet knobs and handles can give your kitchen or bathroom a quick facelift. This minor change can significantly impact the overall look of your cabinets. 4. Create a Gallery Wall A gallery wall allows you to showcase your favorite photos, artwork, and decorative pieces. It’s a personalized way to add character to any room. 5. Reupholster a Chair or Stool If you have a chair or stool that’s seen better days, reupholstering can give it a fresh and modern appearance without the cost of buying new furniture. 6. Install a Backsplash in the Kitchen A new backsplash can protect your walls from spills and splashes while adding a decorative element to your kitchen. 7. Add Crown Molding Crown molding adds elegance and sophistication to any room. It’s a relatively easy project that can make a significant visual impact. 8. Update Light Fixtures Changing outdated light fixtures to more modern designs can enhance the ambiance and functionality of your space. 9. Organize with Built-In Storage Solutions Custom-built storage can help declutter your home and keep everything organized. Consider adding built-in shelves or cabinets to maximize space. 10. Enhance Curb Appeal with Landscaping A tidy and attractive yard can greatly improve your home’s exterior appearance. Simple landscaping tasks like planting flowers or trimming bushes can make a big difference. For more creative ideas, check out our Creative DIY Craft Projects for Home Improvement. Tools & Materials Before embarking on your home improvement DIY projects, it’s essential to gather the necessary tools and materials. Having everything on hand will ensure a smooth and efficient weekend of work. Measuring tape Hammer and nails Screwdrivers (both flathead and Phillips) Drill and drill bits Level Paintbrushes and rollers Painter’s tape Sandpaper Safety goggles and gloves Stud finder Utility knife Ladder Primer and paint Paint trays Decorative elements (shelves, hardware, molding, etc.) Depending on the projects you choose, you may need additional specialized tools, but the above list covers the basics for most weekend projects. Step-by-Step Guide Project Example: Installing Floating Shelves Installing floating shelves is a practical and stylish way to add storage and display space to any room. Follow these steps to complete the project: Choose the Location: Decide where you want to install the shelves. Consider factors like wall space, lighting, and accessibility. Measure and Mark: Use a measuring tape to determine the exact position of the shelves. Mark the spots where the brackets will be attached. Prepare the Wall: Ensure the wall is clean and free of any obstructions. Use a stud finder to locate the studs for secure bracket placement. Attach the Brackets: Drill holes and secure the brackets to the wall using screws. Make sure they are level to prevent the shelves from tilting. Install the Shelves: Slide the floating shelves onto the brackets. Adjust as necessary to ensure they fit snugly and are level. Finishing Touches: Once the shelves are in place, you can paint or stain them to match your décor. Add decorative items to complete the look. For more detailed instructions on similar projects, visit our Easy DIY Projects to Improve Home Value. Budgeting Tips Keeping your home improvement DIY projects within budget is crucial for a stress-free weekend. Here are some tips to help you manage costs effectively: Plan Ahead: Outline your projects and create a list of required materials and tools. This helps prevent last-minute purchases that can inflate costs. Set a Budget: Determine how much you’re willing to spend on each project. Stick to your budget to avoid overspending. Reuse and Repurpose: Look for ways to use existing materials or repurpose items you already own. This can significantly reduce expenses. Shop Smart: Take advantage of sales, discounts, and clearance items. Check local stores and online marketplaces for the best deals. Borrow Tools: Instead of purchasing expensive tools for a one-time project, consider borrowing from friends or neighbors. DIY Where Possible: The whole point of home improvement DIY is to save money. Handle as much of the work as you can yourself to minimize labor costs. Prioritize Projects: If you’re on a tight budget, focus on the projects that will have the most significant impact first. This ensures that your investment yields maximum results. Use Free Resources: Utilize free online tutorials and guides to learn new techniques and find cost-effective solutions for your projects. By following these budgeting tips, you can comfortably undertake multiple weekend projects without stretching your finances. For more budgeting strategies, check out our DIY Design Ideas for a Home Budget. Additional Tips for Successful DIY Weekend Projects 1. Start Small If you’re new to home improvement DIY, begin with smaller projects. This allows you to build confidence and skills before tackling more significant tasks. 2. Gather All Supplies First Before starting, ensure you have all the necessary tools and materials. This prevents interruptions and ensures a smooth workflow. 3. Follow Instructions Carefully Whether you’re following a tutorial or a manual, paying attention to details can make the difference between a successful project

Child playing with dough using whisk, showcasing curiosity and creativity indoors.
Uncategorized

Best Homemade Slime Recipes Safe and Fun for Kids

Homemade Slime Recipes Safe and Fun for Kids Slime has taken the world by storm, becoming a favorite activity for children and a beloved staple in playtime. Creating your own DIY slime not only provides endless hours of fun but also allows for creativity and customization. At My Home DIY Guide, we believe in offering easy homemade slime recipes that are safe and mess-free for kids. This guide will walk you through the essential ingredients, step-by-step instructions, safety tips, and fun variations to make your slime-making experience both enjoyable and worry-free. Ingredients Creating slime is a simple process that requires only a few basic ingredients. Here’s what you’ll need for a basic DIY slime recipe: White school glue (such as PVA glue) Baking soda Contact lens solution (containing boric acid) Food coloring Optional add-ins: glitter, small beads, or foam beads for texture All these ingredients are easily accessible and safe for children when used under supervision. For parents looking to explore more DIY projects, you might also enjoy our [Creative DIY Craft Projects for Home Improvement](https://myhomediyguide.com/creative-diy-craft-projects-for-home-improvement/). Step-by-Step Instructions Basic DIY Slime Recipe Prepare Your Workspace: Cover your work area with newspaper or a disposable tablecloth to catch any spills and make clean-up easier. Mix the Glue and Baking Soda: In a mixing bowl, combine 1/2 cup of white school glue with 1/2 teaspoon of baking soda. Stir until the mixture is smooth. Add Color: Add a few drops of food coloring to the mixture. Stir well until you achieve your desired color. You can make multiple batches with different colors for variety. Add Contact Lens Solution: Gradually add 1 tablespoon of contact lens solution to the mixture, stirring continuously. The slime will begin to form as you mix. Knead the Slime: Once the slime starts to pull away from the sides of the bowl, use your hands to knead it. If the slime is too sticky, add a few more drops of contact lens solution until it reaches the perfect consistency. Customize Your Slime: If you want to add texture, mix in glitter, small beads, or foam beads at this stage. Store the Slime: Place the finished slime in an airtight container to keep it fresh and prevent it from drying out. For those interested in enhancing their DIY skills, our guide on [Easy DIY Projects to Improve Home Value](https://myhomediyguide.com/easy-diy-projects-improve-home-value/) might inspire your next project. Mess-Free Slime Recipe If you’re concerned about the mess that can come with making slime, here’s a mess-free version that minimizes cleanup: Gather Your Supplies: Use a shallow microwavable bowl and a plastic spoon to mix your ingredients. Mix Glue and Water: Combine 1/2 cup of white school glue with 1/4 cup of water in the bowl. Stir until well blended. Add Coloring and Mix-ins: Add a few drops of food coloring and any glitter or small beads you like. Stir thoroughly. Heat the Mixture: Microwave the mixture for 30 seconds. Stir and check the consistency. If it’s too sticky, microwave for an additional 10-15 seconds. Add Contact Lens Solution: Add 1 tablespoon of contact lens solution and stir until the slime begins to form. Knead and Store: Transfer the slime to your hands and knead until smooth. Store in an airtight container. For parents looking to keep their home organized while indulging in DIY activities, explore our [DIY Room Design Tips for Small Spaces](https://myhomediyguide.com/diy-room-design-tips-for-small-spaces/). Safety Tips While making DIY slime is a fun and engaging activity, safety should always be a priority, especially when children are involved. Here are some essential safety tips to keep in mind: Supervision: Always supervise children during the slime-making process to ensure they handle the ingredients properly. Non-Toxic Ingredients: Use non-toxic glue and contact lens solutions to ensure the slime is safe if accidentally ingested in small amounts. Hand Washing: Encourage children to wash their hands thoroughly after playing with slime to remove any residue. No Ingesting: Remind kids that slime is not edible. Even though the ingredients are generally safe, consumption can lead to stomach upset. Storage: Store slime in airtight containers to prevent it from drying out or getting contaminated. Avoid Contact with Eyes: Teach children to avoid touching their eyes while playing with slime. If contact occurs, rinse immediately with water. For more safety-conscious DIY projects, check out our [DIY Natural Fruit Fly Spray for Kitchens](https://myhomediyguide.com/diy-natural-fruit-fly-spray-for-kitchens/) which offers safe solutions for your home. Fun Variations One of the best parts about making DIY slime is the ability to customize it to your liking. Here are some fun variations you can try to make your slime experience even more exciting: Butter Slime Butter slime is soft, spreadable, and has a consistent texture that makes it feel like real butter. Here’s how to make it: Basic Slime Base: Follow the basic DIY slime recipe. Add Lotion: Incorporate 1-2 tablespoons of white or scented lotion into the slime to achieve the buttery texture. Knead Well: Knead the mixture thoroughly to ensure the lotion is fully integrated. For more innovative DIY ideas, explore our [Create DIY High End Decor Dollar Tree](https://myhomediyguide.com/create-diy-high-end-decor-dollar-tree/) projects. Fluffy Slime Fluffy slime is incredibly light and airy, thanks to the addition of shaving cream. Here’s how to make it: Prepare Slime Base: Start with the basic DIY slime recipe. Add Shaving Cream: Gently fold in 2-3 tablespoons of shaving cream into the slime mixture. Adjust the amount based on desired fluffiness. Mix and Store: Stir until the shaving cream is fully incorporated, then store in an airtight container. This fluffy texture provides a different sensory experience, perfect for kids who enjoy soft and squishy materials. Glitter Slime Add sparkle to your slime by incorporating glitter. Here’s how: Make Slime Base: Follow the basic DIY slime recipe. Add Glitter: Mix in 1-2 tablespoons of glitter. Choose colors that match or contrast your slime for a unique look. Knead and Enjoy: Knead the slime until the glitter is evenly distributed. Glitter slime adds visual appeal and enhances the sensory play experience for children. Glow-in-the-Dark Slime For an

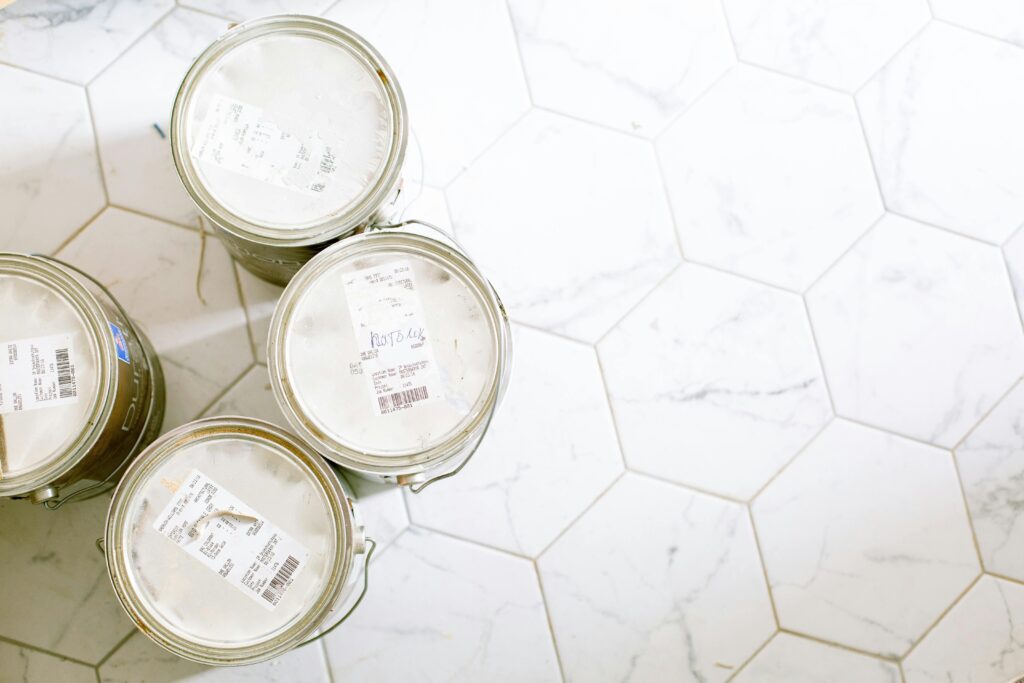
Aerial view of paint cans on a hexagonal tile floor, perfect for renovation themes.
Uncategorized

Creative DIY Craft Projects for Home Improvement

Introduction Embarking on home improvement DIY projects is a fulfilling way to enhance your living space while showcasing your creativity. Whether you’re a seasoned DIY enthusiast or just beginning your journey, there are countless opportunities to transform your home with simple yet impactful craft projects. From creating personalized wall art to building custom shelving units, these DIY projects not only elevate the aesthetic appeal of your home but also add functionality and value. In this guide, we’ll explore a variety of creative DIY craft projects that contribute to home improvement, providing you with the inspiration and instructions needed to bring your vision to life. Craft Project Ideas 1. Personalized Wall Art Wall art is a fantastic way to express your personality and style within your home. Instead of purchasing expensive pieces, consider creating your own personalized wall art. This project allows you to customize colors, themes, and designs to perfectly match your home décor. 2. Floating Shelves Floating shelves are not only functional but also add a modern touch to any room. They provide a stylish way to display books, plants, and decorative items without taking up floor space. Building your own floating shelves can be a rewarding DIY project that enhances both storage and aesthetics. 3. Customized Lighting Fixtures Lighting plays a crucial role in setting the mood and ambiance of your home. By customizing lighting fixtures, you can create unique pieces that serve as both practical light sources and eye-catching décor elements. From pendant lights to lampshades, there are endless possibilities for personalized lighting. 4. Upcycled Furniture Transforming old or unused furniture through upcycling not only promotes sustainability but also gives your home a distinctive look. Whether it’s repainting a dresser, reupholstering chairs, or adding new hardware, upcycled furniture can significantly improve the appearance of your living spaces. 5. Decorative Mirrors Mirrors can make a space feel larger and more open while adding a touch of elegance. Creating decorative mirrors with unique frames or incorporating them into gallery walls can be a stunning addition to your home improvement arsenal. Tools & Materials Needed Before diving into your home improvement DIY projects, it’s essential to gather the necessary tools and materials to ensure a smooth and successful process. Here’s a general list that covers most of the projects mentioned: Measuring tape Level Hammer or drill Screws and nails Paint and brushes Sandpaper Paintbrushes and rollers Wood boards or other materials specific to each project Decorative accents such as beads, ribbons, or fabric Safety gear like gloves and goggles Depending on the specific DIY project you choose, you may need additional materials. For detailed material lists tailored to each project, refer to our guide on easy DIY projects to improve home value. Step-by-Step Guide Project 1: Personalized Wall Art Creating personalized wall art is a straightforward project that allows you to unleash your creativity. Here’s how to get started: Choose Your Design: Decide on a theme or design that complements your home décor. This could be abstract patterns, nature-inspired motifs, or geometric shapes. Gather Materials: You’ll need a canvas or sturdy backing board, acrylic paints, brushes, painter’s tape, and any additional decorative elements like stencils or sponges. Prepare the Canvas: Lay out your canvas on a protected surface. Use painter’s tape to create clean lines or patterns on the canvas. Begin Painting: Start applying your chosen colors within the taped sections. Experiment with different techniques such as blending or layering to add depth to your artwork. Add Decorative Elements: Once the base layer is dry, incorporate any additional elements like stencils or text to personalize your piece further. Finish and Protect: After completing the painting, allow it to dry completely. Consider applying a clear sealant to protect your artwork from dust and fading. Hang and Display: Find the perfect spot to display your personalized wall art, adding a unique touch to your home’s interior. For more creative wall decorating ideas, check out our post on creative cardboard crafts for home decor. Project 2: Floating Shelves Floating shelves are a stylish and practical addition to any room. Here’s a step-by-step guide to building your own: Measure and Plan: Decide on the dimensions and placement of your floating shelves. Use a measuring tape and level to mark where the shelves will be mounted on the wall. Cut the Wood: Based on your measurements, cut the wood boards to the desired length. Sand the edges to ensure a smooth finish. Mount the Brackets: Install the mounting brackets on the wall at the marked spots. Ensure they are level and securely attached to support the weight of the shelves. Attach the Shelves: Slide the cut wood boards onto the mounted brackets. Secure them in place with screws for added stability. Decorate and Organize: Once the shelves are installed, arrange your books, plants, or decorative items to enhance the visual appeal of the space. Finishing Touches: Paint or stain the shelves to match your room’s color scheme, adding a personalized touch to your home improvement project. If you’re looking for more storage solutions, explore our DIY room design tips for small spaces. Project 3: Customized Lighting Fixtures Custom lighting can transform the ambiance of any room. Follow these steps to create your own unique lighting fixtures: Select a Base: Choose an existing lamp or fixture that you want to customize. Alternatively, start with a plain lampshade or light fixture base. Gather Materials: Depending on your design, you may need materials such as fabric, ribbons, beads, paint, or decorative trims. Prepare the Fixture: If you’re painting the fixture or lampshade, ensure it is clean and free from any dust or debris. Apply a primer if necessary. Apply Decorations: Using your chosen materials, decorate the fixture. This could involve wrapping fabric around the base, attaching beads, or painting intricate designs. Let it Dry: Allow any paint or adhesive to dry completely before handling the fixture. Assemble and Install: Once decorated, reassemble the fixture if needed and install it in the desired location. Connect it to the

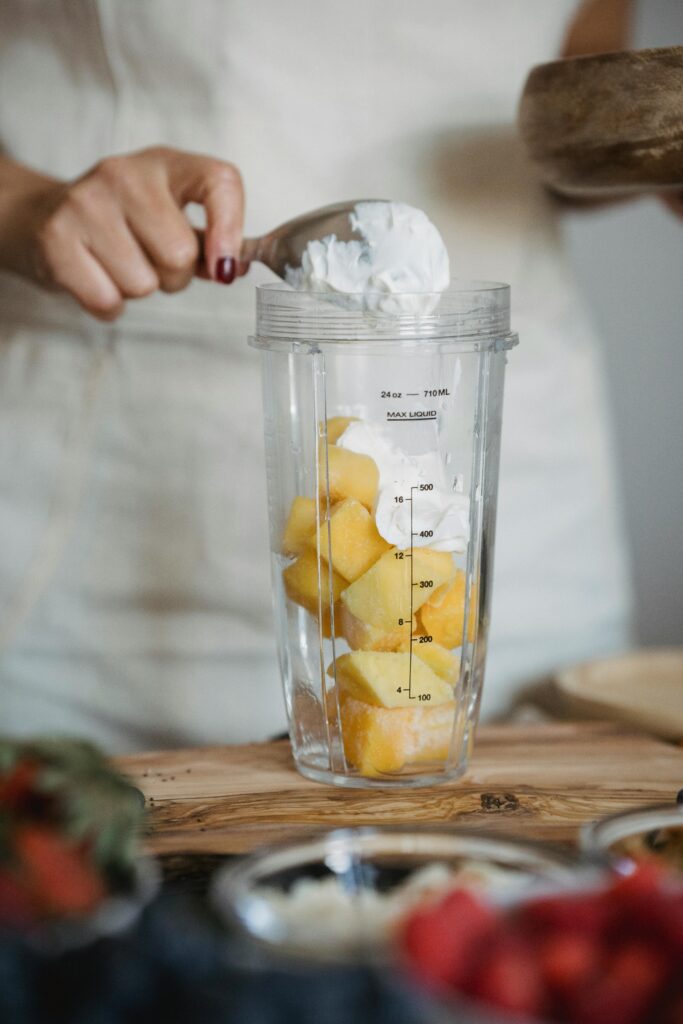
A person making a pineapple smoothie with whipped cream in a blender jar indoors.
Uncategorized

DIY Homemade Gnat Spray Natural Effective Recipe

Introduction Gnats can be a persistent nuisance in any home, especially during warmer months. These tiny flying pests not only cause irritation with their incessant buzzing but can also contaminate food and leave behind unsightly residues. While there are numerous commercial products available to tackle gnat infestations, many homeowners are increasingly seeking natural and eco-friendly alternatives. Enter the homemade gnat spray – a simple, effective, and safe solution for DIY pest control enthusiasts. In this guide, we’ll walk you through creating your own homemade gnat spray using readily available ingredients, highlighting the benefits of natural sprays, and providing practical application tips to keep your home gnat-free. Ingredients Creating a homemade gnat spray is both economical and straightforward. The key lies in combining natural ingredients that gnat pests find repellent or toxic, yet safe for humans and pets. Below are the common ingredients you’ll need: Apple Cider Vinegar: Acts as an attractant and base for the spray. Its strong scent lures gnats, making them more susceptible to the spray. Dish Soap: Reduces the surface tension of the vinegar, allowing the solution to adhere better to the gnats and ensuring they don’t escape once contacted. Water: Dilutes the mixture to ensure it’s safe for household use while maintaining effectiveness. Essential Oils: Oils like lemongrass, lavender, or eucalyptus enhance the repellent properties of the spray and provide a pleasant scent. Additionally, they offer antibacterial and antifungal benefits. A Spray Bottle: For easy application around the home. These ingredients not only work synergistically to repel and eliminate gnats but also ensure that the solution remains safe for use in various home environments. For those interested in expanding their DIY pest control arsenal, you might also explore our guide on creating homemade Japanese beetle spray for garden. Benefits of Natural Sprays Opting for a natural approach to pest control offers numerous advantages over conventional chemical-based products. Here are some of the primary benefits of using natural sprays like homemade gnat spray: Safety for Family and Pets Many commercial pest control solutions contain harsh chemicals that can pose risks to children, pets, and even adults with sensitivities. Natural sprays use ingredients that are generally recognized as safe, minimizing the risk of adverse health effects. Environmental Friendliness Chemical pesticides can have detrimental effects on the environment, including contaminating water sources and harming beneficial insects like bees and butterflies. Natural sprays break down more easily in the environment, reducing pollution and preserving ecological balance. Cost-Effective Homemade solutions often cost a fraction of their commercial counterparts. Ingredients like vinegar and dish soap are inexpensive and readily available, making DIY pest control accessible to all. Avoidance of Resistance Pests can develop resistance to chemical pesticides over time, rendering them less effective. Natural sprays often combine multiple active ingredients, making it harder for pests like gnats to develop resistance. Customizable and Versatile DIY pest control allows you to tailor solutions to your specific needs. Whether you prefer certain scents or have particular sensitivities, you can adjust the ingredients to best suit your household. For more versatile DIY projects, check out our easy DIY home automation projects. Step-by-Step Guide Creating your own homemade gnat spray is simple and requires minimal effort. Follow these steps to prepare an effective spray that keeps gnats at bay: Step 1: Gather Your Ingredients Ensure you have all the necessary ingredients and a clean spray bottle. Gathering everything beforehand will make the process smoother and more efficient. Step 2: Measure the Ingredients Using a measuring cup, combine: 1 cup of apple cider vinegar 1 cup of water 1-2 teaspoons of dish soap 10-15 drops of your chosen essential oil Step 3: Mix the Solution In a clean container, pour the apple cider vinegar and water. Add the dish soap, which helps the spray cling to surfaces and insects. Finally, incorporate the essential oil of your choice. Stir gently to combine, ensuring the ingredients are well-mixed without creating too many bubbles. Step 4: Transfer to Spray Bottle Carefully pour the mixture into a spray bottle using a funnel to prevent spills. Ensure the spray bottle is clean to avoid any unwanted reactions with previous contents. Step 5: Label the Bottle For safety and future reference, label your spray bottle with its contents and date of preparation. This is especially useful if you have multiple DIY solutions in your home. With these steps completed, your homemade gnat spray is ready for use. For those interested in other DIY solutions, explore our guide on DIY natural fruit fly spray for kitchens. Application Tips To maximize the effectiveness of your homemade gnat spray, proper application is key. Here are some tips to ensure your DIY pest control efforts are successful: Target Infested Areas Identify areas where gnats are most prevalent, such as near fruit bowls, trash cans, drains, or houseplants. Focus your spraying efforts on these hotspots to quickly reduce gnat populations. Regular Application Consistency is crucial. Apply the spray every few days or as needed, especially during peak gnat seasons. Regular use will help keep gnats from returning and prevent new infestations from taking hold. Proper Storage Store your spray in a cool, dark place when not in use to preserve its efficacy. Shake the bottle gently before each use, as natural ingredients can sometimes settle or separate over time. Use in Combination with Other Methods For a more comprehensive approach to DIY pest control, combine your gnat spray with other natural methods. This might include removing standing water, sealing food containers, or using sticky traps. Additionally, you can explore homemade sprays for other pests to create an all-encompassing pest management strategy. Avoid Overuse While natural sprays are safer than chemical alternatives, it’s still essential to use them responsibly. Avoid excessive spraying in confined areas to prevent overwhelming scents and potential discomfort to household members. Maintain Cleanliness Good hygiene practices complement your pest control efforts. Regularly clean surfaces, dispose of garbage promptly, and eliminate potential gnat breeding grounds to enhance the effectiveness of your homemade spray. Conclusion Dealing with

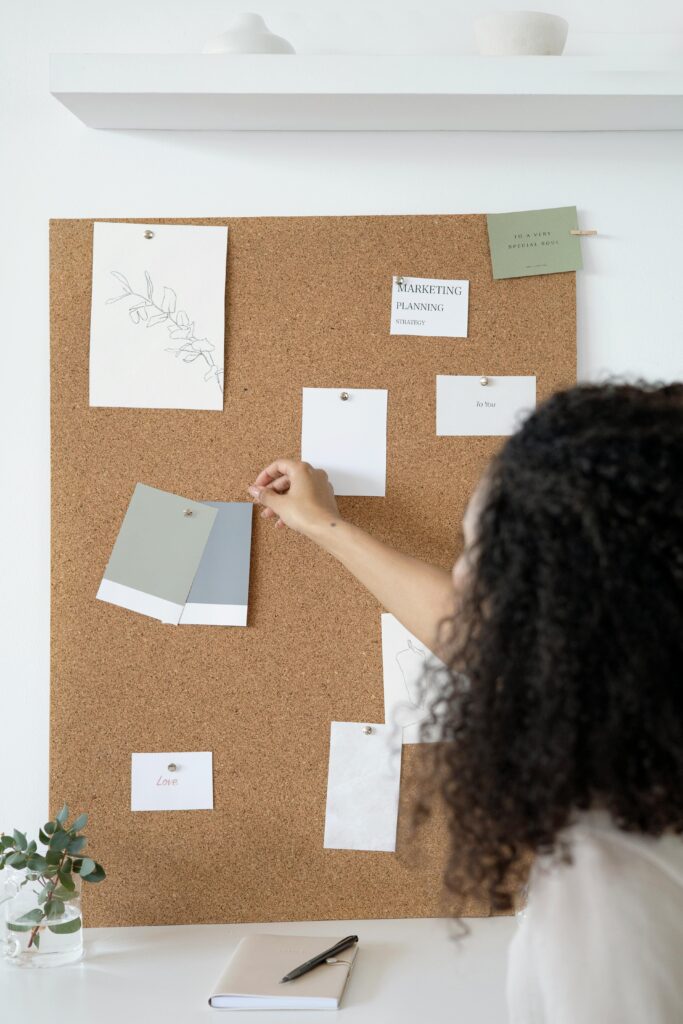
A woman arranges a mood board with design samples in a stylish, minimalist office environment.
Uncategorized

Top DIY Room Design Ideas for Small Spaces

“`markdown Introduction If you are living in a small space, every square inch counts. Whether it is a compact apartment or a cozy home, finding the right balance between creativity and functionality can be challenging. However, with the proper techniques for DIY room design, you can maximize your space without compromising on style or comfort. In this article, we will help you unlock the secrets to transforming small spaces into beautiful, functional living areas. We will explore innovative design ideas, essential materials and tools, and a comprehensive step-by-step guide. Plus, we will throw in some space-saving tips that will make life easier and more organized. Design Ideas Creating a chic, functional design in small spaces demands ingenuity. Here are some ideas that ensure both aesthetics and utility: Utilize Vertical Space Incorporate shelving units that reach the ceiling to make the most out of vertical space. Floating shelves are another stylish way to store items without cluttering valuable floor space. Choose Multi-Functional Furniture Furniture that serves more than one purpose is essential in a small room. For example, a sofa bed or a coffee table with built-in storage provides additional function without occupying extra space. Select a Light Color Palette Light colors can make a room feel more open and airy. Whites, pastels, and soft grays reflect natural light, creating the illusion of a larger space. Opt for Minimalist Design Less is more when it comes to small spaces. A minimalist approach, including reducing clutter and opting for clean lines, can make the room look larger. Implement Mirrors Strategic placement of mirrors can reflect light and create depth, making the room appear bigger and brighter. For budget-friendly decor solutions, explore our [DIY High-End Décor from Dollar Tree](https://myhomediyguide.com/create-diy-high-end-decor-dollar-tree/) guide. Materials & Tools Having the right materials and tools on hand will make your DIY projects more efficient and enjoyable. Here is a handy checklist: Paint and Primer: Choose light shades that expand space visually. Brushes and Rollers: Different sizes will accommodate various surfaces. Folding Furniture: Include pieces that can be tucked away when not in use. Wall Hooks and Brackets: Essential for installing shelves or hanging artwork. Measuring Tape: Precise measurements are crucial for small spaces. Level: Ensures installations are perfectly straight. Drill and Screwdriver: Vital for assembling furniture and installing wall fixtures. Storage Baskets: Offer stylish, compact storage solutions. Step-by-Step Guide Transforming your small room into a paradisiacal sanctuary doesn’t have to be daunting. Follow these detailed steps to make your vision a reality: Step 1: Plan Your Layout Start with a plan to figure out how you want to arrange the space. Consider the flow of movement, and make sure to leave enough space to walk around comfortably. Step 2: Prioritize Furniture Identify the essential furniture pieces you need. Opt for multifunctional items to maximize their utility. For more ideas, our [Easy DIY Projects to Improve Home Value](https://myhomediyguide.com/easy-diy-projects-improve-home-value/) post offers creative solutions. Step 3: Use Wall Space Wisely Think about creating vertical storage options to keep the floor area clear. Shelves, hooks, and cabinets mounted on walls are excellent options. Step 4: Paint It Right Choose paint colors that make rooms appear larger. Applying a fresh coat of light-colored paint enhances the room’s ambiance. Use a primer for better paint adhesion and finish. Step 5: Install Mirrors Mirrors are magic workers in small spaces. Position them opposite windows or near light sources to double the natural light effect. Step 6: Add Personal Touches Incorporate personal elements like photos or art that resonate with you. Feel free to reference DIY art ideas in our [Creative Cardboard Crafts for Home Décor](https://myhomediyguide.com/creative-cardboard-crafts-home-decor/) article. Step 7: Develop Smart Storage Solutions Incorporate storage solutions that are both functional and beautiful. Hidden storage, like under-bed compartments or wall-mounted cubes, are excellent options. Space-Saving Tips Making the most of your small space involves clever tricks that can help reduce clutter and boost functionality. Here are some practical tips: Embrace Foldability Opt for foldable furniture such as dining tables or cutting boards that can be stashed away easily when not in use. Incorporate Floating Elements Items like a floating desk or nightstand can free up floor space while still offering needed functionality. Maximize Corner Space Corners are often underutilized. Consider adding corner shelving, which can store books, plants, or knick-knacks. Utilize Underutilized Areas Think about spaces under the bed or above the door. These can become creative storage areas without adding clutter. Zone Your Space Give each area of your room a designated purpose, whether it is a reading nook or a work corner. This creates a sense of order and function. Think Beyond Traditional Furniture Sometimes conventional furniture may not fit well. Custom-build a piece if needed to fit your specific requirements and measurements. Keep it Clutter-Free Regular decluttering will help maintain an open and organized living area. Choose storage solutions that make it easy to stash away everyday items. For more décor and DIY inspiration, explore our extensive collection of [DIY Design Ideas for Home on a Budget](https://myhomediyguide.com/diy-design-ideas-home-budget/). The possibilities are endless when it comes to DIY room design for small spaces. With some creativity and the right guidance, your compact room can become a cozy, functional haven. Start small, think big, and watch as your space transforms to suit your lifestyle while reflecting your design aesthetic. “`

Scroll to Top